In today’s tutorial, I’ll guide you through creating a delightful Cupcake Applique with your ScanNCut. This project is designed to fit into a 4×4 embroidery hoop, making it accessible for those with smaller hoops. The topper is compact and versatile, ideal for a range of creative uses, and ideal for the Towel Topper which will feature in the next tutorial.
This tutorial will take you through the entire process:
- Designing the applique in Embrilliance Essentials
- Transferring the design to your Brother sewing machine using Wi-Fi
- Cutting the fabric pieces with your ScanNCut and Canvas Workspace
- Sewing your Applique Cupcake out.
Let’s get started!
Video Tutorial on How to Applique the Cupcake Design
This video includes how to do this in Embrillance, and then how to cut the Applique with your ScanNCut. You will also discover how to sew the placement stitch with your Embroidery machine and attach your Applique design.
Disclaimer: As an Amazon Associate, I earn from qualifying purchases. Links included in this tutorial may be affiliate links, Amazon or others, meaning I may earn a small commission at no additional cost. These commissions will help me continue creating content for you. Thank you for your support! Read my very boring full disclosure policy here.
Cupcake Applique Tutorial: Perfect for 4×4 Hoops
What do you need?
- A small amount of fabric for the Applique Design – this could be scrap
- Approximately 12″x12″ piece of fabric to suit a Towel Topper if you plan to do the next tutorial.
- Embrilliance Essentials – This is optional as I have included the FREE SVG and embroidery files so that everyone can follow along.
- Embroidery machine – I have the M370 (Aust) which is similar to this one in the US. Your embroidery machine should be fine as I have included all the popular embroidery extensions.
- I used this Iron on for Applique or a similar stabilizer
- Cutting machine – I used my ScanNCut to cut the Applique design
- FREE Cupcake Applique Design from the Create With Sue Resource Library
Designing the Applique in Embrilliance Essentials – optional
The applique design we’ll be using is a charming cupcake, available for free in the Create With Sue Resource Library. Download the design and unzip the file. Choose the format you need. If you do not have Embrilliance you can skip this next step.
To begin, open the design in Embrilliance Essentials or any other compatible software module. Using the PES file format is ideal for Brother embroidery machines, as it ensures compatibility and smooth operation.
Once the design is loaded, navigate to the object panel and locate the position stitch. Identifying this stitch is a crucial step, as it allows you to position the design on your fabric for accurate stitching.
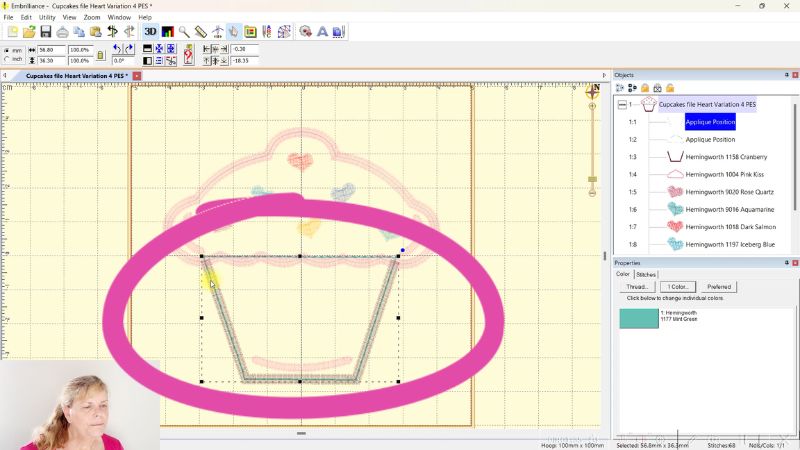
Next, adjust the applique inflation settings. Setting the inflation to 0.5 is generally recommended, as this value provides a good balance for most designs and materials, ensuring clean and professional results.
Note: When using the free design, I have already inflated the file for you.

Finally, save your file in two formats: as a PES file for embroidery and as an SVG file for cutting. The PES (or file format of your Embroidery machine) will be the stitch file and the SVG (Scalable Vector Graphic) will be the cut file for your cutting machine.
NOTE: If you don’t have Embrilliance, you can use the included SVG file to proceed directly with your ScanNCut. I have also included various popular embroidery machine file formats.
Cutting the Fabric with ScanNCut and Canvas Workspace
Next, we’ll prepare the fabric pieces using Canvas Workspace and our Brother ScanNCut:
Start by importing the SVG design into Canvas Workspace and arranging the pieces on the mat to correspond with the placement of your fabric. You could import the file directly to your ScanNCut via USB if this suits you better.
Before placing the fabric on the mat, apply a stabilizer, such as an iron-on adhesive, to the fabric. I really like the Brother Iron On Applique Contact Sheet however the Heat N Bond lite will work well too. This step not only helps the fabric adhere securely to the mat but also ensures clean and precise cutting edges.
For the best results, particularly when working with poly-cotton fabrics, use the gold-topped fabric blade or the Rotary Blade. Other blades for the various models of the ScanNCut could be used if that is all you have. The advantage of using one of the suggested blades is that they are dedicated for fabric. This is a bit like keeping your sewing scissors ONLY for fabric. Cardstock and other materials will blunt the blades much quicker than fabric. Using a sharp blade for fabric is beneficial.
Here is more information on the Rotary Blade kit.
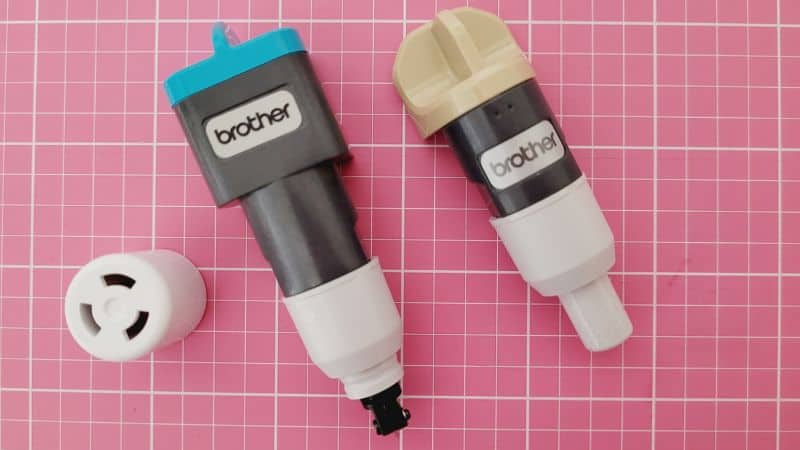
While the default settings on your cutting machine typically perform well, you can make adjustments if necessary to achieve optimal cuts.
If a cut doesn’t go through completely, you can easily re-cut by editing your cut files to remove already-cut pieces. Remember to avoid unloading the mat to maintain alignment.
Stitching the Applique on the Embroidery Machine
Once the fabric pieces are ready, it’s time to start stitching the applique on your embroidery machine:
For this project, I used my Brother M370 embroidery/sewing machine and it produced great results. I also have a Brother PR655 6-thread dedicated embroidery machine which I love. It is about 15 years old and always does a great job.
The main downside to the M370 is that the 4×4 hoop can be a little limiting. This did not worry me when I purchased it as I can use larger hoops on my PR655. Both of my machines are excellent for handling detailed applique projects. Check out the tutorial on hoops here.
TIP: If you are purchasing an embroidery machine, my recommendation would be to buy an embroidery machine with the biggest hoop size you can afford. While the 4×4 hoop is fine for some projects, many projects are easier to achieve with a larger hoop.
Begin by preparing your hoop with the appropriate stabilizer. I used a lightweight cutaway stabilizer which is ideal for the type of project I am doing. It provides excellent support during stitching and ensures a clean, professional finish. Carefully hoop the fabric and stabilizer, making sure it is taut and securely positioned to prevent shifting during embroidery.
Consider the material you’re using and the project you’re creating to ensure you leave enough room to cut your final piece from the fabric. When making the Towel Topper project, I didn’t always hoop in the best spot. While it wasn’t a major issue, it did result in less efficient use of the fabric, which could have been avoided with better planning.
Next, import your design into the embroidery machine. You can transfer the file using Wi-Fi or with a USB drive, depending on the capabilities of your machine and your software. I found that my copy of Embrilliance was able to Wi-Fi to my Brother M370. (I was quite excited about that LOL). My PR655 uses a USB to transfer data to the machine. This is a perfectly acceptable way to do it as well if your machine does not have Wi-Fi.
Make sure you select the correct file format for your embroidery machine. I selected PES for my Brother embroidery machine. Do not choose the .BE version of the file as this is only a working file.

Once the design is loaded, check that the placement stitch is set as the first step in the stitching sequence. This stitch serves as the guide for positioning your fabric pieces accurately.
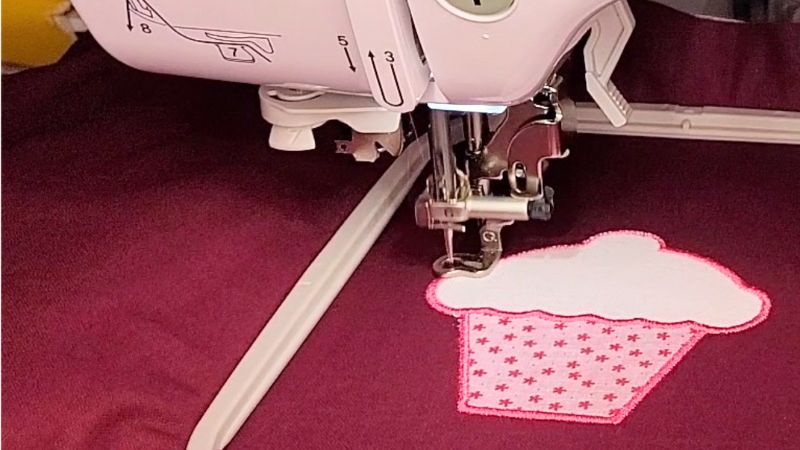
Below is the position stitch sewn out on the Brother M370 embroidery machine ready for the Applique pieces to be ironed on.

When layering your fabric pieces, take your time to align them with the placement stitches. With a .5 inflation, I found that the Applique pieces fit perfectly over the placement stitches. Proper sizing and alignment is key to achieving the correct sew-out position for the satin stitch and results in a neat and professional-looking applique design.
I use my HTVRont Mini Press to iron the Appliqe pieces onto the position/placement stitches. Press the wrapper first and then the cake topping (icing?) next. The HTVRont Mini Press fits perfectly inside the embroidery hoop.
NOTE: Do NOT remove the fabric from the embroidery frame to place the Appliques pieces onto the placement stitches. The fabric will not hoop in the same location and your satin or finishing stitches will not align with the original placement stitching.
I do not touch anything apart from thread changes if needed. I do not turn my embroidery machine off…nothing. Simply remove the hoop, iron on the Cupcake Applique pieces, and replace the hoop into the embroidery machine. Voila!
Finishing your Cupcake Applique Project
With your topper complete, you’ll have a beautifully crafted applique piece ready to adorn your favorite items. Whether you’re a beginner or an experienced crafter, this project offers a fun way to practice applique techniques while making something truly special.
In this Applique Series, I have a tutorial planned on creating a Towel Topper with this Cupcake Applique on it so stay tuned. You will find a free SVG for the topper that can be cut out with your ScanNCut in the Resource Library. You can, of course, create whatever project you would like with your beautiful Applique design, it doesn’t have to be a Towel Topper :-).
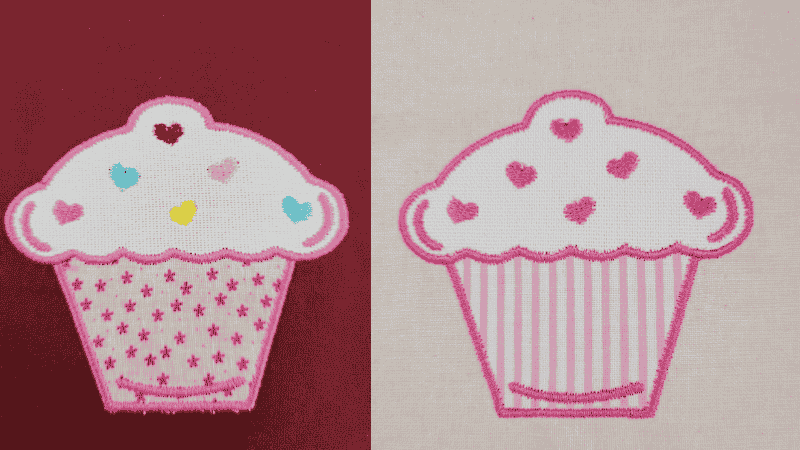
Below is a picture showing two variations of the same Cupcake design. One has colored hearts on the cake topping and the other was created with the same pink thread for the entire design. I use Hemmingworth Embroidery threads for 99% of all my projects.
If you enjoyed this tutorial, explore more crafting resources and free designs in the Create With Sue Resource Library. You will also find all the fabric-related tutorials below.
Happy creating,


Scan N Cut Courses
I have several courses and cheat sheets available to help you with your crafting journey.
You will find more information about them here
Fabric Tutorials for your ScanNCut and Embroidery Machine

Scan N Cut Rotary Blade – Is it worth it?

How to Cut Fabric with your Scan N Cut

Create Faux Leather Earrings – Scan N Cut

My Applique Journey – ScanNCut Applique Series

Let’s Look At Embroidery Hoops – Applique Series

Best Stabilizers – Applique Series
Embroidering Cardstock: A Creative Twist for Your Craft Projects
If you’re looking for something a little different to add to your cardmaking or papercraft projects, then embroidering cardstock is a fabulous technique to try….
- #Applique tutorial #ScanNCut applique #Brother sewing machine #Canvas Workspace #Free embroidery designs #4×4 embroidery hoop #Cutting fabric with ScanNCut #Embrilliance Essentials tutorial