Give Your Jeans a New Life with Heat Transfer Vinyl
If you’ve got an old pair of jeans sitting at the back of your wardrobe, this is your chance to bring them back to life. Using heat transfer vinyl, also known as HTV, and your Brother ScanNCut, you can transform tired denim into a stylish, custom piece you’ll love wearing again. In this tutorial, I’ll walk you through each step, from using features of the ScanNCut to layering HTV the right way, applying it securely, and even sharing a free design to get you started.
BONUS – I have added this design to the Create With Sue Resource Library
Video Tutorial To Create Your HTV Jeans Makeover
While this tutorial is rejuvenating my old jeans, you can use this design for any number of projects. I thought of quite a few that I want to do. Hope you enjoy the tutorial which covers quite a few ScanNCut features for new ScanNCut crafters. The SVG would be suitable for Cricut and Loklik crafters as well.
NOTE: This is a great video for beginners as it covers using the ScanNCut to resize the design, mirror the design, check placement and much more…..
Disclaimer: As an Amazon Associate, I earn from qualifying purchases. Links included in this tutorial may be affiliate links, Amazon or others, meaning I may earn a small commission at no additional cost. These commissions will help me continue creating content for you. Thank you for your support! Read my very boring full disclosure policy here.
What Do you Need
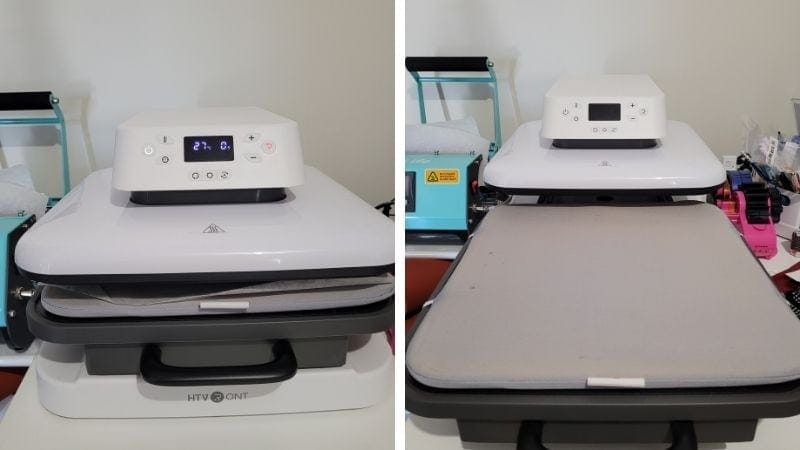
- Heat Press – this is the one that I used
- A pair of jeans or maybe a windcheater. Any item of clothing that suits your needs
- HTV – I used this glitter HTV and also a non glitter HTV which I thought was a great combination.
Choosing the Right Jeans and Preparing Your Materials
Start by selecting a pair of jeans that are still wearable but could use a refresh. This project works particularly well with denim that’s a plain design. Make sure they are clean and pressed for best results. Choose heat transfer vinyl colors that contrast well with the jeans and suit your style. For example, bold white HTV pops beautifully on dark denim, while glitter or holographic vinyl adds eye-catching flair. You’ll also need a heat press or iron, a pressing mat, and your ScanNCut cutting machine.
This is one of the heat press machine I own and I love it. There is a newer model out so if you are considering purchasing a heat press ensure you compare them both.
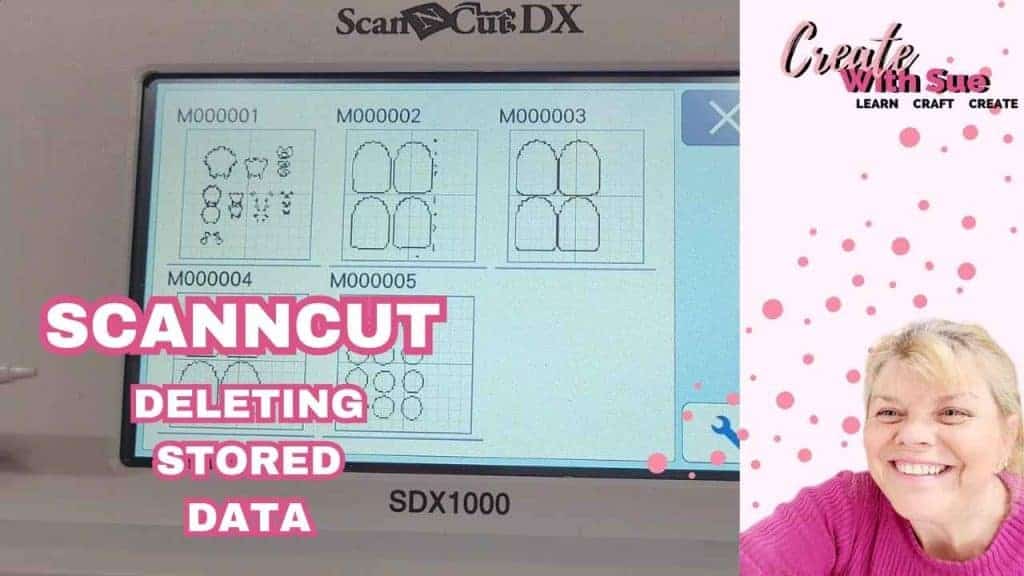
Using Your ScanNCut to Cut HTV Designs
Once your materials are ready, it’s time to turn to the ScanNCut. Import the free design included with this project or use a custom one if you prefer. Place your HTV shiny side down on the mat and load it into the machine. Make sure you mirror your design before cutting. This is a crucial step when using HTV. In the tutorial, I demonstrate how to select the correct blade settings and walk you through using the ScanNCut screen to fine-tune the cut before sending it to the machine.

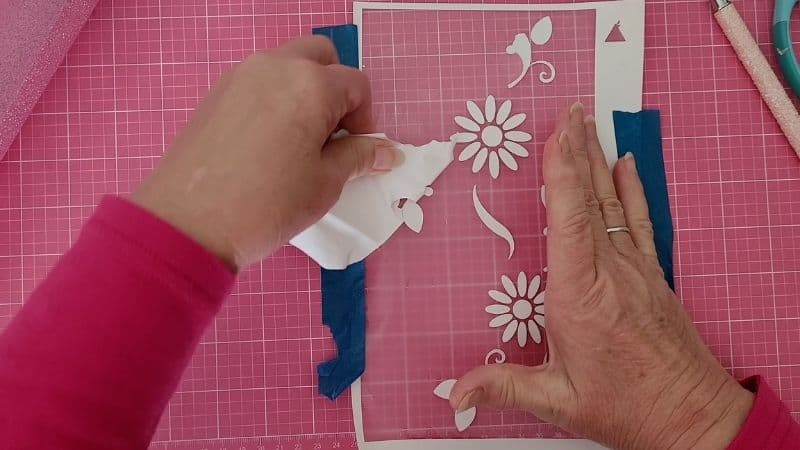
Weeding and Preparing the Vinyl
After cutting, weed away the excess vinyl, leaving only your design on the clear carrier sheet. Take your time here and make sure all fine details are cleanly removed. (I have been known to miss small sections when weeding…. the centre of the e’s and a’s are often my downfall) This step sets you up for success when it’s time to press.
I always recommend checking the fit of the weeded design on the jeans before moving on, just to confirm the placement and overall look.
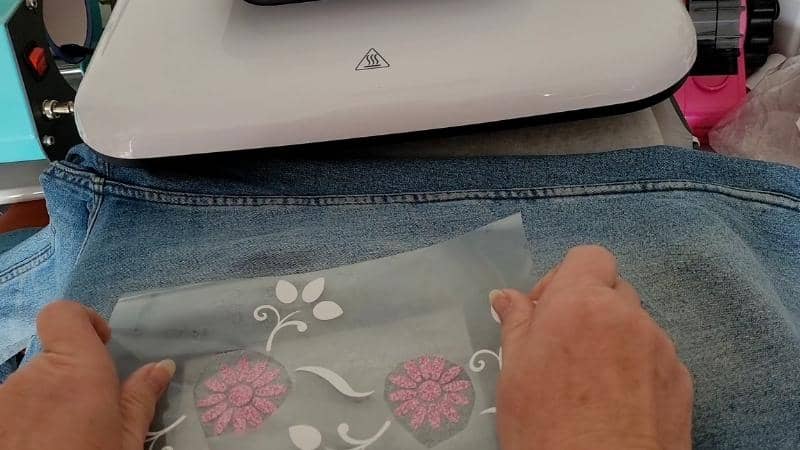
Layering and Pressing HTV onto Denim
Layering HTV on denim is easier than you might think. Start by applying the base layer and pressing it according to the vinyl’s temperature and time recommendations. In this project, I used a temperature of around 160°C for 10–15 seconds, but always check your HTV brand’s guidelines. Once the base layer is adhered, allow it to cool slightly, then add the next layer. Repeat the process until all layers are applied. I show exactly how I aligned the layers in the video tutorial, so feel free to watch it for visual guidance.
Finishing Touches and Tips for Long-Lasting Results
To ensure your new design lasts through washes and wears, apply a final press over the whole design using a protective sheet such as baking paper or Teflon. Let the jeans cool completely before wearing or washing. I recommend turning them inside out when laundering and avoiding tumble drying to prolong the life of the HTV.
Download the Free Design and Start Creating
I’ve included a free HTV design to help you jump right into the project. Your download will include a zipped file so ensure that you unzip this before trying to use it. If you need help with unzipping check out this tutorial. Be sure to check the sizing before cutting so the design fits your jeans just right. I ended up adjusting mine (I think to suit my mood lol)
Final Thoughts and Inspiration
This project was incredibly rewarding, and I was genuinely pleased with how my jeans turned out. It’s a fun, budget-friendly way to experiment with your ScanNCut and create something unique. Whether you’re rescuing a pair of jeans from the donation pile or adding flair to your wardrobe, this HTV project is the perfect blend of creativity and practicality.
My jeans have never looked so good after adding the gorgeous floral design. This project was on my “to do” list for such a long time and I am really excited to get it finally created.
If you create your own upcycle, I’d love to see it. Share your projects in my Facebook group or tag me on social media. Don’t forget to subscribe to my YouTube channel for more crafting inspiration!
Happy creating,


Join me on Facebook
Join me in the Scan N Cut – Let’s Create With Sue Facebook group. It is a group of awesome craft friends sharing and caring.
I would love to see you there.
You are always welcome to say Hi at [email protected] or [email protected]. It would be great to hear from you!
Courses available
Would you like to learn all about creating your very own designs in Canvas Workspace? This course is ideal for beginners and intermediate users of Canvas Workspace (downloaded version)