Cutting Fabric and Creating Applique with the Scan N Cut: The Ultimate Guide
Did you know the Scan N Cut was originally designed to cut fabric? While its ability to cut paper, vinyl, and other materials is impressive, its fabric-cutting capabilities are where it truly shines. Whether you’re quilting, or crafting intricate appliques, the Scan N Cut offers precision and versatility that make it a fabric crafter’s dream. No more fussy cutting!
In this tutorial, we’ll explore everything you need to know about cutting fabric and creating applique with your Scan N Cut, including the tools, techniques, and tips for success.
- Cutting Fabric and Creating Applique with the Scan N Cut: The Ultimate Guide
- Why the Scan N Cut is Perfect for Fabric Projects
- Essential Tools for Cutting Fabric
- Preparing Fabric for Cutting
- Applique Series with your ScanNCut
- Tips for Success
- Scan N Cut Courses
- Join me on social media
- YouTube
Why the Scan N Cut is Perfect for Fabric Projects
The Scan N Cut combines cutting-edge technology with user-friendly features, making it ideal for fabric projects. The ability to scan the fabric once it is placed on the mat means that you can achieve precision placement, and the design can be moved around to be aligned in the best location to suit your project.
An example of this would be if you have a section of fabric that has a nicer area of pattern, you can place the cutting lines to make the most of that fabric. Awesome hey!
The tutorial for precision placement can be found here. It is definitely one of my favorite features of the ScanNCut.
Disclaimer: As an Amazon Associate, I earn from qualifying purchases. Links included in this tutorial may be affiliate links, Amazon or others, meaning I may earn a small commission at no additional cost. These commissions will help me continue creating content for you. Thank you for your support! Read my very boring full disclosure policy here.
Essential Tools for Cutting Fabric
To achieve clean, professional results, it’s essential to use the right tools and accessories.
Blades for Cutting Fabric
- Standard Blade: The standard blue blade for the CM range of ScanNCut machines and the black-top blade are both suitable for cutting simple fabric. These blades work best when paired with stabilizers.
- Fabric Blade: The gold top blade (sometimes referred to as beige) is a dedicated blade designed for clean, precise cuts through fabric. Keeping this blade for fabric use only will keep it sharp. Cutting other materials with it can be detrimental. It is a bit like keeping your fabric scissors only for fabric. You want them sharp so that they cut cleanly.
- Brother Rotary Blade Kit: This blade is a game-changer for cutting felt, loose weave fabrics, delicate or stretchy fabrics. The rotary blade rolls and glides smoothly through fabric, reducing the risk of fraying or tearing. Think of a mini fabric rotary cutter that automatically cuts where you have programmed it to.
- You will find more information about the Rotary Blade here.
Cutting Mats
- High-Tack Fabric Mat: This mat is a gold color and is only available for the SDX range of ScanNCut machines. Fabric needs to firmly adhere to the mat and this high tack mat keeps fabric securely in place to prevent shifting during the cutting process. The Fabric mat code is: CADXMATF12
Standard Mat with Fabric Support Sheets: The standard mat for both the CM and the SDX range of ScanNCut machines is fine for cutting fabric. The trick is that you need your mat is sticky enough for the fabric to adhere firmly. As fabric naturally isn’t very stiff, stabilizing the fabric can assist. I will cover that more as we move through the guide. If your mat is sticky enough you can get away without using the fabric support sheets. They are optional. Often, the new ScanNCut models are distributed with a sample sheet or two to get you started.
You will find a complete guide on mats here.
Stabilizers
- Why use stabilizers? Well, they provide the necessary structure to keep the fabric in place, ensuring that your Scan N Cut can deliver great results every time. Stabilizing your fabric can be crucial for achieving clean cuts. and it also helps to prevent the fabric from fraying, stretching, or moving during the cutting process.
Stabilizer options include:
Iron-On Stabilizers: This type of stabilizer will bond to the fabric and provide a firmer, sturdy surface for cutting. My favorite for Applique is the Brother Iron On Applique sheet. Others work really well too.
Temporary Adhesive Sprays: These lightly hold the fabric in place without leaving residue. You need to be mindful not to get the sprays anywhere near the rollers or rolling area as this can cause issues.
Spray Starch: Products like Terial Magic and other fabric starches can be a handy addition, particularly for those who are using the ScanNCut for quilting or projects that you don’t want a permanent stabilizer on them. Terial Magic in particular when sprayed on, makes the fabric firm up and feel like paper. Hence you will get a better cut. The starch simply rinses out.
Fabric Support Sheets: These work in conjunction with your cutting mat to stabilize the fabric. They add extra stickiness so the fabric adheres to the mat better and reduce the potential movement of the fabric during the cutting process.
Fabric sheets can be found here.
Preparing Fabric for Cutting
Stabilizing fabric is very important. You will find more comprehensive information, including a video here.
Proper preparation is key to success. Follow these steps:
Choose the Right Fabric: Cotton, and polycotton are excellent for beginners. Stretchy or sheer fabrics may require additional stabilizing and felt can be a bit tricky. This is mainly because felt can vary considerably between brands, plus it is not a woven material, as it has a diverse composition.
Apply Stabilizer: Use an iron-on stabilizer or adhesive spray to prevent the fabric from fraying or shifting.
Position on the Mat: Ensure the fabric is flat and secure on the cutting mat. Smooth out wrinkles for accurate cuts.
Test Cut: Always perform a test cut to ensure your blade settings are correct.
Applique projects are a popular use for the Scan N Cut, offering endless creative possibilities for embellishments on clothing, quilts, and home décor. I have been creating Applique projects for many years, long before a ScanNCut was invented. Yes, fussy cutting was involved. LOL
You will find some more information about My Applique Journey here.

In the section below you will be guided towards various tutorials that are part of the Applique series. Applique is a LOT of fun. These are the basic steps. The full tutorials will provide you in depth information. PLUS, I have included some free files for you to play with. You will find them in my Resource Library.
- Design Selection
Use pre-loaded designs, import your own via USB, or create custom shapes in Canvas Workspace. - Cutting Applique Pieces
Use the rotary blade or the gold top blade for intricate designs or delicate fabrics. Adjust the blade depth and pressure if required for optimal results. The majority of the time, I find the SDX models default settings work really well. It always pays to do a test cut just to make sure. On all ScanNCut machines, the default settings are those with a black box around them. - Sewing the Placement Stitch:
For this next step, you need to set up your Applique design to sew out the placement stitch first. The placement stitch is also referred to as a position stitch. Same thing.. Do not remove your fabric from the hoop while creating your Applique project. It never goes back in the same place and your alignment will be at risk. - Attaching Applique
Fuse appliqué pieces to your project with a heat press or sewing machine. Use fabric adhesive or stabilizers for added security. - Sewing the Applique Design
The final stage is sewing the satin, blanket stitch, or E-stitch around your Applique design. While these are the most popular choices, you may even choose one of the other fancy stitches you have available.
Depending on your design, you may need to add sections of the Applique project bit by bit. Sewing a placement stitch, fusing the Applique piece on then sewing the next piece etc.
Applique Series with your ScanNCut
Stabilizing your Fabric To Hoop

Lets Look at Hoops

Cupcake Applique with your ScanNCut – Applique Series

Tips for Success
• Keep Your Blades Sharp: Dull blades can snag fabric and reduce cutting accuracy.
• Clean Your Mat Regularly: Remove lint and debris to maintain the mat’s adhesive quality. Remember that the fabric needs to be adhered to the mat well for a good cut. Alcohol free baby wipes are great for regular wiping down of the mat. You will be amazed at the amount of fluff cutting fabric can leave on the mat.
Check out this guide for help with mat issues.
• Experiment with Settings: Each fabric is unique. Take time to find the best settings for your project.
• Watch Video Tutorials: Explore my step-by-step demonstrations for additional guidance.
This section will have more tutorials added to it as I create them. Enjoy.
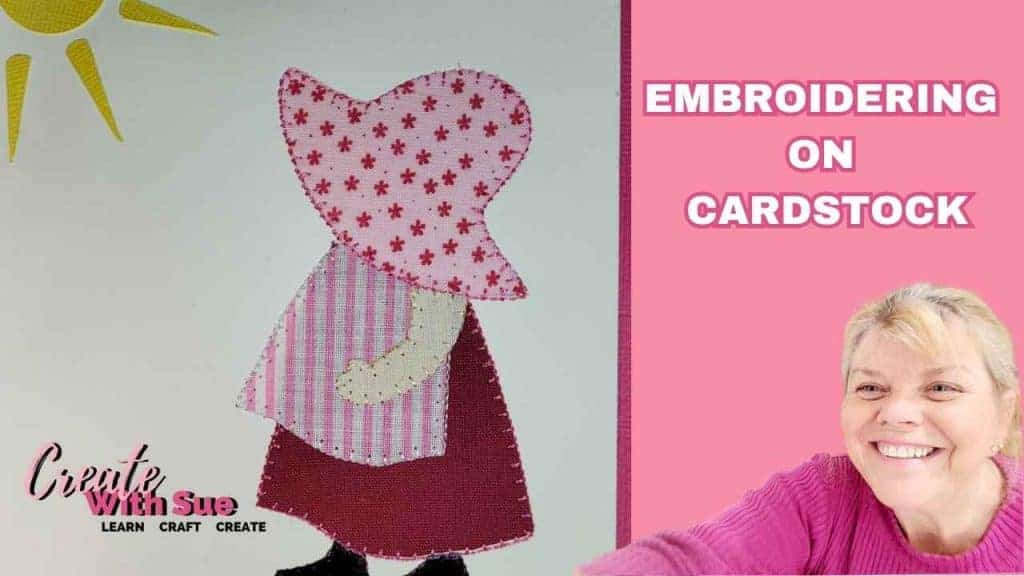
Embroidering Cardstock: A Creative Twist for Your Craft Projects
If you’re looking for something a little different to add to your cardmaking or papercraft projects, then embroidering cardstock is a fabulous technique to try….
Cupcake Applique with your ScanNCut – Applique Series

Best Stabilizers – Applique Series
Let’s Look At Embroidery Hoops – Applique Series
My Applique Journey – ScanNCut Applique Series

Create Faux Leather Earrings – Scan N Cut

How to Cut Fabric with your Scan N Cut

Scan N Cut Rotary Blade – Is it worth it?
Happy creating,


Scan N Cut Courses
I have several courses and cheat sheets available to help you with your crafting journey.
You will find more information about them here
Join me on social media

Follow me on Facebook as well as join the group. Here is the link to my Facebook page.

YouTube
Here is the direct link to my YouTube videos. Remember to like and subscribe when you are on my YouTube channel so you don’t miss any new video releases.

Let’s not forget Instagram. You will find me there too. Here is the link to follow me.