Cutting cardstock with your ScanNCut can produce beautiful results, but sometimes you may notice issues like fluffy edges or uneven cuts. Let’s take a look at a few practical tips that will help you get cleaner, smoother cuts every time.
In this guide, I’ll share some easy tips for cutting cardstock cleanly with your ScanNCut, choosing the right materials, and keeping your blade and mat in top condition for perfect results every time.
Choosing the Right Cardstock
Not all cardstock is created equal. I use a variety of cardstock types, but solid core cardstock consistently gives the best results.
What is solid core cardstock you ask?
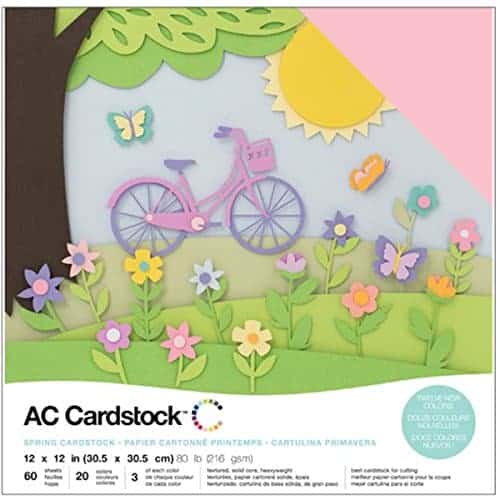
When it comes to cutting cardstock with your ScanNCut, the core type of the cardstock makes a big difference in how clean the edges look. Solid core cardstock is coloured all the way through, meaning the inside of the paper is the same colour as the surface. This type of cardstock cuts beautifully because any tiny nicks or edges blend in with the colour, giving a smooth, professional finish. It’s my go-to choice for most ScanNCut projects. One of my favorite brands for solid core cardstock is American Craft. It comes in a variety of colors often in color coded pack similar to what is pictured below.
White core cardstock
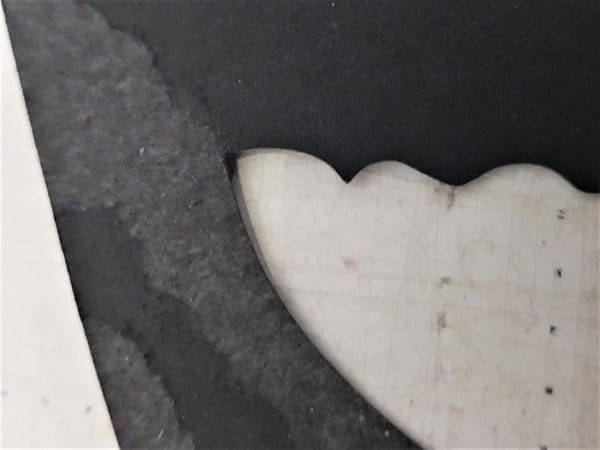
I also use white core cardstock and it can cut really well. You dont need to purchase the most expensive brands to get a good cut however some brands are not good at all. For example I purchased this cheaper pack of 12×12 which was half white and the half black cardstock to try. The white cut like a dream…loved it. Then, I went to make something with the black. It was awful, one main problem was that it split and while it was a grey color inside…it still was not a good result
White core or coloured core cardstock, has a differently coloured centre – most often white, but sometimes a contrasting shade. When cut, this inner layer can show along the edges, especially on darker colours like clack, burgundy or navy. That’s when you might notice the “fluffy” or light-looking edge after cutting. It’s not that your machine is doing anything wrong, it’s just the makeup of the cardstock. You can still use these types of cardstock for beautiful projects, but it helps to be aware that the edges may have a slightly different look, and you may need to adjust your settings or techniques to achieve the finish you want.
This is a picture of my disastrous black cardstock. It would be classified as “colored core”.
TIP: If you notice fluffy or rough edges—especially with darker colours like burgundy, it’s often due to the paper’s quality or core type. Switching to a solid core cardstock or even a different brand can make a big difference in how clean your cuts appear.
Adjusting Your Cutting Speed
For intricate designs or sharp turns, try slowing your cutting speed down. The ScanNCut can handle delicate details well, but lowering the speed helps prevent tearing or snagging on tight corners.
Adjusting the speed to a slower one will often reduce the instances of that jagged inside corner cut.
Blade Care and Maintenance
Cutting cardstock regularly can dull your blade over time. Keep a spare blade on hand so you can swap it out when needed.
A quick maintenance trick: scrunch up a piece of aluminium foil and jab the blade into it about 30 times. This doesn’t actually sharpen the blade, but it removes any sticky residue or paper fibres that can affect performance.
While you’re at it, clean any small bits from the blade holder to keep it moving freely.

Mat Stickiness Matters
A properly sticky mat is essential. If your mat is too sticky, it can tear the cardstock when you remove it. Too little stick, and the cardstock can lift or move mid-cut. Wiping the mat between projects with an alcohol free baby wipe works a treat. If you inadvertently end up with your cardstock stuck like glue to your mat… a rinse under the tap or a short soak in the bath will remove it. Just remember not to rub too hard or you will remove the mat glue.
For more information on managing mats, you will find an entire tutorial on it here. It includes tips on re-glueing your mat and extending its life.
Dealing with Raised or Fluffy Edges
Raised edges are a common issue with certain types of cardstock. Here are two simple fixes you can try:
- Flip and Mirror: Turn the cardstock over, mirror your design, and cut from the back. This works especially well for glitter cardstock—look for the encapsulated glitter type for best results.
- Burnish the Edges: Use the white spatula that came with your machine (or even an old credit card) to gently burnish or flatten raised edges after cutting. This quick step often makes your finished piece look much neater and one I use often. It is particularly handy when cutting the card bases etc.
Comparing ScanNCut Results to Die Cutting
It’s worth noting that the finish from an electronic cutting machine like the ScanNCut will differ slightly from what you’d get using a manual die cutting machine such as a Sizzix Big Shot.
Those little embossed details and softly rolled edges are characteristic of die cutting and can be hard to duplicate digitally. Plus, creating a full sheet of embossing is definitely better on a die cutter. Here is a VERY old tutorial I wrote about my Sizzix
The all over embossing can be created by the ScanNCut with and without the Embossing Kit. My preference for the ScanNCut embossing kit is only line embossing. Creating something like pictured above is much better with the Sizzix
Final Thoughts
Try these tips and see how your results improve. I’d love to hear how you go—drop a comment or send me a message if you notice a difference in your next cardstock project.