Video – Let’s Look At Embroidery Hoops
In this Applique Series tutorial, we’ll take a look at the embroidery hoops I use with my Brother PR655 and M370 embroidery machines, highlighting their sizes, features, and uses for each one. Embroidery machine hoops are essential tools that can make or break your embroidery or Applique project. Whether you’re just starting or looking to expand your hoop collection, this guide will help you pick the best options for your projects!
Disclaimer: As an Amazon Associate, I earn from qualifying purchases. Links included in this tutorial may be affiliate links, Amazon or others, meaning I may earn a small commission at no additional cost. These commissions will help me continue creating content for you. Thank you for your support! Read my very boring full disclosure policy here.
Exploring Embroidery Machine Hoops
Read on to find out more about embroider hoops and the options available to you.
What Are Embroidery Hoops and Why Are They Important?
Embroidery hoops hold your fabric securely, keeping it taut while your machine works its magic. Most machines come with a standard set of hoops, but you can often purchase additional sizes to suit your needs.
Standard sizes include:
- 4×4 hoops: Perfect for small projects.
- 5×7 hoops: Great for medium designs.
- Larger hoops (8×10 and beyond): Ideal for big or continuous embroidery projects.
Each hoop has its strengths, so let’s take a look at the embroidery hoops I own. Hoops also work well for Applique projects so when I mention “embroidery” we are referring to “Applique” as well.
Big Hoops for Big Projects
One of my favorite hoops for the Brother PR655 is the 200×300 mm hoop (11.8×7.8 inches). This heavy-duty hoop is perfect for larger designs, like embroidering towels or creating larger embroidery or applique designs.
When I first got my PR655, I used the embroidery hoop pictured below for nearly everything. It’s sturdy and versatile, but bigger hoops aren’t always the best choice. Using a smaller hoop for small projects can make hooping easier. Other benefits include using less stabilizer and potentially less material (depending on your project)

My Magnetic Hoops – I Love IT!
About a year into using my PR655, I purchased a 200×300 mm magnetic hoop, and it’s been a game changer. Magnetic hoops make hooping so much easier, especially for thicker fabrics like toweling or plush fabric.
Why I love it:
- It’s strong and durable even after 15 years of use.
- Great for large projects with minimal fabric shifting.
- Doesn’t crush fabric – this is ideal for velvets or velours
- Great for thicker fabric that might be tricky to hoop in a regular hoop
- After 15 years this magnetic hoop still packs a great magnetic punch! Check out the video to hear the “snap” when I click the two pieces together.
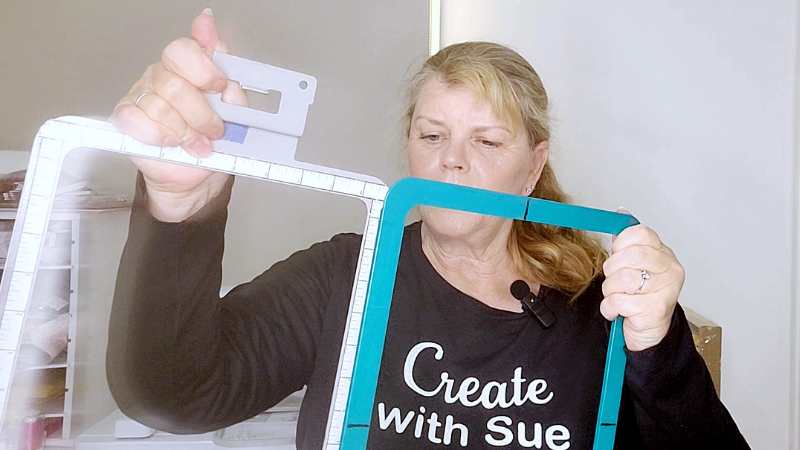
If you work on big projects often, I highly recommend investing in a magnetic hoop.
The Versatile 5×7 Hoop
The 5×7 hoop (180×130 mm) is one of the most versatile sizes. It’s big enough for most designs, like names on towels, but small enough to save stabilizer and fit comfortably on many machines.
This hoop works perfectly for both the PR655 and M370. If you’re buying your first embroidery machine, I’d suggest choosing one that supports at least a 5×7 hoop as this will do most types of projects for you.
The 4×4 Embroidery Hoop
The 4×4 hoop (100×100 mm) is a standard size that comes with most entry-level machines, including the Brother M370. Unfortunately, the 4×4 can be a little limiting in my opinion however if your budget only allows for this size embroidery machine, then the 4×4 embroidery hoop is still a winner.
PROS:
- Ideal for small projects like monograms or patches.
- Compact and easy to use.
CONS:
- Limited size means you may need to reposition fabric for larger designs.
If you’re just starting out, a 4×4 hoop will get the job done, but upgrading to a 5×7 can give you more creative freedom.
Specialty Hoop for Tiny Projects
For very small designs, like logos or intricate designs, I occasionally use my 60×40 mm hoop (2.4×1.6 inches). It is a TINY embroidery hoop! I will confess that it’s not something I use often, but it can be handy for specific smaller projects.
My Tips for Choosing an Embroidery Hoop
- Pick the right size: Match the hoop size to your project to reduce stabilizer waste and make hooping easier.
- Use magnetic hoops for tricky fabrics: They hold fabric securely without leaving marks.
- Keep your hoops clean: If you use Sticky stabilizers, they can leave residue. There is also a bit of a trick if you have trouble with your fabric moving in the hoop where you can tape the edges of your hoop and reduce slip. Isopropyl alcohol works wonders for cleaning off any unwanted sticky.
- Adjust for a snug fit: Use the hoop’s tightening screw to secure your fabric and stabilizer. Both the fabric and the stabilizer need to be taut in the hoop and NOT move during the stitching process.
- Storage: I used to keep my hoops in a big box. Rumble my way through the box to look for the one that I wanted to use. NOW, I hang them on a hook and pop them in my wardrobe (craft supply wardrobe LOL)
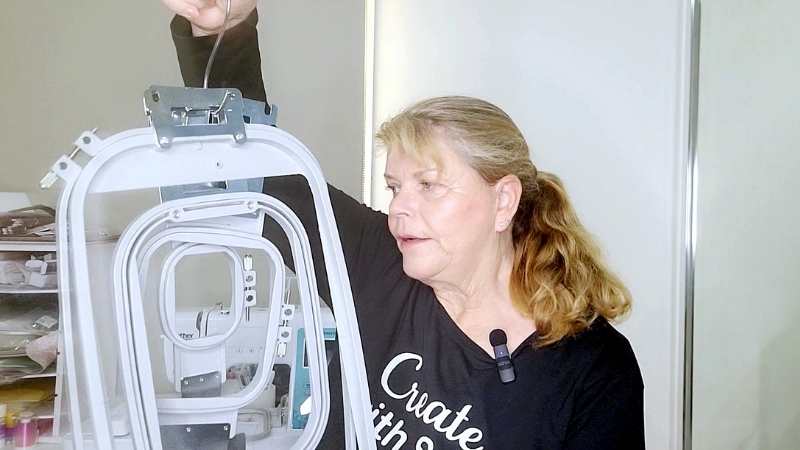
Which Hoop Should You Use?
If you’re working on small projects, stick with a smaller hoop like the 4×4 or 5×7. For larger projects, a 200×300 hoop or a magnetic hoop is a great choice. The key is to pick a hoop that fits your design without wasting materials. Keep in mind that you can also “float” your fabric or project without actually hooping it.
What is Floating?
What is floating? It is an odd term and definitely has nothing to do with water. Floating in the embroidery world is using a sticky type stabilizer to hold your fabric in place on TOP of the hoop as opposed to clamping it in between the hoop.
Stabilizers that can be used include spray type stabilizers like 505 Adhesive Spray or Quilters Basting Spray. You could also use the sticky type stabilizer where you remove an area of the stabilizer to reveal a sticky area. A bit like double sided tape…. You only remove as much of the top layer as needed to secure your project.
Another way to float a project is using the basting feature of either your embroidery machine or embroidery software. Not all embroidery machines include a basting option.
Conclusion
Embroidery hoops are a vital part of your embroidery journey, and having the right ones can make all the difference. Whether you’re using a 4×4 hoop on an embroidery machine like the Brother M370 or a larger magnetic hoop on a big multi-needle PR655, there’s a hoop for every occasion.
I hope this guide helps you get more out of your hoops and inspires your next project. Stay tuned for the next post in this series, where we’ll talk about the various types of stabilizers!
Happy creating!


Join me on Facebook
Join me in the Scan N Cut – Let’s Create With Sue Facebook group. It is a group of awesome craft friends sharing and caring.
I would love to see you there.
You are always welcome to say Hi at [email protected] or [email protected]. It would be great to hear from you!
Embroidering Cardstock: A Creative Twist for Your Craft Projects
If you’re looking for something a little different to add to your cardmaking or papercraft projects, then embroidering cardstock is…

Scan N Cut Rotary Blade – Is it worth it?

How to Cut Fabric with your Scan N Cut

Create Faux Leather Earrings – Scan N Cut
My Applique Journey – ScanNCut Applique Series

Best Stabilizers – Applique Series
