This heart pop-up card is a fun and easy way to make a personalized gift for Valentine’s Day, anniversaries, or any special occasion. It is an easy ScanNCut card tutorial. In this tutorial, I’ll walk you through the steps to design, cut, and assemble this beautiful card. You can also watch the video tutorial embedded below!
Video tutorial – ScanNCut Card Tutorial | DIY Heart Pop-Up Card | Easy Valentine’s Day Card Tutorial
Materials You’ll Need
Before we begin, gather the following supplies:
- Cardstock in your chosen colors. This is one of my favorites!
- Cutting machine (such as the Brother ScanNCut)
- SVG file (Get your FREE design from my Create With Sue resource library)
- Adhesive (glue or double-sided tape) I used this Art Glitter Glue from Amazon
- Optional embellishments (stickers, gems, ink for edging, etc.)
Download the Free SVG File
To make this project super easy, I’ve designed a FREE heart pop-up card SVG for you! You can find it in my Create With Sue resource library.
Once you’ve downloaded the file, upload it to your cutting machine software.
Cutting the Card Pieces
Using your Scan N Cut (or other cutting machine), load your cardstock and select the heart pop-up card SVG.
Tips for a perfect cut:
- Ensure your cutting mat is clean and sticky enough to hold the cardstock firmly. If your mat has lost its sticky, find my tutorial here to fix that.
- Adjust your blade depth and pressure based on the thickness of your cardstock. I normally start with the Auto settings if using an SDX model ScanNCut and work from there.
- Perform a test cut before cutting the full design. This is important if you are using new untested materials, first cuts or manually adjusted settings.
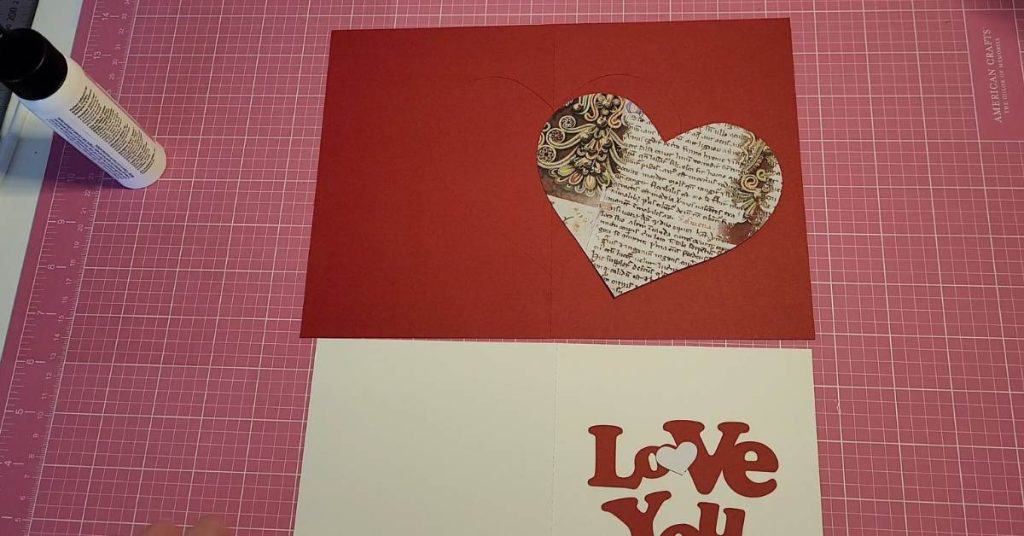
Once cut, carefully remove all pieces from the mat. Below are all the pieces of the red card that I initially cut out. I ended up cutting a few more hearts to embellish further.
NOTE: The heart in the design is slightly smaller than the pop-up heart, creating a border effect when glued in place.
Assembling the Pop-Up Card
Now comes the fun part – assembling your card!
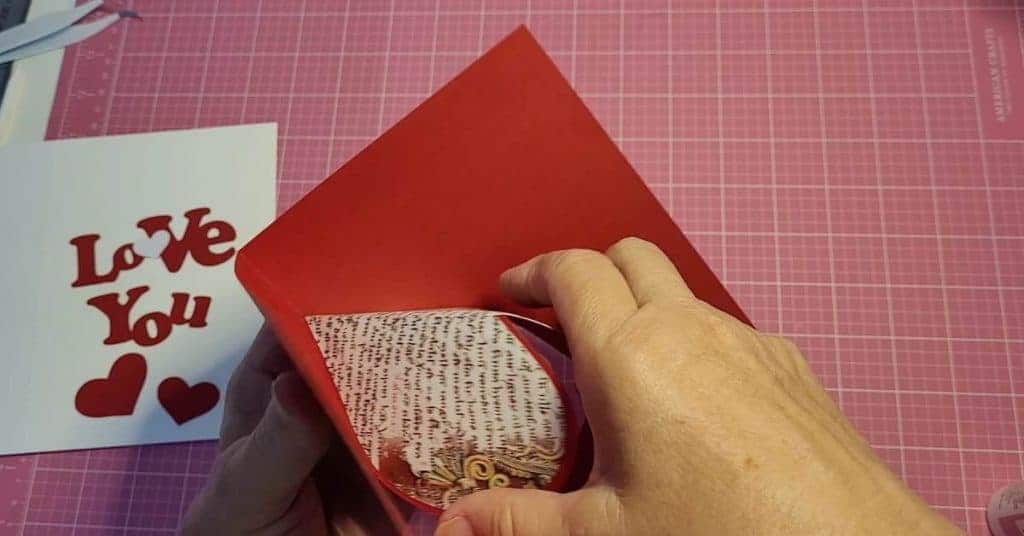
- Fold along the dashed lines – These folds create the pop-up effect inside the card.
- Attach the pop-up insert – Apply glue or tape to the edges of the pop-up piece and carefully position it inside the card base. Ensure that you do not stick the popup heart down at all as it needs to be free to pop!
- Secure the layers – If your design has multiple layers, align them and adhere to each piece in order.
Take your time to ensure the card folds properly and the pop-up effect works smoothly.
This is the fold of the heart in the popup. Bend the heart edges inwards and kind of push the fold lines forward and down into the card’s halfway fold.
Adding Embellishments
To give your card a polished and unique look, consider these decoration ideas:
- Ink the edges for a soft, blended effect.
- Add gems or glitter for extra sparkle.
- Write a heartfelt message inside to personalize your card.
Get creative and make it your own!
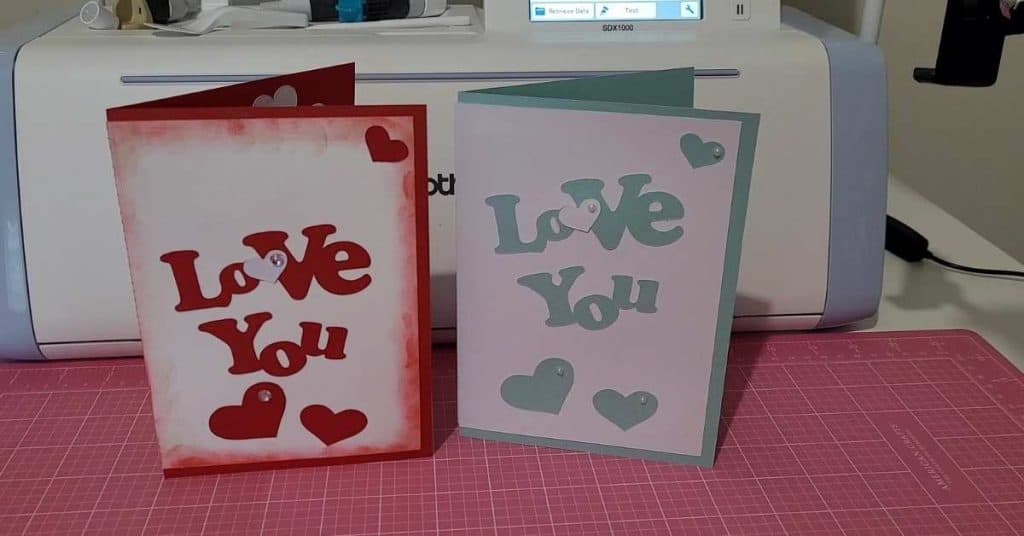
Finished Heart Popup Card project!
And that’s it! Your heart pop-up card is complete and ready to impress. This design is perfect for special occasions, and with the free SVG, it’s super easy to recreate.
Don’t forget to check out the full video tutorial for a detailed walkthrough! If you enjoyed this project, be sure to explore more crafting tutorials on Create With Sue.
Join me on Facebook
Join me in the Scan N Cut – Let’s Create With Sue Facebook group. It is a group of awesome craft friends sharing and caring.
I would love to see you there.
I hope that you have fun creating these Christmas designs. Please feel free to ask any questions that you need.
Happy creating


Would you like to learn all about creating your very own designs in Canvas Workspace? This course is ideal for beginners and intermediate users of Canvas Workspace (downloaded version)