
This shaped house card was fun to make and I have a free SVG template included in my Resource Library so you can make one too.
Let’s look at what you need to make the house card and how to do it. The instructions include how to create this with Canvas Workspace (downloaded version) for the Scan N Cut.
Disclaimer: As an Amazon Associate, I earn from qualifying purchases. Links included in this tutorial may be affiliate links, Amazon or others, meaning I may earn a small commission at no additional cost. These commissions will help me continue creating content for you. Thank you for your support! Read my very boring full disclosure policy here.
- What do you need
- Get the free house card template
- Import the file into Canvas Workspace
- Make some alterations before you cut
- Export the house file to your Scan N Cut
- Using scraps to create the house embellishments
- Let's put the shaped house card together
- Do you like making houses?
- Join me on Facebook
- Check out some of my other tutorials
What do you need
- A4 cardstock for base card
- Multiple colored cardstock scraps to make the house embellishments
- Small pieces of vellum
- Cutting machine
- Glue and/or double sided tape
- Small piece of double-sided foam tape
- Embellishments – I used 3D liquid Pearl Drops
Get the free house card template
Go to the Resource Library and download the file. The file is called House Card 2 CWSue.zip and will need to be unzipped to be able to be used. If you need help unzipping the file check this tutorial for more information.
Import the file into Canvas Workspace
Once the file has been unzipped you can import it into Canvas Workspace. It will look like the picture below. If you need a tutorial on how to import an SVG file check here.

Make some alterations before you cut
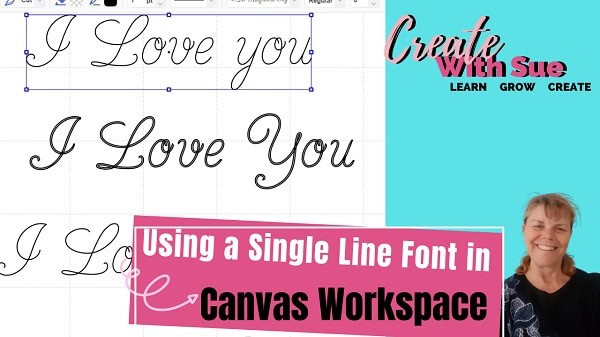
If you are planning to use the “home” sentiment you need to alter the lettering from being a cut file to a drawing file. Go into the Layers panel and click on the cut icon next to each letter. A choice between cut and draw will drop-down. Choose the “Draw”. You will notice that the icon changes from a knife to a pen.

Above is Canvas Workspace showing the shaped house card in the layers panel with the home lettering already altered to a Draw file.
Note: the dashed line is set up for the fold line. You can alter this to a draw line if you would prefer to use a scoreboard or if you are in Design Space for Cricut, alter it to a scoreline.
Export the house file to your Scan N Cut
There are a number of ways to export your design to your Scan N Cut. You can send it all at once or you can use the Layers panel to export the pieces that you want to cut by using the “eye” icon to hide the objects you don’t want to export.

The above picture is the Layers panel with some of the design hidden using the “eye” icon to hide them. Ready to be sent to the Scan N Cut via wifi. Note the eye is still showing alongside the shapes that are still on the mat.
Using scraps to create the house embellishments
One of the great features of the Scan N Cut is how to scan the mat and see where small leftover scraps of cardstock are placed on the mat and then you can ensure you place the shapes exactly where you want them on the materials.
If you need some guidance on this check out this tutorial on cutting multiple colors on one mat.
Let’s put the shaped house card together
These are the layers of the shaped house card in the order for you to put together.

I used a combination of glue and double-sided tape to put this card together. There are a few places in this design that would be hard to use double-sided tape. Around the windows for example. For the “home” sign, I used double-sided foam tape to add a little extra dimension.
All the pieces cut out
Below are all the pieces cut out. I used various colored cardstock AND used vellum for inside the window and door opening to give the effect of a frosted window.
TIP: If you have trouble getting your cardstock off of your mat, flip the mat over and gently bend the mat slightly, and peel the cardstock off. Also, a thinner scraping tool lifts easier than the plastic tool that comes with your Scan N Cut. I like this one.

TIP: If you have any raised edges you can flatten them with the edge of the spatula.
Building the layers of your card
This is the first two layers glued onto the shaped backing card. You can see it coming together already.

Glue the vellum to the window and door
Add the vellum to the door and window on the backside of each. When gluing vellum, be careful where the glue spreads as even though the glue is clear or will dry clear, it will take away from the frosted appearance of the vellum.
Below is the window of the house card with the vellum attached at the backside of the window.

From here you continue to build up the house layers and add any embellishments that you find appealing.
Add the remaining embellishments

I ended up creating a door handle by drawing it on with the Brother Scan N Cut pens, these are the same pens I used to write the wording “home”.

3D Liquid Pearl drops are a great product to embellish various projects including this one. I used them for the centers of the flowers. You can create a small circle if you would rather use cardstock or use other alternatives like a small craft pom pom, diamonte, pearl etc. There are so many choices when it comes to embellishments. Even small buttons make a great option for flowers.

Add your “home” sign to the top
The use of double-sided foam tape is great for creating a 3D effect and giving your projects added dimension. It comes in various widths and the one pictured is quite narrow. A very handy size to have.
I used this to add the “home” sign to the front of the house card.

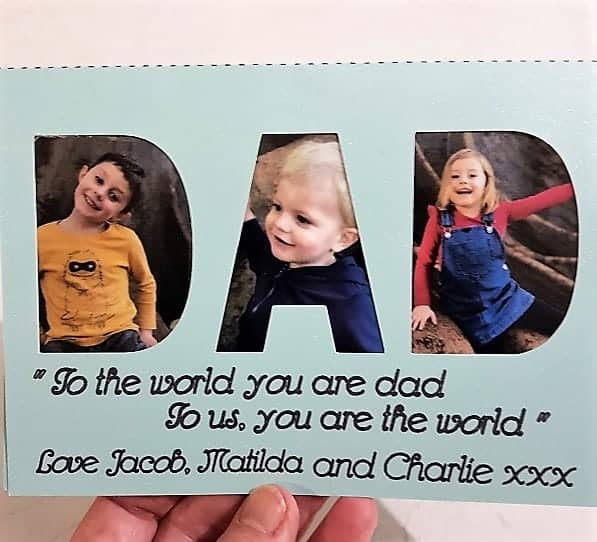
Have you thought of other options for the front of the house sign? I have! Think about who you are gifting the card to. You could add their family name, first name, a cool slogan, a well wish or congratulatory wish.
The home sign was created with the text tool and then by adding an offset to the wording. These can be done in Canvas Workspace or directly on your Scan N Cut.

ahh, did you notice that my chimney is two-colored? All I did was cut two chimneys in complementary colors and basically layered them so that part of the second color shows. All these embellishments are optional.
I cannot wait to see how you make this card with your selection of embellishments and colors making it your own unique creation!
Do you like making houses?
Do you want to try making actual little houses? Or already love making them? I have a friend, Lucy Foxworth who has an ENTIRE site dedicated to creating small houses.
Now, Lucy is a Cricut crafter however her designs will work for your Scan N Cut or Cricut cutting machines. (probably for the Silhouette too however I don’t have one of them to test)
TIP: The main things to check when importing a file that may have been created and tested on a Cricut imports into your Scan N Cut the correct finished size and also the fold or score lines.
Here is a link to Lucy’s Paper Glitter Glue website for you if you would like to check out.
Now, don’t forget to come back and look around the rest of my site too. I have lots of tutorials for you to wander your way through.
Happy creating,

Join me on Facebook
Join me in the Scan N Cut – Let’s Create With Sue Facebook group. The group is full of awesome new friends to share your projects and problems with. Sharing ideas will inspire you to create.
We would love to see you there.
Check out some of my other tutorials
While you are here, don’t forget to check out my other posts, there are heaps of helpful information in them.

Vinyl T-Shirt Design – Scan N Cut
Vinyl T-Shirt designs are so much fun to create! This tutorial will cover how to create a vinyl T-Shirt and includes the featured design as …Read More

Scan N Cut Background Screen
The Scan N Cut background screen is a really great Scan N Cut feature. It is available on both the CM range of Scan N …Read More

T-Shaped Thank You Card – Scan N Cut
T-Shaped thank you cards are a variation of a normal plain card and can be an interesting alternative AND a lot of fun. This tutorial …Read More


Awesome – thank you so much – and love that you give the full instructions as to how to make this.
Thanks
Glad you like the card. I thought it was very cute too. Thanks for letting me know that liked it.
Hi Sue, i would love to make the card with Cricut design space but i cant transfer the svg into my working space.
i tried it various times and redowloaded the cricut design app to my macbook but it isnt working….
Please help! =)
Hi Nicole, thanks for letting me know. I have made some alterations to the file and sent them to you. The Resource Library will be updated shortly. Please let me know if you have any further problems with the file. 🙂 Thanks again Sue