
STOP! Don’t throw your Scan N Cut mat away if it is not working how you expect or you have damaged it in some way, I have heaps of tips to rejuvenate, restick, re..err everything really.
Cutting machine mats can be the bain of a crafter’s existence.
Yep! Painful – let’s look at how to minimize that frustration and not spend more money than required on purchasing new mats.
These tips will resolve most of your Scan N Cut mat problems.
What we will cover in this tutorial:
- The new Scan N Cut mat
- How to prevent paper from sticking to your Scan N Cut mat
- Reduce the stickiness of your mat
- Tips to get your design off the mat successfully
- Mat is not sticky enough
- Cut through your mat? Still don't throw it away
- Found this information helpful?
- Re-sticking your Scan N Cut mat
- Best way to apply Zig glue
- One more reason not to throw your Scan N Cut mat away
- More Scan N Cut problem solving
- Found the mat information helpful?
Disclaimer: As an Amazon Associate, I earn from qualifying purchases. Links included in this tutorial may be affiliate links, Amazon or others, meaning I may earn a small commission at no additional cost. These commissions will help me continue creating content for you. Thank you for your support! Read my very boring full disclosure policy here.
The new Scan N Cut mat
New mats are quite expensive to purchase. Fortunately, your Scan N Cut machine should have arrived with at least one mat included in your purchase. Some models may have multiple mats included.
Before we start, if you are a new user do not be concerned that the first cut on your mat makes score marks. You can see exactly where your Scan N Cut has cut. If this is too deep, you can use the test cut feature and tweak the settings so as not to cut too deeply into the mat.
New mats are sticky
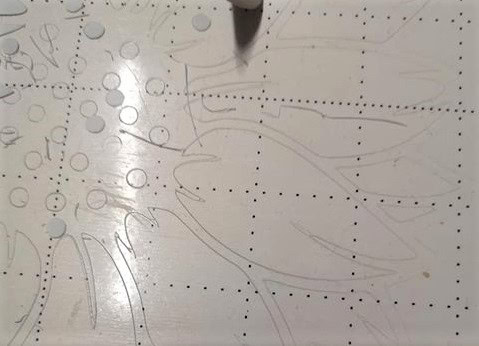
The fact that is a new mat may cause new users problems as often they are TOO sticky. Often they are too sticky for the first and sometimes second use, this is particularly the case for projects made from cardstock.
Your gorgeous design cuts out perfectly and as you lift it off the mat, disaster happens and you leave a large section of your design on the mat. The cardstock has separated and some of it is stuck fast!
Soul destroying.
We will look at ways to avoid this disaster.
How to prevent paper from sticking to your Scan N Cut mat
There are a number of precautions that you can do to prevent this from occurring.
Brother make a number of different mats for your Scan N Cut. My favorite is the 12″x12″ standard tack mat as you can use this for nearly EVERYTHING.
BUT
The standard mat is quite sticky when you first start using it. Brother also makes a low-tack mat which is obviously less sticky than the standard cutting mat however it can still be too sticky for some cardstock – mainly on the first or second cut.
NOTE: you don’t necessarily need a low-tack mat
Reduce the stickiness of your mat
You can reduce the stickiness of your mat by patting it down with a lint-free cloth. You can use any cloth as long as it does not leave bits on your mat as this may affect your cut, you still need your materials to stick for a good cut – it is a balance.
Test your materials
You can do a quick test of your materials before you cut your design. Things to check are:
- Does your material stick firmly to your mat?
- When removing the material from the mat does it lift off cleanly? If it comes off cleanly then you are probably good to cut.
- Is one side of the material better or sturdier than the other? You can always place the other side down onto the mat – think about your design if you do this, you may need to mirror so the pieces of your project still fit perfectly together.
Some Do’s and Dont
If your mat is too sticky there are some Do’s and Dont’s you can follow. They work with too sticky and then in reverse if your mat is not sticky enough.
- For mats that are too sticky, don’t press your material down quite as firmly as you would when using an older, less sticky mat. A light press will do it.
- Don’t use a Brayer – while Brayers are excellent when you want your materials to stick firmly and evenly onto the mat, this will be too much on a newer mat or newly re-tacked mat (will go over this soon). Brayers are marvelous for intricate projects like mandalas, where all the cardstock needs to adhere to the mat well.
- Cardstock choices can make a huge difference in how a project will turn out. Solid core cardstock is exactly that.. solid through the core. This type of cardstock is less likely to leave a layer of the card on the mat. While your Scan N Cut will cut any type of paper or cardstock, some card is more challenging than others.
Tips to get your design off the mat successfully
These tips are useful even when your mat is just perfect. Those intricate designs can test your patience so you need to be careful. So the next trick can be getting that design off the mat after it has been cut.
- Some designs will lift off the mat very easily. Might need a bit of a flex of the mat to pop them up, but overall, very easy to remove.
- Other projects need a little assistance. You can use the small plastic spatula that Brother may have provided with your machine or I mostly use the metal Cricut spatula. Brother has a metal one that can be purchased too, I happened to locate a Cricut spatula first so Cricut it is for me.
Flex your mat slightly so that the materials start to lift and then use the spatula where the materials have adhered to the mat more firmly and ease the design up. If you get to a patch that is giving you grief, there is no rule to say that you have to keep working in the same direction. Find another edge to start lifting the design up. Move around the design carefully until it has lifted completely off the mat. - Ok, so if you are still having problems, my next tip is to turn the mat over so the material you have just cut is underneath. Bend or flex the mat upward allowing the design to peel off. You can use a spatula again if needed. The mats are very flexible so as long as you are only bending it and not folding it, the mat will be fine.
Mat is not sticky enough
This is the next problem, your Scan N Cut mat is not sticky enough. This problem is EVERYONE’S problem.
When a mat is not sticky enough, this is often when a new crafter thinks that they need to buy a new mat. STOP! Don’t throw your Scan N Cut mat away!
There are a lot of fixes for this problem and a new mat is not necesarily one of them. Don’t throw your Scan N Cut mat away! There are a number of fixes that you can do to rejuvenate your mat. PLUS, there are ways to use your mat with some of the Brother tools
- The first step is baby wipes. – These are non-alcohol wipes that will quickly remove any bits left on your mat after you have cut a design. The mat is quick drying and has gained a lot of stickiness back. This solution works over and over again and can be done every cut or every few cuts. I mostly use the wipes after a few projects.
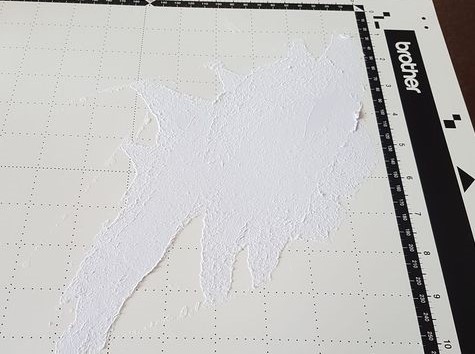
- Next level – you may have too much stuck to your mat. I have seen whole sheets of cardstock firmly stuck onto the mat – baby wipes are not going to “cut the mustard”. (ok, so that is slang lingo which just means baby wipes are going to be hard work to get the card off)
A quick rinse under the tap should do the trick. You can even soak the mat in a bathtub if you have had a major incident. (I will put my hand up).
The downside of this very wet method is that it takes a little longer for the mat to dry which is why I have marked it “Next Level”. You also need to take care that you do not rub too hard as the mat’s glue will lift off. - Finally, you can use dishwashing liquid to the above method. I only use dishwashing liquid when I am preparing to re-glue my mats. I will cover this shortly.
Cut through your mat? Still don’t throw it away
This happens! Not often, but it is a bit of a trap for the new crafter – even more experienced ones occasionally. Earth-shattering for new Scan N Cut owners and a darn nuisance for everyone who has the misfortune to cut through their mat. Stop, still don’t throw your mat away. Have a shot at resurrecting it.
Tape is your friend in this instance. You can use a number of different types of tape, from packing tape to wide sticky tape. The tape needs to be fairly thin and have quite a good sticking power. Make certain it is wide enough to cover the cut entirely with good coverage on either side of the cut.
Place the tape on the backside of your mat, over the entire cut area. Hopefully, your cut is only a small one however if it is large, still give this a try.
If you have cut out an entire shape, it is still worth piecing the cut out back into place. I would recommend purchasing another mat in readiness as your fix may not last as long as we would like.
An “if all else fails” solution
For the larger cut or if you have cut out an entire shape, you can also try adding a clear top sheet onto your mat – (or the backside of the mat).
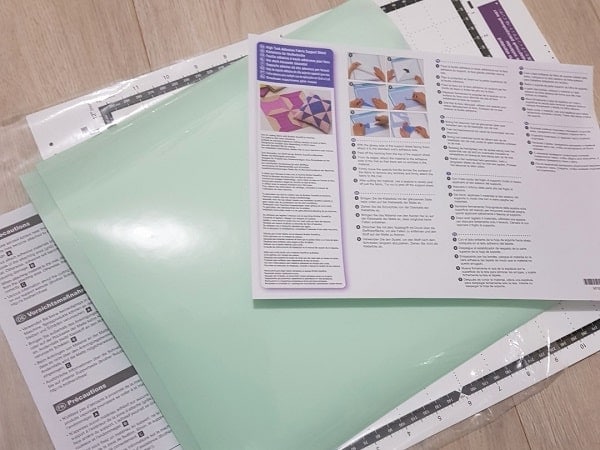
Brother sells stick-on sticky sheets for added tack to cut fabric. The sheets stick onto the top of the mat to provide that added stickiness. These sheets are usually disposable due to the fact that fabric can be quite fluffy and you cannot really clean the sheets.
A variation of this may be to try adding Contact to the front (or backside) of your mat.
Contact on the front side of your mat is only a short-term solution should the above tips do not work and you aren’t able to find another mat. This is called desperation… we have all been there for various reasons. 🙂
This is a picture of the fabric sheet that Brother has available.
Found this information helpful?
It is available as an ebook from my Thrivecart website so you can keep it at your fingertips. You will find a few additional tips too!
Re-sticking your Scan N Cut mat
We have finally got to the resticking of your mat. I have an entire tutorial on this as it is something that maintains your mat’s stickiness and I will put a link to my other tutorial at the bottom of this one.
In short, I use this particular Zig glue which is a repositionable type of glue. A repositionable glue is often referred to as a “two-way” glue which can be used to glue items together when wet and retain its tackiness once dry. This is where it shines for re-tacking our mats.
Other brands of glue to re-tack
There are other brands of repositionable glue. Aleenes Tack It Over and Over is one and Pinflair glue is another. Some crafters use spray tacking glue. I do not generally recommend this as it is hard to keep this spray glue from the roller area, even if you tape the area.
Why I don’t like spray glues
The spray glue is quite a quick solution, which is probably why some crafters like to use it. While this can be a bonus, spray glue can be quite messy. You certainly do not want it anywhere near your expensive Scan N Cut cutting machine.
You also do not want it to get outside of the grid area of your mat as it tacks up the rollers of your machine and basically buggers them up. (am I allowed to say that word?) It describes what happens accurately LOL.
Best way to apply Zig glue
You still need to be careful when applying Zig glue (or other brands). Here are some quick tips.
- Apply sparingly – less is best
- Work in the quarters of the mat – ie top left quarter, then top right, bottom left, and bottom right. If you are left-handed you might swap the quarter so you are not working over the wet areas
- Work from the top of the quarter square evenly across and then work your way down the grid. Basically, work out a pattern that you can follow so that you don’t apply the glue to the same areas over and over
- Allow to dry thoroughly. This may be up to 24 hours depending on the climate. I haven’t needed it longer than 24 hours and on some occasions, a couple of hours has been fine.
- Apply sparingly – oh, I said that one already? There is a reason I am repeating it LOL
One more reason not to throw your Scan N Cut mat away
Hard to believe that there could be more reasons not to throw your Scan N Cut mat away right?
The next reason on my list is that some tools have sticky additional mats that you adhere to your main mat. The Brother Embossing Kit is a prime example. The mat is tacky and difficult to take on and off so a slightly damaged mat is ideal to stick the additional mat to AND LEAVE IT THERE. Such a relief not to have to take this mat in particular on and off.
Just another reason not to throw your mat away. I still have every single one of mine.
More Scan N Cut problem solving
This tutorial has covered a large number of Scan N Cut mat problems. If you resolve the mat issues then your cutting problems will also diminish.
Tip for protecting your mat
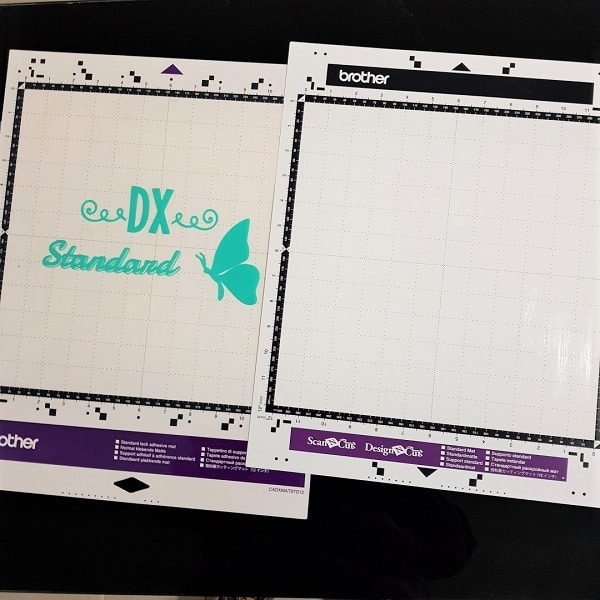
Make a vinyl design for your plastic covers. Why is this a good idea?
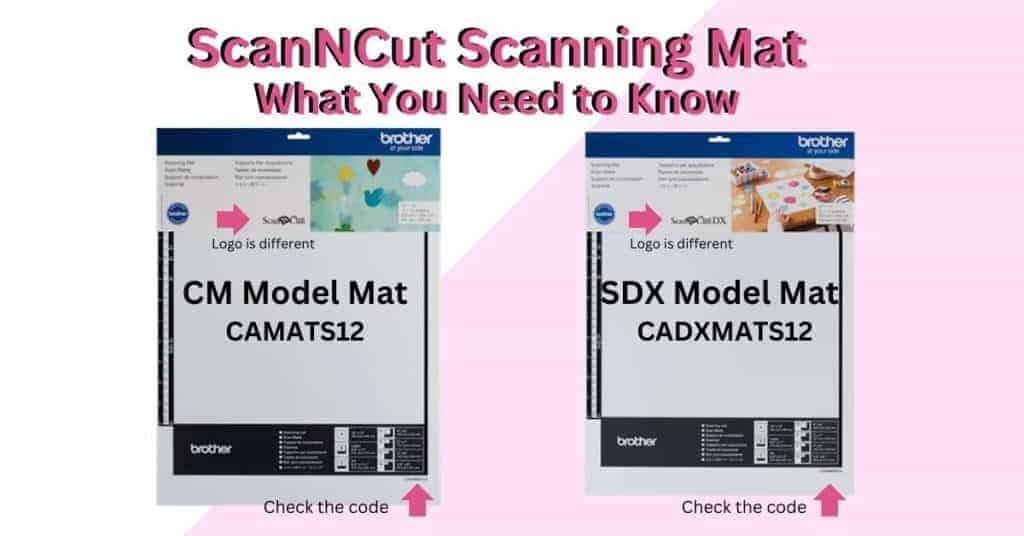
- It will help you tell your mats apart quickly. The two mats in the picture are for the DX on the left and the CM on the right … yes.. TWO different models and not interchangeable
- Show you which side is the clean side once you have taken it off your ma and put it down
- Locate where you have put the clear plastic cover down. Yep 🙂
- Retain the cover for added mat protection, if you damage or lose your cover use some thin acetate as a replacement
There is the below design in the Resource Library or make your own.
I have a number of other tutorials that look at troubleshooting Scan N Cut projects.
How to tell the mats apart
There are two ranges of Scan N Cut machines. The CM range and the DX range. The mats are NOT interchangeable. This tutorial will help you to identify which mat you need and also what other mats are available for your machine.
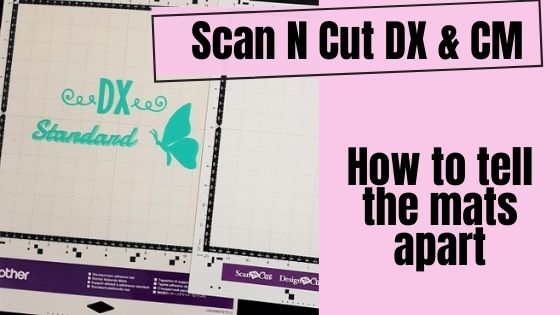
Click on the picture to go to the tutorial
How to stop materials moving on your mat
I have covered a lot of the tips in the above tutorial. There may be a few more in this one that you might be interested in too.
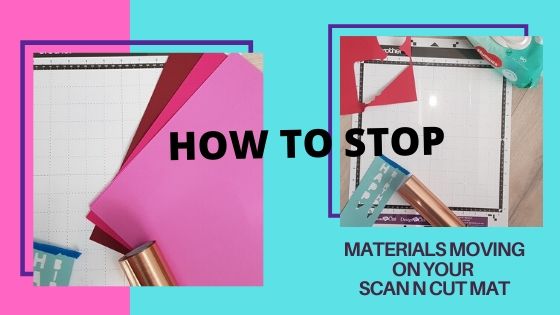
Click on the picture to view the tutorial
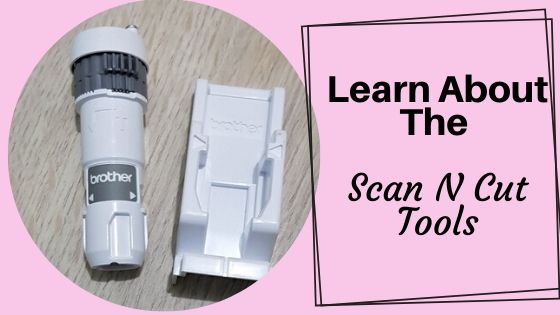
There are LOTS of tools available
Well, I need to update this tutorial again. Brother continues to release more fantastic tools, for the DX range of Scan N Cut machines. Their newest release is the rotary cutting blade. I have just purchased one and will do a complete tutorial on that as soon as I get a chance. Keep a watch out.
In the meantime – have a read of the Scan N Cut tools tutorial. Some tools are indispensable.
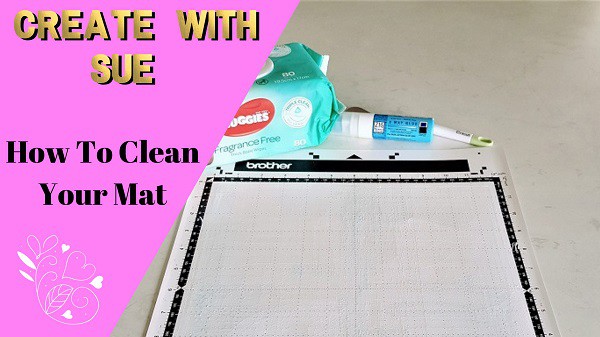
How to clean and re-tack your mat
This is the entire tutorial on resticking and cleaning your Scan N Cut mat. There is a video tutorial. This post and video are older tutorials of mine. The video may be helpful to demonstrate how to apply the Zig glue if you need a little more information.
Found the mat information helpful?
This information is available as an ebook from my Thrivecart website so you can keep it at your fingertips. You will find a few bonus tips too!


You are always welcome to join me in the Create With Sue Facebook where you can make friends, share your creations, and ask questions for additional assistance. I will provide any assistance that I can to help you use your Scan N Cut and Canvas Workspace.
Join me in the Scan N Cut – Let’s Create With Sue Facebook group.
I would love to see you there.
Happy creating,

**Thanks to my FB group for some of the photos I have been able to share with you of various problems with mats.


Hi I always get so much useful tips thanks.
But I’m having a problem with my mat not going into machine straight. It looks like the right side of may is not loading properly from the metal roller . What can I do.? It is frustrating how many times I have to load in over and over.
Hi Peggy, what model do you have?. There were some issues with the SDX1200 machines however there can be other minor reasons for the mat to not load correctly as well.
First, check that your mat does not have any damage, scrape marks, burred corners/edges, stuck bits etc that may cause it not to load correctly. Next, check that you don’t have any tiny pieces of tape or scrap caught up in your machine. This can happen easily and most often causes the mat to not load at all. You can also use a little extra guidance with your hands as the mat loads to attempt to keep it straight.
If all of this is ok then next, try placing a bit of tape on the edge of the mat in the area that feeds into the roller. This may provide a little extra grip if your roller has worn slightly. Hopefully, something suggested will help, if not, give Brother Support a call.
I have that problem, SDX1200, been cutting fine then all of sudden, it pulled only the right side of the mat into the machine and refused to take in the left side. As it turned out I had another mat, hardly used, and after trying tape and cleaning I used this other mat and no problem.
What I found strange was that this was not gradual. I did notice that I had marks on the back of the mat from how often it had been through the machine and it felt like it had created a shallow trough where it has been going through the rollers. If this is the cause then the machine is hyper sensitive when loading and any imperfection will upset it.
Hi Petrik, ooh, that is definitely very strange that it was so sudden. Sometimes the mats do wear down or get gouges in the roller run path. Have you tried applying some painter’s tape on the side of the mat that is playing up so that it gains a bit of grip and the shallow trough is filled? This may give the mat a bit of extra life. The SNC machines will not load mats for a number of reasons… damage to the mat is one of them. I hope that you don’t have any more issues.
I personally find that the mats themselves last such a long time. In fact, when I purchased my last Scan N Cut the SDX2200D, I had FORGOTTEN what a new mat felt like LOL. It was quite a surprise to remember. A nice one 🙂 The biggest problem with mats is losing the sticky and maintaining the stickiness level to be just right.
Excellent information…thank you.
Thank you Susan 🙂
Hello, I love reading all your tips and tricks to help us either our Scan n Cut machines.
I have a sdx1000 , when I first got the machine it loaded the mat perfectly. But after a while it loaded on an angle so I kept trying until it loaded straight.
Now I leave my mat in the machine and turn it off at the power point not on the machine. That way it doesn’t spit out the mat. When I turn the power on I have to press the load button and it goes in a little way to aline the mat in the machine and then I can do all my cutting again no problem. Hope this helps others.
Thanks Toni. Such a nuisance when the mat does not load properly. Another tip is to place some painter’s tape just on the edge of the mat starting at the top corner, where the rollers pick up the mat. Only place the tape in the roll area of the mat. There are a few reasons for the rollers to not pick the mat up correctly. These range from the mat thinning through use, burring at the edges, items being caught up in the roller, and rollers wearing on older machines to mention a few. I am pleased that you have found a solution that works for you.
Hi Sue Thank you all ways good to go through problems again so we can refresh ourselves and remember.
Hi Patricia, I am glad that you enjoyed the post. Thanks for letting me know 🙂
Hi Sue. This is a fabulous message for all of us Scan n cut users. I have a cm and a dx but still learning all the time on both so thank you. Trish
Hi Patricia, pleased that you liked the post and found it useful. Thanks for letting me know. 🙂 Sue
Thanks for this valuable information.
Thank you Sheryl 🙂
Good information here.
Thank you so much, Cheryl. I am pleased that you found it helpful! 🙂
Just to clarify if using Pinflair glue it is the STENCIL glue that you need.
Yes, stencil glue :-). Any repositionable glue should work.