This Brother Scan N Cut tutorial will show how to cut multiple colors on one mat. Yes, multiple shapes and multiple colors all on one mat! We will step through how to cut everything on one mat with each image precision placed on different colored materials. Using the Brother Scan N Cut’s super cool and unique scanning abilities this is really easy to do.
I love the scanning feature of the Scan N Cut.
I have included a video tutorial for those who prefer video.
- Scan feature of the Scan N Cut
- When NOT to cut multiple colors on one mat
- Add a design
- Scan the multiple materials on your mat
- Move your design to the color you are cutting
- Zoom in for precision placement
- Changing the background
- Cutting out your design
- Multiple colors on the mat
- Ways to resolve cutting issues
- The finished multiple colored design
- Video tutorial on how to cut multiple colors on one mat
- Join me on Facebook
Scan feature of the Scan N Cut
The scan feature is one of the best features of the Brother Scan N Cut. And, the scan feature is not just one method. There are three ways to use the scan feature.
- Scan your mat for precision placement
- Scan to data – this will scan and then allow you to save your scanned image to your Scan N Cut, USB or back to Canvas Workspace. You can then either edit or simply use again and again
- Direct cut – scan your image and cut it out straight away
We are going to scan your mat for precision placement.
When NOT to cut multiple colors on one mat
Why wouldn’t you cut multiple colors on the one mat?
If your project consists of quite different thickness materials. Your cutting blade (even the auto sensor blades) will set their cut at the desired depth depending on their first test of the material that you are cutting. This means that thicker or thinner areas on the mat may not cut through fully or cut way too deep.
When choosing cardstock or vinyl to cut out multiple colors on the mat, ensure that the thickness of the various material choice is fairly even. Don’t choose fine paper and thick cardstock together as this will give you grief. If your project does include different thickness materials then make sure that you plan your cutting accordingly and keep them even.
Add a design
First step is to add a design. I am going to select an inbuilt design from my Disney Scan N Cut 2200D however you can select any design that you would like to cut and follow along. Import a design from Canvas Workspace if you have a special design in mind.
If you need help in adding a design check the “How to add a design- Scan N Cut DX “ tutorial out.
Choosing your design
Choose a design that will give you some practice in placing multiple materials and cutting multiple colors on the mat
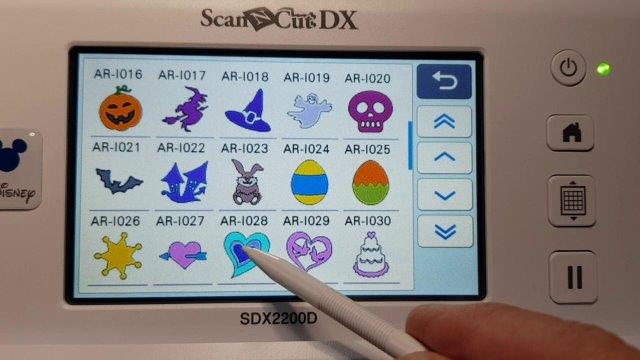
On your machine select the Pattern icon as the first step.
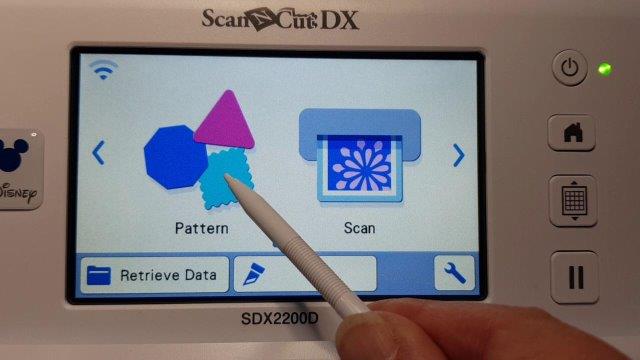
Next, I have chosen the pictured icon. This may look slightly different for you but don’t worry, it is easy to find your way around. Have a play until you locate your inbuilt patterns and while you are in there…. have a really good look around. There are some lovely designs right at your fingertips.
Scroll through and choose the design you would like to add. The one I have chosen for the tutorial is via another picture icon, the rocking horse/heart.
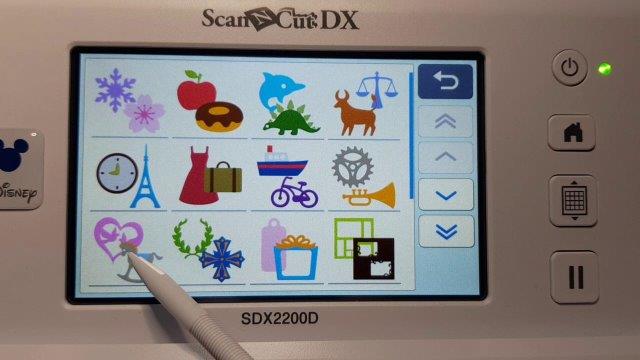
I thought that this heart would be good as it has multiple layers and we can cut each layer out of a different color piece of cardstock. All in one pass!
Managing multiple layered designs
Inbuilt into your Scan N Cut, both DX and CM models are multiple layered designs. These are easy to manage and you can do it a couple of ways.
You will see that the multiple layered designs are listed as design piece A, design piece B, and design piece C. There may be more layers or less however you get the general idea. Also note, that there may be a picture with ALL the layers showing.

Depending on what you are trying to acheive your Scan N Cut will walk you through adding each image as a separate item. First A, then B, then C or which ever order you select. OR you can add all the layers in one hit and then move them around the screen and precisely place them on the mat to suite your material placement.
If you add image A your Scan N Cut will add only that image to the screen mat and you can cut that image out. You would then go back and add image B and then C in turn. There is also the opportunity to edit the file and increase or decrease the size of it.
Resize your design at this step
Note: If you are going to resize the design it is easier to make the changes to all the image pieces at once.
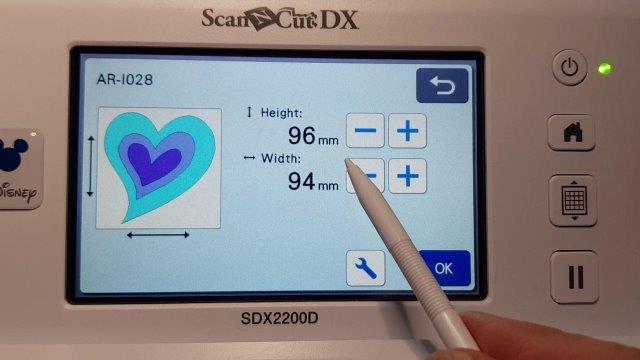
In the next steps, we are going to add the multiple layered version of the design so all the pieces of the design are placed on the mat all at once. Once you have resized your design to suit your project, click OK and your design will be added to the on-screen mat.
Scan the multiple materials on your mat
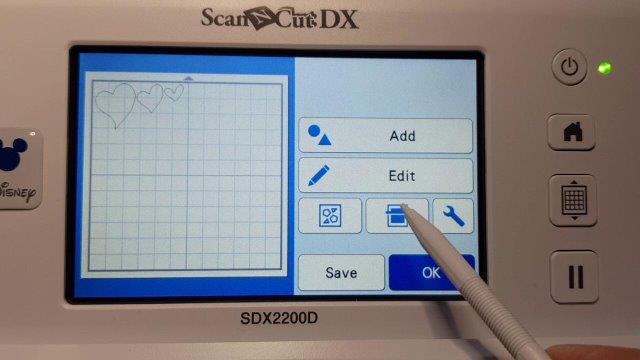
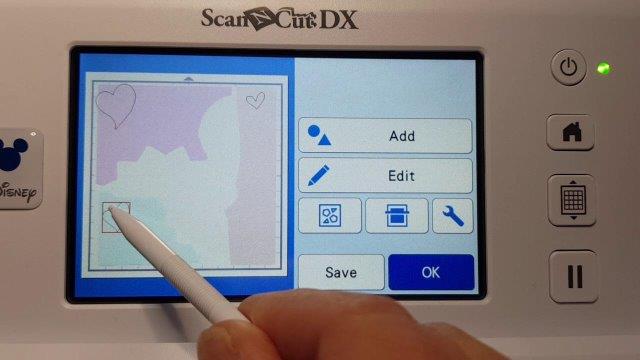
In the screenshot below you can see the multiple layers of the design have been added on the top left-hand side of the screen mat. The mat image is identical to your real mat and provides a great guide to where items are placed.
The middle icon that I am pointing to in the picture is the ” Scan to Mat ” icon. When you click on the Scan to Mat icon it will scan the materials that you have placed on your mat. A message will pop up letting you know what it is doing.
Cutting multiple colors on one mat can be economical
By scanning the materials on your mat and cutting multiple colors at once can be very economical.
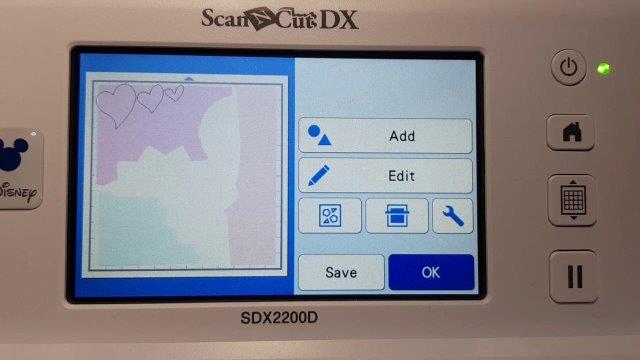
Pictured is the scanned image of my materials, in this case cardstock, that I have placed on my mat. You can see there are three different colors. A piece of colored card for each layer of the heart.
Note in my picture below that the pieces of cardstock are not nice neat squares of card. Nope, they are all the bits of scrap that I have leftover from another project.
Placing them strategically and scanning the mat is how to cut multiple colors on one mat very easily!
The scan feature of your Scan N Cut is a GREAT way to use every skerrick of scrap that you have. I have squeezed designs into such tight spaces with only a few millimeters to spare.
This is especially useful if you don’t have more of the color or material available.
Move your design to the color you are cutting
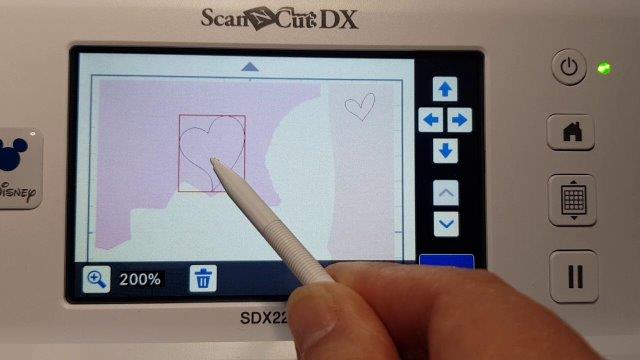
Using your stylus, you can grab each piece of the design individually and move them to the most suitable location to be cut out.
Simply place your stylus on the screen and drag. You will notice that a red highlighted box will appear around the object that you are working with. This is the same for any screen. The active object will have a red highlighted box around it.
I have placed a heart shape on each different color cardstock that is on the mat.
Zoom in for precision placement
Now, this is the really, really fun bit. Using the Zoom feature you can zoom right in and place your shape precisely. The zoom feature has two choices, 200% and also 400%. See the magnifying glass on the bottom left-hand corner with a plus sign? Clicking on the icon will increase the zoom level.
Look how close you can place the shape to the edge. Unless absolutely necessary, I would recommend that you leave a little bit of room between your shape and the edge of the materials on the mat.
This is where I ended up placing my shape. This is a 400% zoom and the magnifying glass has now changed from a plus sign to a minus sign which means if you click it again it will take you back to 200%.
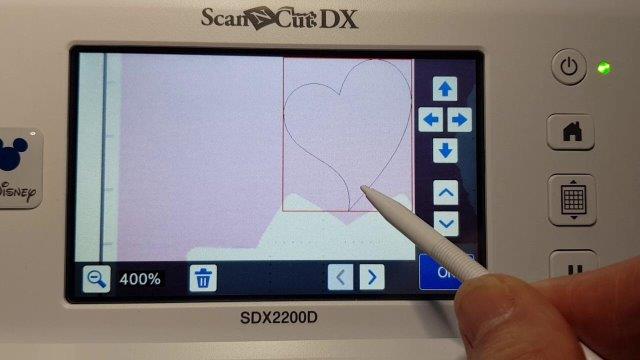
Also note the arrows. The top arrows will nudge your design a little bit higher, lower, left or right. The two arrows below will move the entire page view so you can see other areas of the mat. The sideways arrows will move the entire page left or right.
When you are happy with the precision placement of your design then select the OK button.
Changing the background
If you have issues seeing what you have placed on your mat when you have scanned you can change the settings.
Brother has incorporated 3 settings which are designed to scan light colored materials, dark colored materials or simply turn off if that is the best option for your project.
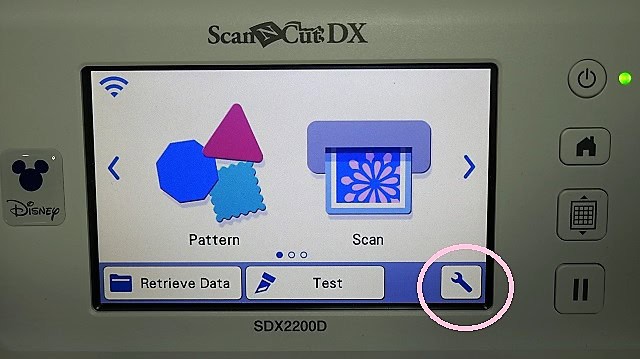
Scan N Cut home screen on the DX model Scan N Cut showing the Tools icon which takes you to all your settings. You will find this feature in the same manner on the CM models too.
To access the setting go into the Tools/Wrench icon and scroll until you find “Background”. There you will find the options to change the background color when you scan your mat.
Choose the color that enables you to see your materials and the design the clearest.
Cutting out your design
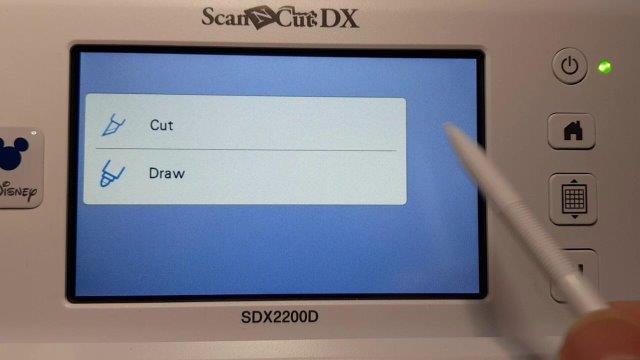
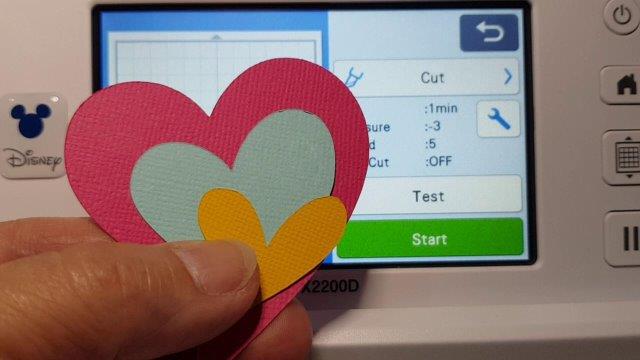
Click OK and when you get to the screen below choose either Cut or Draw depending on your project. In this instance, we are choosing Cut. Click OK and when you get to the screen below choose either Cut or Draw depending on your project. In this instance, we are choosing Cut.
The test cut
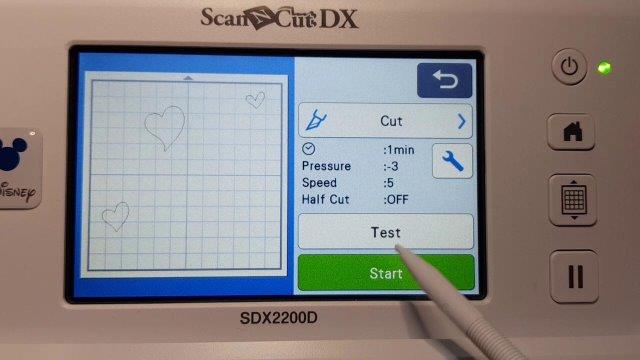
I recommend that you utilize the Test cut feature. Clicking the Test cut button will add a small shape (triangle by default on the Disney) to your project.
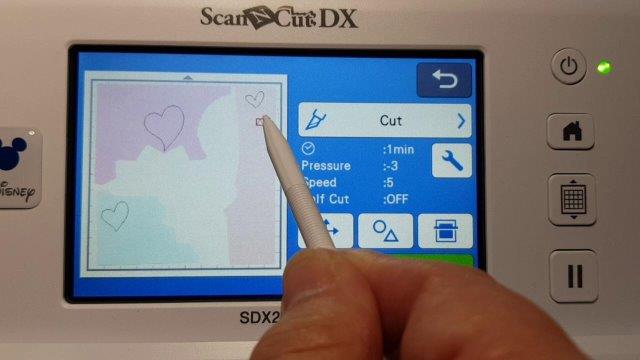
Once you click on Test you will be taken to a screen where you can move the small test shape to a location on the mat where it suits your project best. I usually aim for somewhere on the right-hand side in a spot that doesn’t waste too much of your material. I often don’t unload my mat to check the test cut so consider that when you are placing the shape as well.
Once you are happy with the placement select the Start button. Your Scan N Cut will cut out the test shape first and stop. This will allow you to check your test cut. If you need to make some adjustments you can select the Tool icon and make the changes.
In the DX models you really only have the cut pressure and cut speed to adjust. This is because the DX models have auto sensor blades and automatically adjust the depth.
So adjusting pressure and/or speed are your choices.
If your shape has not cut all the way through the materials then increase your blade/cut pressure. If your blade is scoring your mat too much then you can reduce the cut pressure.
Once you have made any adjustment you will have the option to test again. If you are happy with the test then continue on.
Multiple colors on the mat
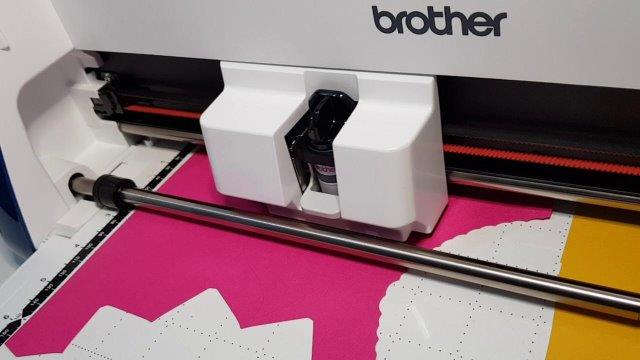
Here is a picture of the multiple colored cardstock on my Scan N Cut mat. Very bitty, but a great way to use up left over pieces. I LOVE IT !
Ways to resolve cutting issues
Materials moving on the mat are a problem. This is often due to the mat not retaining a high enough level of stickiness. Cleaning your mat after use with alcohol-free wipes (baby wipes) will bring back a lot of the stickiness. Using a Brayer is another way of pressing the materials firmly onto the mat.
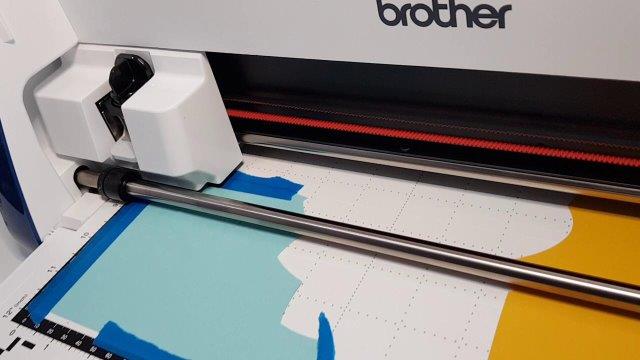
I resolved my temporary problem of the blue cardstock moving … with painters tape. You could also use washi tape as an alternative.
Do your best to secure the tape to your mat so that it doesn’t lift up and get caught in your machine.
Occasionally, even if you have tried to secure the tape firmly, it dislodges and sticks to the scanner glass. You can remove the bottom cover of the scanner and gain access to clean the glass and remove any bits that are in there.
I advise against clear sticky tape (scotch tape or sellotape).
The clear sticky tape is a NIGHTMARE to find and remove whereas the painter’s tape or masking tape is relatively easy. (umm, ask me how I know this one :-/ )
I have put together some tutorials to try and help you over these hurdles.
- How to stop your materials moving on your mat
- How to restick your Scan N Cut mat
- Cutting issues with your Scan N Cut
- How to clean your Scan N Cut scanner (CM model)
The finished multiple colored design
Pictured are the multiple colored heart shapes, placed on one mat, and cut out all at once.
Well, nearly.
Watch the video to see the small mishap as it occurred. I left the issue in the video so you could see that it is nothing to panic about and how I resolved the problem. While it is a bit of a nuisance when something goes wrong, it can be an easy fix.
Don’t let it deter you!
Video tutorial on how to cut multiple colors on one mat
If you prefer to watch how to do something then here is the video tutorial showing how to cut multiple colors on one mat.
I hope that you have found the tutorial “How To Cut Multiple Colors On One Mat” useful. Let me know as I love to get feedback on my tutorials and I am always looking to improve them so they are as helpful as possible.
Happy creating,


Join me on Facebook
Join me in the Scan N Cut – Let’s Create With Sue Facebook group. It is a group of awesome craft friends sharing and caring.
I would love to see you there.
Remember, you are always welcome to say “Hi” at [email protected] or [email protected]. It would be great to hear from you!

Need to learn how to use Canvas Workspace? More information can be found here!