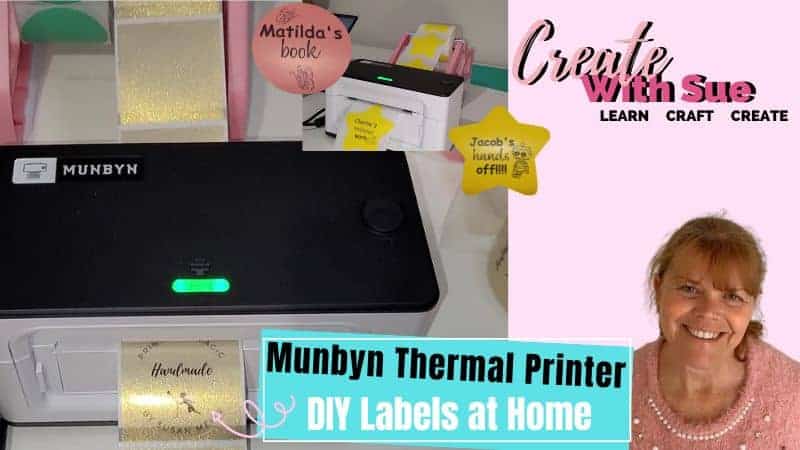
Have you wondered about how to create DIY labels at home? Using a Munbyn thermal label printer can be the answer. This is especially true if you have a small business, create crafts for sale, or attend craft fairs and want to create professional DIY labels at home.
It is important for businesses to personalize labeling for branding and marketing purposes and particularly important for small businesses. Well-designed labels can enhance the perceived value of craft items and attract customers to repurchase.
Join me on my Munbyn thermal printer journey where I will cover setting up the thermal printer, how to create designs, and how to print professional labels and stickers in your own home. And the good news is that DIY thermal labels are a cost-effective solution!
Disclaimer: As an Amazon Associate, I earn from qualifying purchases. Links included in this tutorial may be affiliate links, Amazon or others, meaning I may earn a small commission at no additional cost. These commissions will help me continue creating content for you. Thank you for your support! Read my very boring full disclosure policy here.
My thermal printer journey
I have been very fortunate that Munbyn provided this thermal printer to me for review. Up until now I have either been making my own labels with my Scan N Cut or ordering them from a printing company (I was not happy with the labels that I received).
Crafting my own labels and cutting them out using my Scan N Cut has several.
The two main ones for me were:
Time-consuming – to create one sheet of stickers or labels is fairly easy to do. However, if you are creating anything to sell, the numbers game kicks in. It is so time-consuming that, if you run a small business you would know that time is a precious commodity. The Munbyn thermal printer is so quick, it prints 72 labels per minute. Can you believe the amount of time saved printing your stickers?
Creating professional looking labels – this is the aim of all of us. If you need to label an item, you want it to look professional. The Munbyn sticker choices are awesome! So much so I couldn’t decide which ones to choose so I ended up buying a number of different rolls of stickers. I particularly love the translucent gold stickers as these would be fairly difficult to create on my Scan N Cut.
Purchasing a thermal printer
Before my printer arrived, I did a ton of research. I think I looked at every brand of thermal printer on the market. The Munbyn stacked up well against them indeed. A very exciting start to my Munbyn journey. I could see this was a great solution to DIY labels at home.
Important things to consider are what the printer can do and what labels it can print. Printing speed and ease of use are key. Oh, and I guess the technology behind the prints is very important too. Sometimes we don’t consider that.
Here we go:
I looked at the P941 series Munbyn printer. You can choose a model with USB connectivity or both Bluetooth and USB connectivity.
The technology is thermal which means no cartridges, toner, or ink is required. Whoohoo, this is great as it reduces the cost of printing! You only need to buy the labels or stickers. Thermal printers are a very sustainable choice and Munbyn states that they are BPA free too.
Print resolution:
The very basic model’s print resolution is 203 dpi (dots per inch). This is perfectly adequate for most printing that you would like to do however if you need to print shipping labels with a barcode you need to consider what shipping company you are using and whether 203 dpi will be OK.
Apparently, 203 dpi is sufficient for shipping labels with barcodes in the US/UK, however, if you need to print Amazon FBA barcodes, it’s recommended to use 300 dpi. Australia Post also requires 300 dpi. All in all, the 300 dpi is an excellent resolution for graphics plus it will suit a wider range of requirements for barcodes and I am super pleased mine is 300 dpi.
Print speed to print labels quickly
Print speed is a key factor as this is where time is saved..and time is money. 72 labels per minute is pretty awesome.
Compatibility with your equipment
The USB model will work with Windows, Mac OS, and Chrome OS (I interpret this as a Chromebook)This means it will work with your desktop computer or laptop and the Bluetooth version of the Munbyn thermal printer is also compatible with your iPhone or iPad iOS and Android operating systems. Basically, computers, laptops, smartphones, and tablets.
Labels for your products and packaging
Now choosing labels is the fun bit. It will work with thermal labels and sticker sizes from 1.57” to 4.3” wide.
Color of the actual printout
Note that thermal printers utilize heat to print black designs onto thermal stickers. Initially, I considered this a potential drawback; however, my perspective changed swiftly upon inspecting the labels. As I sat down to strategize the labels and stickers I intended to print, I came to the realization that black was the primary color needed. As long as the resolution remained sharp and clear (check), the stickers proved to be visually captivating (check), and the sticker designs maintained a professional appearance, all the criteria were met (check).
Compact and very portable
The size and weight of this thermal printer makes the printer space-saving AND portable, one of my favorite things. Product dimensions are 7.8×3.8×4.3 inches and it only weighs 1.9 lbs or 0.9kg. That is less than a small bag of sugar! How easy is that to pack away or take with you to a craft fair!
My Munbyn thermal printer arrived!
Finally, my Munbyn thermal printer arrived. Very exciting!
This is the box mine arrived in. I loved the “hello” when I first started opening the box up. It is a very cute addition to the packaging.

Video for printing DIY labels at home
Here is a video of me playing with my new printer. It covers unboxing the thermal printer, installing the print driver, and a peek into the manuals that are included (there is a great Munbyn setup guide.) Adjusting the settings to get the labels to print correctly, and much more. This is a great video to show you how to print labels at home. (Don’t forget to read the rest of my post too though as there are often additional snippets.)
Setting up your Munbyn thermal printer
The Munbyn thermal printer is very easy to set up. My first step was to check out what was in the box. I love getting new stuff and unpacking it. The good news is that the printer is compact which is great if space is an issue. More room for craft materials is ALWAYS better.
Inside the box was a black and white colored printer, the USB cable to connect the printer to your computer, the power cable (make sure that you purchase the Munbyn printer to suit your country), sample rectangle postal labels, and a small manual. There was also a card with QR codes to assist you in finding manuals, and helpful setup information and troubleshooting tips.
Overall everything was well packaged and looked great so I was keen to start printing.
Installing the print driver
I followed the information to locate and download the Munbyn thermal printer driver from the Munbyn site. The print driver was installed on my Windows laptop without any issues at all. Drivers were also available for the Mac and Chromebooks.
The Munbyn printer setup guide downloads with the printer driver which is an awesome addition. I haven’t seen this before and thought it was really great.
I had a small delay as I hadn’t realized that the printer needed to be connected during the installation. The driver prompted me to connect it and I was able to continue on with no issues.
Setting up to print the labels
Placing the labels in the printer and adjusting the guides to the correct size was very easy too.
First up, adjust the guides to suit the label and feed the label through so that part of the label overhangs the front of the printer, and then, close the top back down. You should see the end of the label peeking through.
Before printing your label, press the green button on the top of the thermal printer to calibrate it to suit the size label that you are printing. It moves the label in and out a few times and then stops. Mine stopped with two labels popped out.

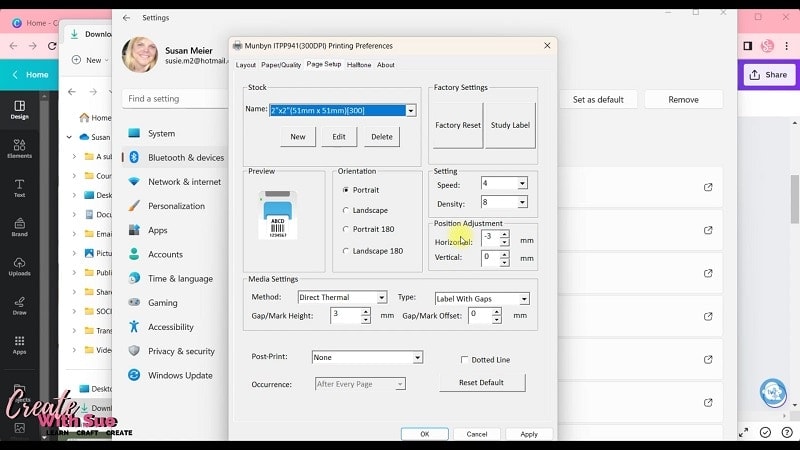
Adjusting the print settings
This is actually more important than I initially thought. I printed out a test label and it was the wrong size (I had forgotten to select the label size) and then it was a little off-centre.
It is a good idea to check your printout by printing ONE sticker or label and check that you are happy with it before you print too many.
In the print settings, you have the ability to adjust both the horizontal and vertical settings so that your print sits centrally on the label. I adjusted a couple of times to get it perfect with my best setting -2 horizontal and -2 vertical. This may not be the case for every label or all your designs (it certainly wasn’t with my labels.) Hence, calibrate the printer so that it reads the inserted label and then checks placement.
My first thermal labels printed!
Once I had the settings sorted, I was really happy with how the labels turned out. I printed on the translucent gold labels and they turned out absolutely gorgeous. So shimmery and pretty. Plus, the print quality was lovely and crisp. I love the fact that you don’t need to buy ink supplies for the printer too. How economical is that!
Here are my first labels after I correctly adjusted the settings. Note that they are actually a round label however they have the square outside area that just peels off.

Let’s look at the labels
I must admit that I had the best fun looking for labels. I mean, this is the basis of how the end product will look.
Now, I didn’t just look at Munbyn labels and stickers. I looked at ALL thermal labels that I could find as the Munbyn printer will accept other brands of thermal labels so you are not restricted. As long as the size of the label fits and it is a thermal label you are good. I ended up purchasing Munbyn stickers for a number of reasons.
Why I chose to purchase Munbyn labels.
Waterproof
This was a biggy for me. Many of the thermal stickers I looked at were not waterproof which meant if they got slightly damp they may not retain the professional look I wanted. Can you imagine creating a beautiful label that doesn’t last as long as you need? Whether it be for branding purposes, a shipping label, labeling an item in your pantry, a kid’s book, product labels … whatever you plan to put the label on… you will want it to stay nice for as long as possible!
UPDATE: I checked the pink labels to see how waterproof they actually are and they are great! I didn’t find any deterioration at all. Yippee.
The cost
The cost was the next factor. Munbyn’s pricing was extremely competitive plus I discovered if you join up on their website you get an added discount. You can also purchase Munbyn thermal labels on Amazon at a fairly good price. I bought mine through the actual Munbyn website though… plus, I collected some points for doing so too which are an added discount.
Color selection
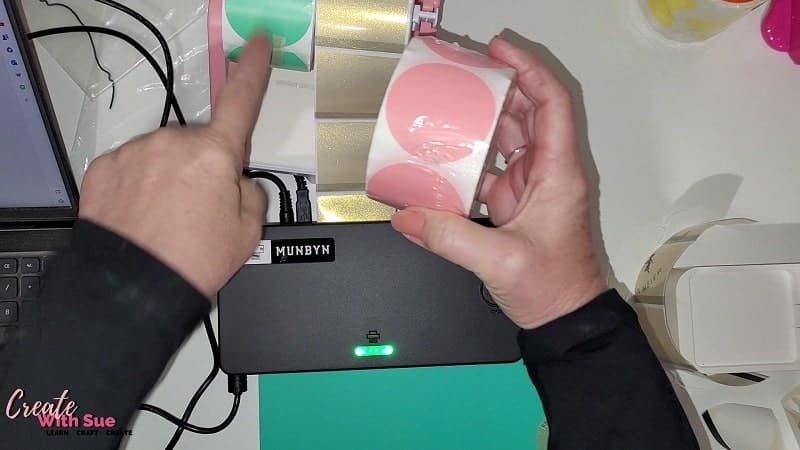
Fun, fun, fun. I purchased way more than I really needed as I was so excited.
I bought pink ones, green ones, clear ones, yellow star-shaped ones, and of course, I had the gold translucent labels that Munbyn sent me with the printer. Lots of fun.
A label holder that enables the labels to feed through freely was also purchased. These label holders support both the label rolls and the flat rectangular shipping labels.
You can purchase various labels directly from the Munbyn website or from Amazon. I am sure there are other places as well.
Printing Performance at a Glance
I was amazed at how quickly the printer prints the label. So quick!! This is going to be a huge time saver for me. This can be a great boost to business operations and a definite advantage when printing DIY labels at home.
Creating the designs for your labels
Now, I love creating designs and you are able to create designs in pretty much any design software. Inkscape, Gimp, Affinity Designer, and Publisher are all examples of software that you can create your labels in. I created some in Affinity Designer and a number of them in Canva. A great thing about Canva is you can use the free version and it is really easy to use. Affinity Designer was easy for me as I use it a lot for creating sublimation designs. Be aware that there is a bit of a learning curve for Affinity Designer.
Later in this post, I’ve included a link from Munbyn that guides you on creating labels in Word as well. Realistically, there’s a wide range of software available that you can use to craft labels in the comfort of your own home.
The size of the Munbyn thermal printer is a definite bonus. It is not too small that it is fiddly. However, it is small enough to be super portable and easy to move around or take with you, especially for events.
Pro’s and Cons of a thermal printer for shipping labels
I am a member of a few Etsy groups on Facebook and when I was looking the other day someone asked “For those of you who use a label printer for postage, what are your pros and cons?”
Well, I was pleasantly surprised that over 100 people responded and 99.9% of them said there was no downside to getting a thermal printer. Now, not all said what brand printer they had purchased. They were fairly general comments but it was obvious that printing shipping labels at home for small businesses was a big positive.
I have taken a snapshot of some of the comments and blanked out the names for their privacy.


My only “Con” was that thermal printers will only print black… this is the nature of thermal printers. I decided that this was not that big of a deal as this was ideal for my business purposes.
Where to purchase your printer
These links will take you to the main Munbyn website. If you end up in the wrong country you can alter this on the top right-hand side. There you can find and change the flag that relates to your country.
Munbyn thermal label printer
USA: – Buy a Munbyn thermal printer in the US
UK – If you are in the UK use this link
AUST – Based in Australia? This link will take you directly to the Aussie site
You will also find the Munbyn thermal printer readily available on Amazon.
There is a large range of Munbyn thermal labels and stickers
USA: – Check here for the choices of DIY thermal labels and stickers for home printing
UK – Here is the link to some of the UK labels
AUST – Let’s not forget the Aussie link
Thermal labels are also available on Amazon as well.
There are a variety of specialized labels for home printing so check them out too;
USA – Holographic, watercolor, and various shapes.
UK – What is available in this range in the UK
AUST – Make sure you take a look at the watercolor ones as they look really nice.
Munbyn tutorial on how to print stickers from Microsoft Word.
You are able to use many software programs to create your DIY labels at home and print including Microsoft Word, Microsoft Publisher and would you believe… Microsoft Powerpoint.
Check here to view Munbyn’s tutorial on creating and printing from Word.
Frequently asked questions
Final Thoughts: Elevating Your Business with Munbyn
Overall, I was very pleased with the Munbyn thermal printer for its ease of setup, use, and speed. It is great for small businesses to print DIY labels from home and create professional labels for their products. It will certainly make a difference to mine, providing a professional looking label is important to me.
I thought there was a great choice of labels and I had a lot of fun choosing and designing labels to print. I particularly loved the translucent glittery gold labels even though my brand colors are green and pink. The translucent labels really “popped” and sparkled.
For anyone needing to print shipping labels from home will find that a thermal printer is a huge benefit. If you need to barcode your products you can do that too.
The main thing that I was a little disappointed with was that I needed to adjust the design to sit centrally on the labels each time I changed the labels. If you are using one roll of labels this wouldn’t be an issue at all however I was swapping around with star-shaped, round, translucent labels. Etc.
To note: – The design alignment may have had something to do with my design or the program I was using to print with so I will look into those possibilities. Another thing that you can check is whether the adjustment guides are perfectly placed as this too would make a difference.
My recommendation would be to print one test label to ensure the label prints correctly and you are happy with it. Then WRITE THE SETTING down. During my first few labels, I found that each label type seemed to need a bit of a tweak to get the setting perfectly placed. Once set, it would then print continuously in the correct placement. Some of this may have been “new user” related. Time will tell.
Join me on Facebook
Join me in the Scan N Cut – Let’s Create With Sue Facebook group. It is a group of awesome craft friends sharing and caring.
I would love to see you there.
Please feel free to ask any questions that you need in the group.
Happy creating,


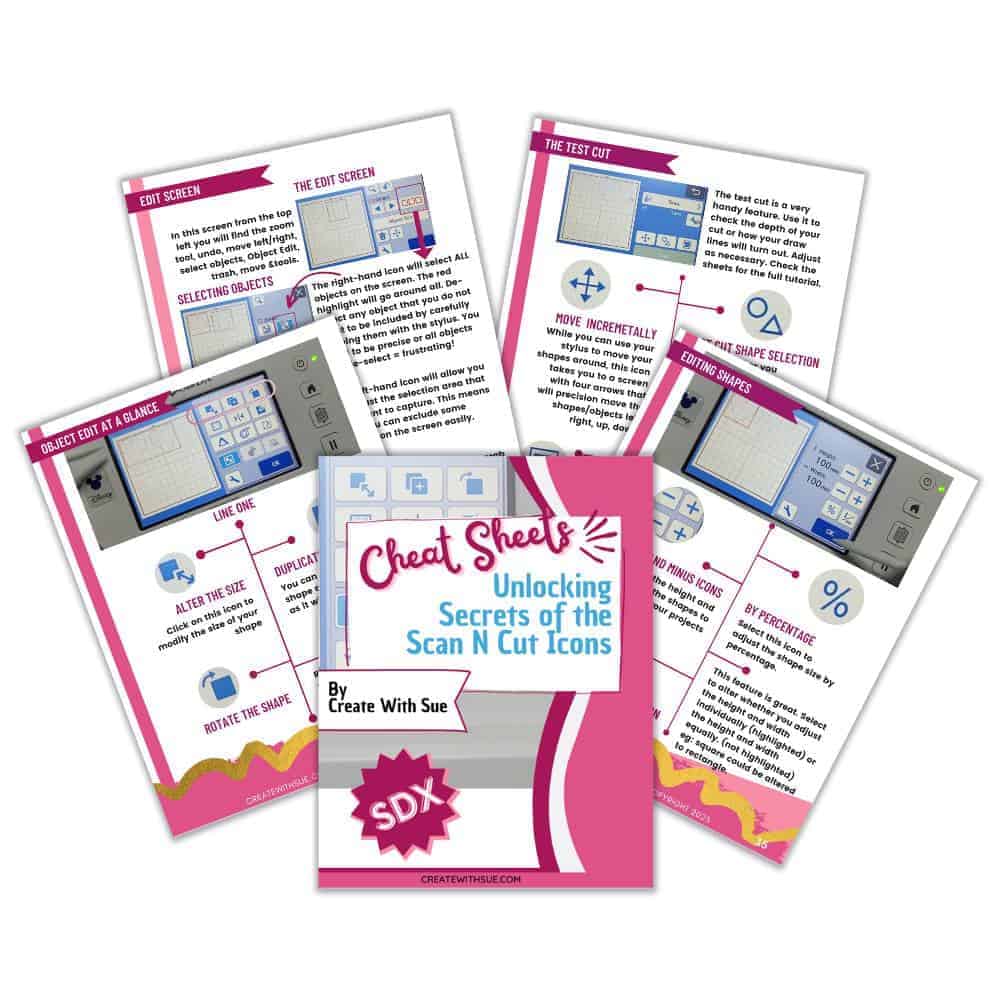
Scan N Cut Cheat Sheets for the SDX models
Are you at a bit of a loss with what all the icons in your cutting machine are for? I have a solution for you… Cheat Sheets. These cheat Sheets suit all models of the SDX Scan N Cut machines.
Cheat sheets for your Scan N Cut can be a great help.