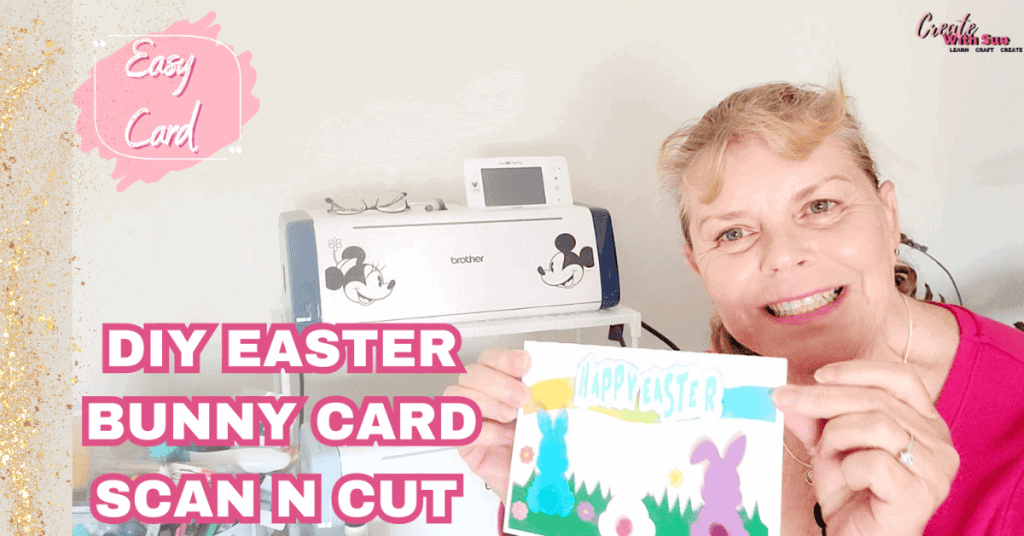
Discover the endless possibilities of the One Sheet Wonder card technique! In this article, we will explore how this creative and versatile method can help you create stunning and unique greeting cards with just a single sheet of paper. Whether you’re a seasoned crafter or new to the world of card making, this technique is sure to inspire and captivate your imagination. So grab your scissors, glue, and let’s get crafting!
Disclaimer: As an Amazon Associate, I earn from qualifying purchases. Links included in this tutorial may be affiliate links, Amazon or others, meaning I may earn a small commission at no additional cost. These commissions will help me continue creating content for you. Thank you for your support! Read my very boring full disclosure policy here.
Where did the One Sheet Wonder idea originate?
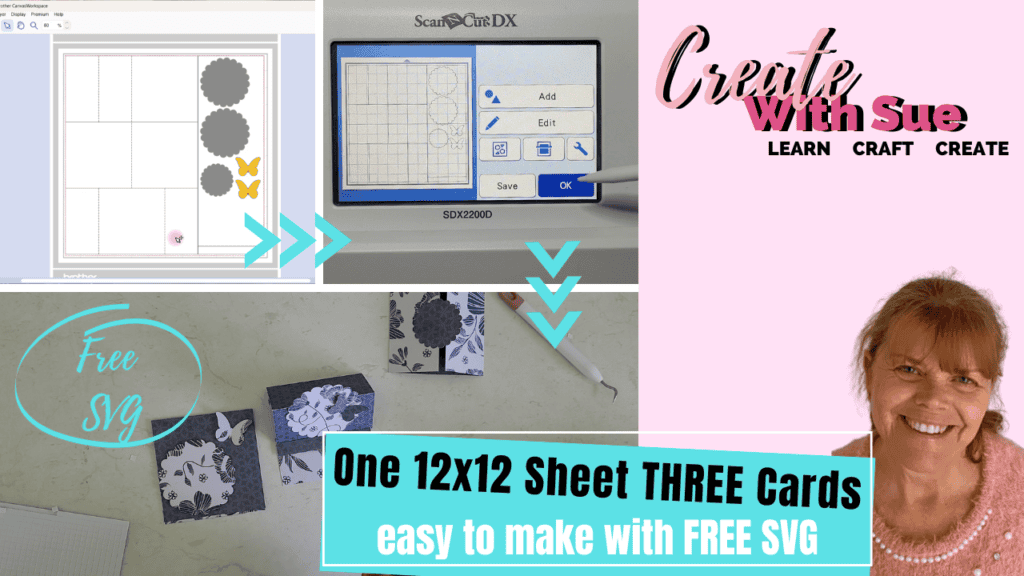
During the process of creating this tutorial, I came across a fascinating technique known as “One Sheet Wonder cards”. This technique involves producing multiple cards using a single 12″x12″ sheet of cardstock. While I’m unsure of the originator of this brilliant concept, I drew inspiration from an incredible crafter who executed the cards far more skillfully than I did. The primary objective of this tutorial is to demonstrate how to transform a non-Scan N Cut idea into an exceptional Scan N Cut project. You will find a video below to assist your further plus a FREE SVG template so you can create this version of the One Sheet Wonder cards.
Wandering through the Creative Fabrica site I spotted a short course on how to create these cards. The crafter’s short course is aptly called “One Page Wonder”. The best news is that the course is free and well worth watching. As I mentioned, her cards turned out so much nicer than mine. Here is my affiliate link to the free course https://www.creativefabrica.com/
I am also able to share a special limited-time offer that you can use to gain 10 free downloads. You will also have the option for a limited-time special pricing on a subscription to Creative Fabrica. I personally love it and spend far too much time wandering around it.
Here is the link to more information about the special offer
What do you need
- 1 piece of double-sided patterned Cardstock 12×12 I like this brand
- Glue or double-sided tape
- Cutting machine – Scan N Cut or Cricut
- Free Template from the Resource Library
My first tip for the One Sheet Wonder card
Now, here’s my top tip for crafting a One Sheet Wonder card. Opt for double-sided cardstock that complements both sides of the sheet as well as the cards you intend to create. Unfortunately, the cardstock options I had on hand weren’t the best… but hey, despite that, the cards still turned out pretty nice. Interestingly, the pattern is starting to grow on me as they sit on my bench looking at me.
The best part is that this concept can be repeated again and again, making it truly awesome.
Download the FREE SVG template
Once you have your cardstock sorted, head over to the Resource Library for the free template. It is created in SVG format and should work on most cutting machines. The files are in a zipped folder and if you need assistance on how to un-zip the file on a PC check this tutorial. There is an FCM version of the template included to give you the opportunity to play with the file in Canvas Workspace if you choose. Use the SVG version for the greatest ease.
Feel like a challenge? Create your own template. I would love you to share a picture of what you make inside our Facebook group. Add the comment if you have created or varied the template I have on offer. This is a great growth challenge.
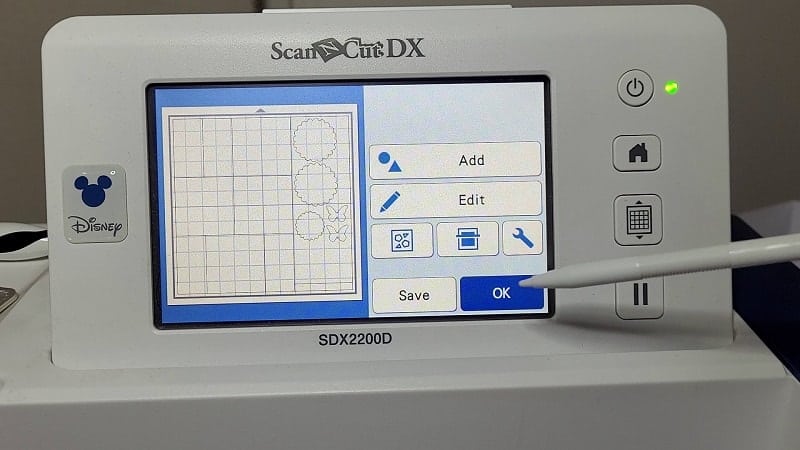
Import the file
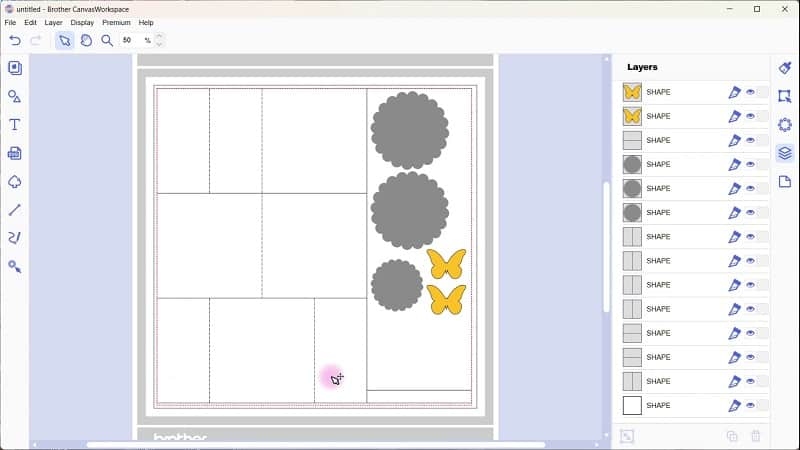
Import the file to either Canvas Workspace or directly into your Scan N Cut. There is a small space remaining on the cardstock for you to add some more embellishments. Think about adding something more to your cards. May as well use ALL the cardstock.
This is how the template will look when it is imported into Canvas Workspace. You can see the tiny area of blank space. Another option is to change out the scalloped edge shapes and replace with a different shape from the shapes panel.
What about turning it into a birthday card. Replace the scallap shapes with a number… Imagine a number 8 for an 8th birthday placed where the scallop shapes would be. Or, perhaps add the numbers onto the scallop shape, you are not restricted to one piece of card. Using your imagination turns one type of card into LOTS.
So many choices, so much fun!
NOTE: The template is set up with Dashed lines for the fold/score lines. These could be altered to Draw lines if you prefer. Have you seen my investigation on how to do this. Check it out when you have a minute.
Cutting out the cardstock
The One Sheet Wonder Cards feel a little like a jigsaw puzzle with all the various pieces however it is really a very simple pattern. Such a clever idea.
TIP: Occasionally it is an issue with components moving once imported to your Scan N Cut. An easy solution is to group all the objects together so that nothing moves incorrectly. To Group – select all and Group. The Group icon can be located at the bottem left of the Layers menu. Also located in the main top menu.
For this particular template I didn’t bother to scan the cardstock for placement as the template takes up the entire cardstock. I simply exported to my Scan N Cut and cut it out.
Finishing the cards
Here are the various pieces of the cards after they have been cut out. From here the choices are all yours. Which sides of the cardstock you would like to use showing on the outside. What embellishments to add. Remember, you are NOT limited to what we have cut out below. Add some bling, banners, wording, or perhaps flowers, any embellshments that suit your end goal for your project.
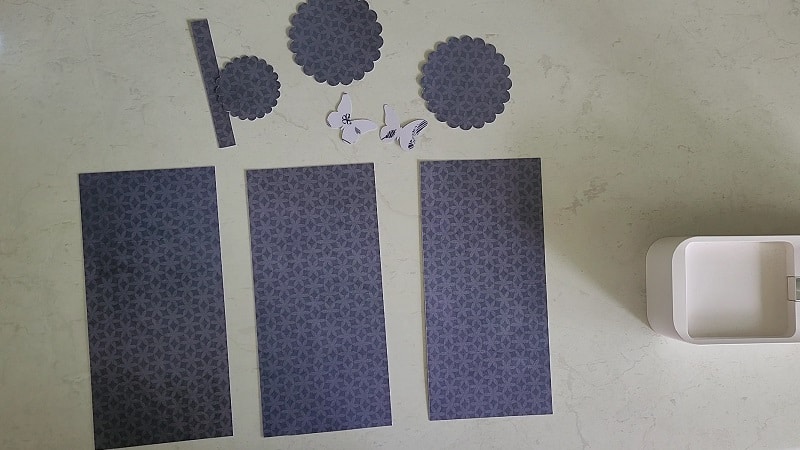
Feel for the fold lines and fold accordingly.
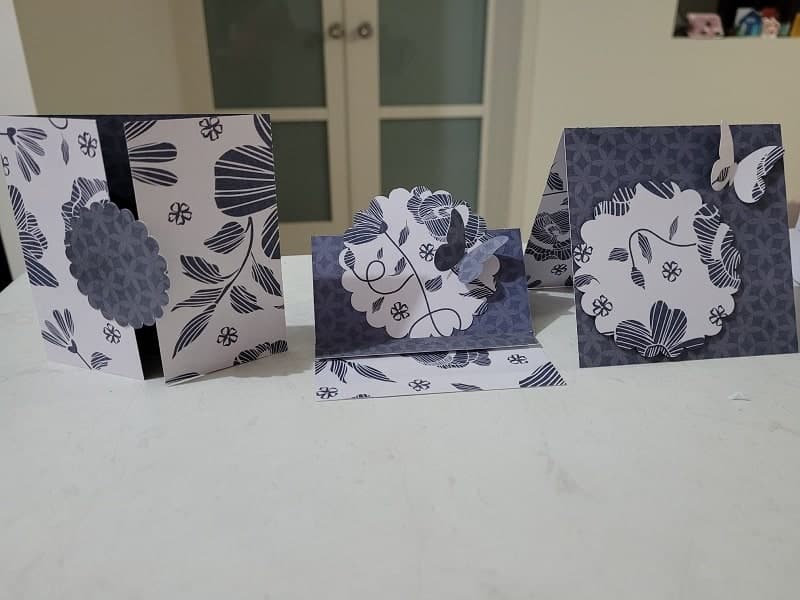
Finished cards
Fold the cards to to the Gate fold, Easel fold and the Single fold style. Then, add the scallop shapes to the various cards.
I used the 2 inch scalloped shape on the Gate fold card and the 3 inch ones on the Easel and Single fold. Remember, no rules 🙂
Video of the One Sheet Wonder Cards
Often the steps are easier to follow on video. So, here it is!
Don’t forget to show your support by liking and subscribing to my channel! By doing so, you’ll stay updated on all the latest video releases. Your likes and subscriptions also provide valuable feedback and help guide me in creating more content that you’ll enjoy. Thank you for your support!
I hope that you have found this tutorial useful and provided you with a wealth of ideas.
Remember to check out the 10 free downloads offer! There are also so many free items to choose from too. Take a wander.
Join me on Facebook
Join me in the Scan N Cut – Let’s Create With Sue Facebook group. It is a group of awesome craft friends sharing and caring.
I would love to see you there.
Please feel free to ask any questions that you need in the group.
Happy creating,


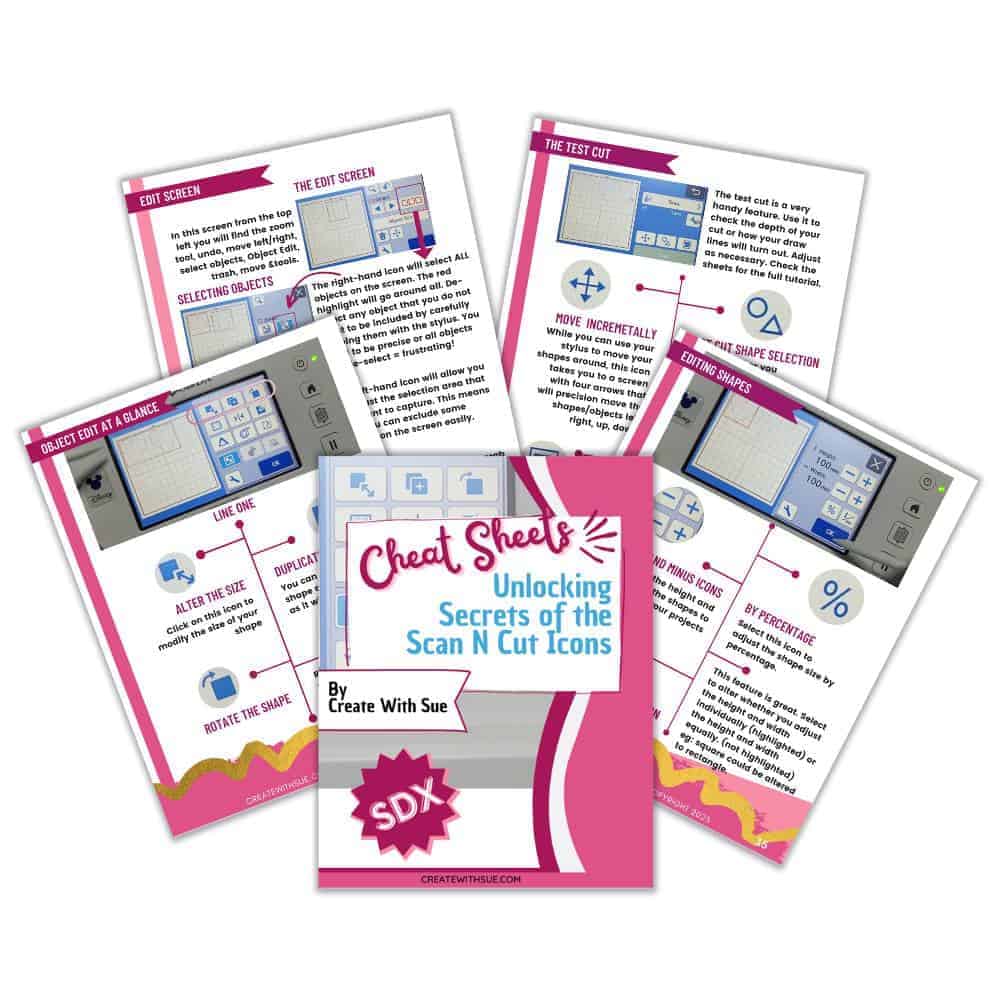
Scan N Cut Cheat Sheets for the SDX models
Are you at a bit of a loss with what all the icons in your cutting machine are for? I have a solution for you… Cheat Sheets. These cheat Sheets suit all models of the SDX Scan N Cut machines.
Cheat sheets for your Scan N Cut can be a great help.