
Artspira is the new phone app for the Brother Scan N Cut. This is IF you have the correct model as it does not work for all models of the Scan N Cut machines.
The app has been on the radar for a little while and I was able to put my name down to be notified when it was released.
And here it is!
Disclaimer: As an Amazon Associate, I earn from qualifying purchases. Links included in this tutorial may be affiliate links, Amazon or others, meaning I may earn a small commission at no additional cost. These commissions will help me continue creating content for you. Thank you for your support! Read my very boring full disclosure policy here.
What is Artspira
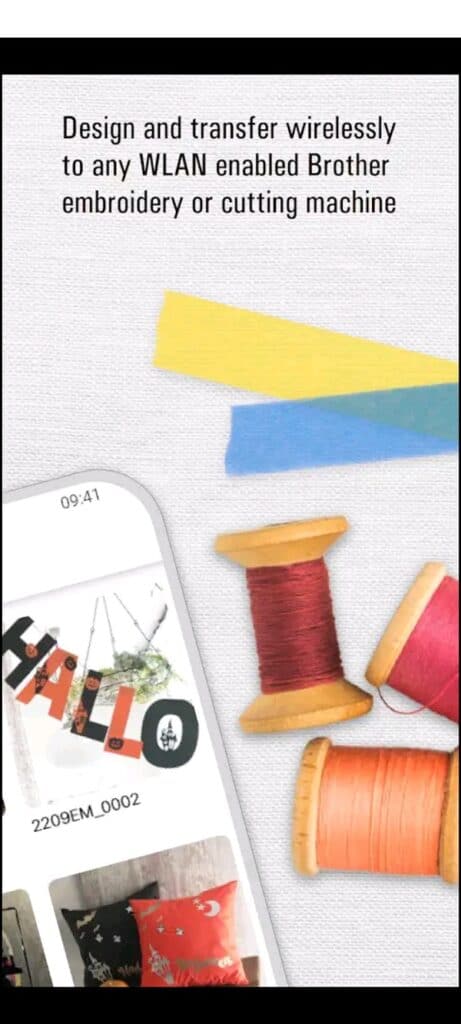
Brother’s new Artspira app has been designed for use with WLAN-enabled Brother embroidery machines and Brother Scan N Cut cutting machines. While Brother states that it is for any WLAN-enabled Brother cutting machines, I believe that this is not quite correct. It does not appear to work with the CM range of Scan N Cut cutting machines.
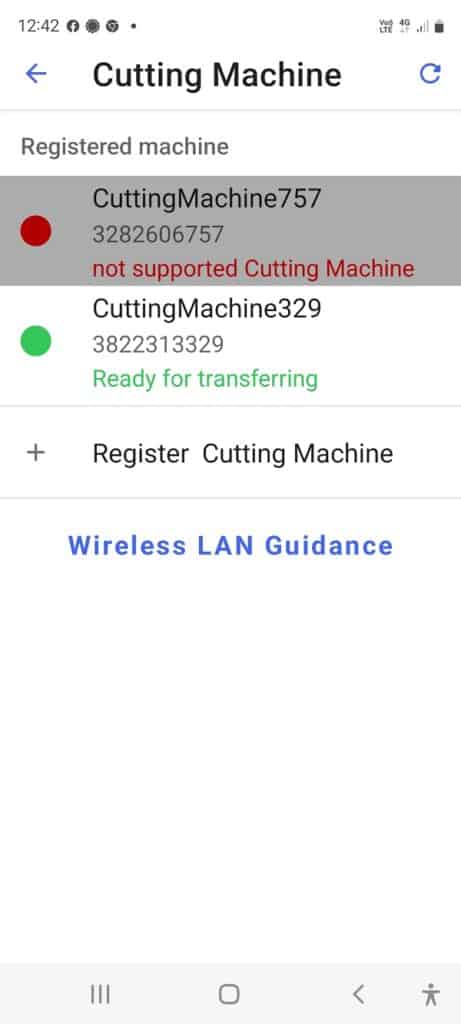
Below is how Brother has advertised the app in the Google Play store however, the picture on the right is my CM900 model Scan N Cut cutting machine which is WLAN enabled however it is showing as not supported.
Which models will the app work with
Brother has supplied a list of models that the app will work with here. It may not be the complete list as it will vary for different countries.
Let us look further into what this app will do for you!
How to install the new Artspira app
First up installing the Artspira app is pretty easy. I have a Samsung phone so I used the Google Play store to download the app. Enter the wording “Artspira” into the search bar and you will be presented with the app to select. You could also search for “Brother“.
Once selected you can have a bit of a read (actually a look at the pictures as there is not much of a description) then install.
It will only take a short while to download and install. Then select the green open icon to check out your new app.
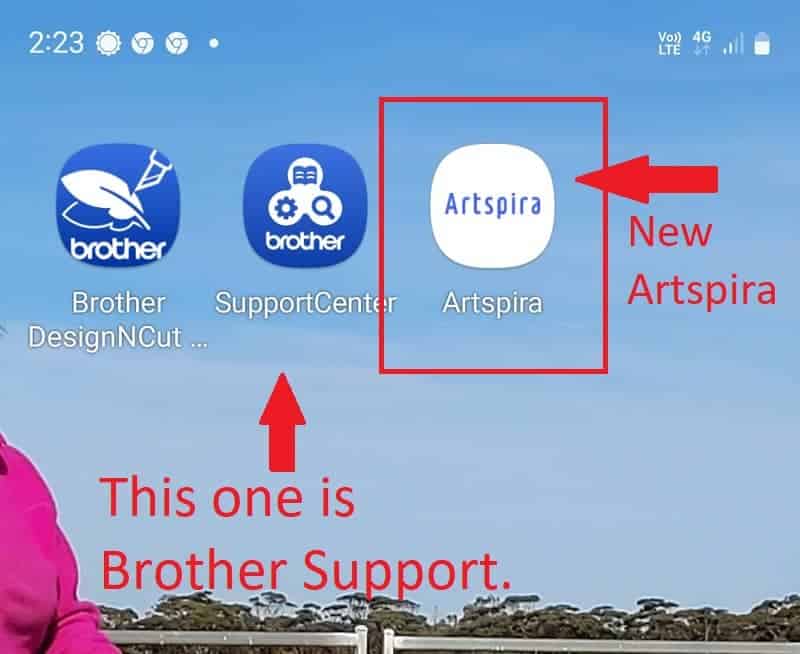
You can see in the above screenshot the new Artspira app installed. It will go on the last page of your apps by default. The other two Brother apps are the DesignNCut for the DesignNCut models and the Brother Support Centre app.
The Support Centre app is definitely worthwhile installing.
I have noticed there is already an update to the Artspira app since I initially installed it on my phone.
Let’s look at the app
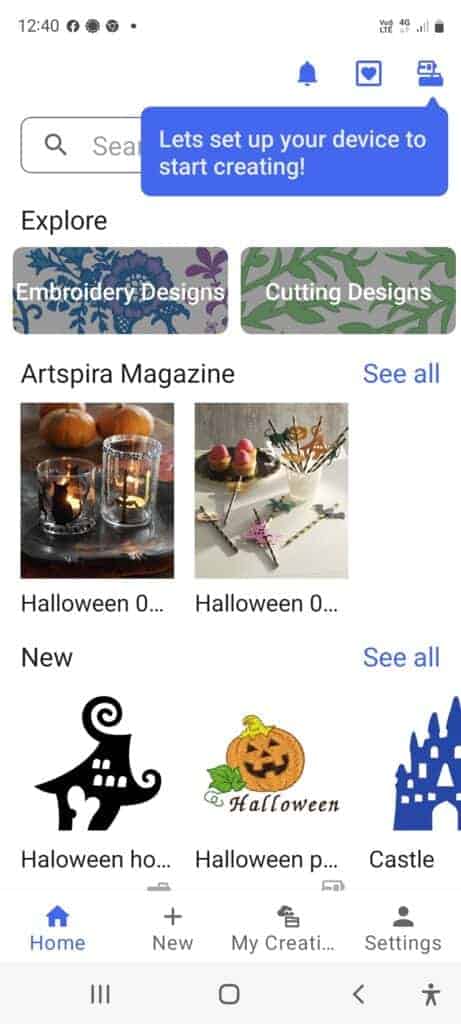
The first screen that popped up had this large blue box indicating to connect my Scan N Cut to the app. You can also see in the screenshot the two distinct choices of Embroidery Designs or Cutting Designs.
To set up you need to enter your Canvas Workspace username and password which automatically linked me to my cutting machines. This was a very easy process.
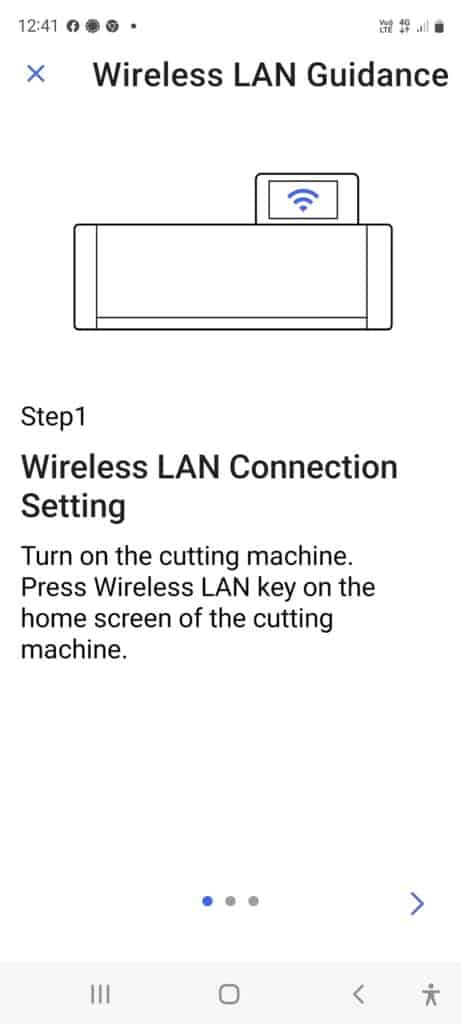
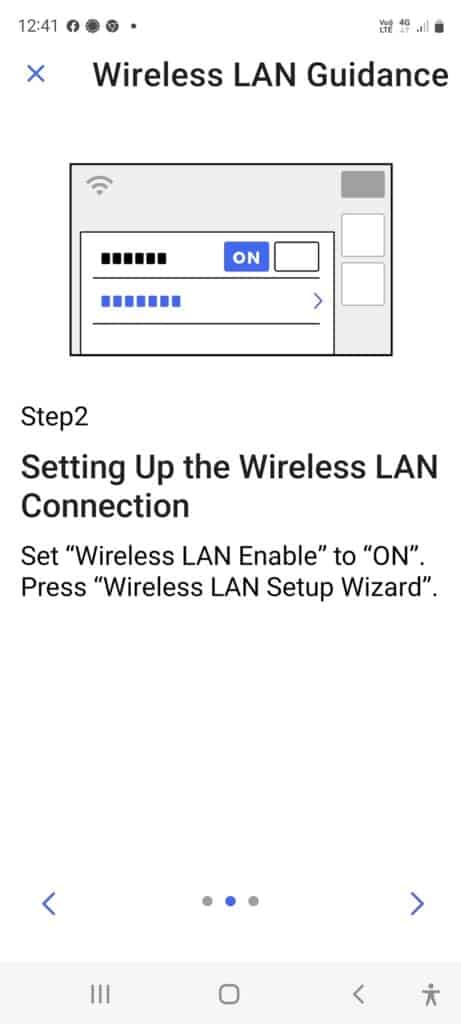
Quick tutorial to set up wireless without Canvas Workspace
Now, I linked my app up with my Canvas Workspace login however Brother has provided a quick tutorial to connect the app by entering your WLAN settings directly into the app. Screenshots are below of the Brother tutorial.

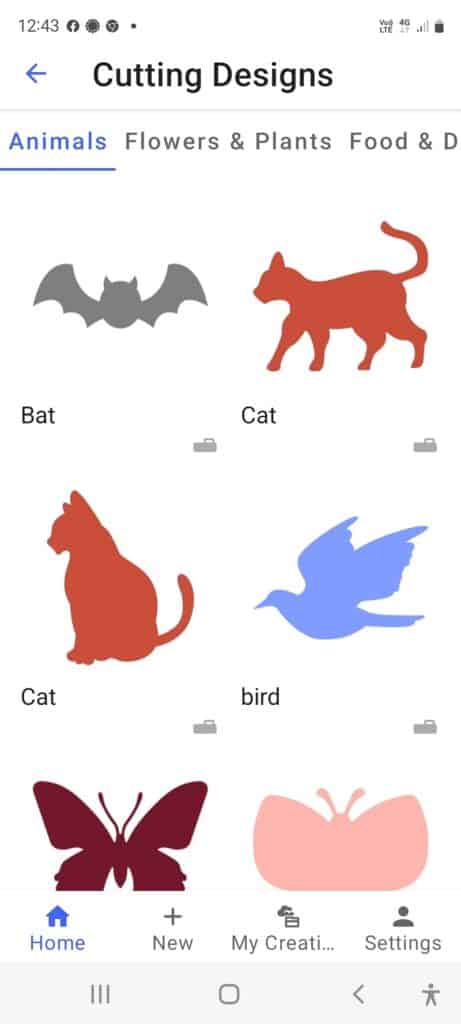
Accessing the designs
In the first screenshot, you will see some of the Cutting Designs that will be available to you. Access them via the home screen Cutting Designs choice. The cut files are divided into categories that are easy to flick through and choose a design from.
There are two types of files, embroidery files and cut files. These are highlighted in the second screenshot below. The embroidery icon is a tiny sewing machine and the cut file is indicated using a cutting machine icon. These icons will assist you in distinguishing the file you are looking for.
I might add, I wandered around aimlessly playing with lots of files before I worked this out. This didn’t phase me as I am also an avid embroiderer so it was all fun. I had a great time playing with the embroidery butterfly to see what I could do with that. Unfortunately, while I have a beautiful 6-thread embroidery machine, it is NOT a model that can use the Artspira app.
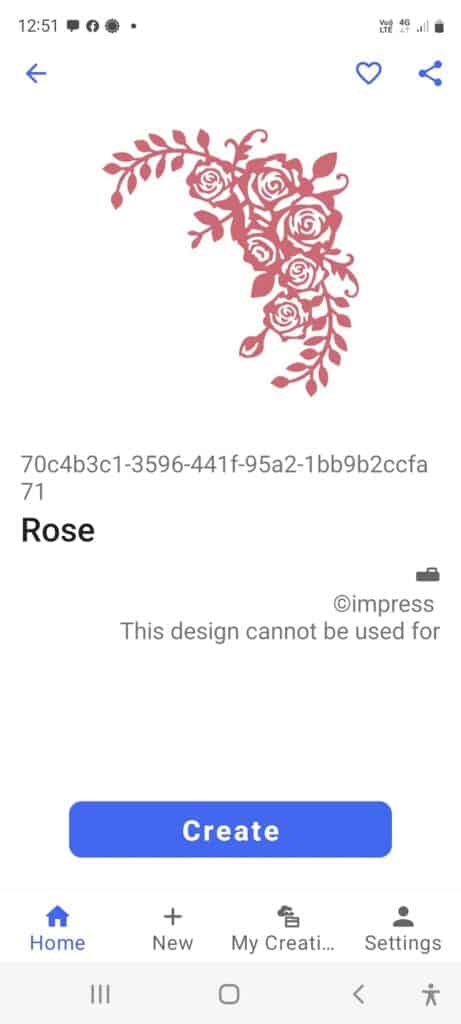
After selecting a cut file you will be presented with a screen like this one where you have a blue button to create your design.
Photos in the selection below
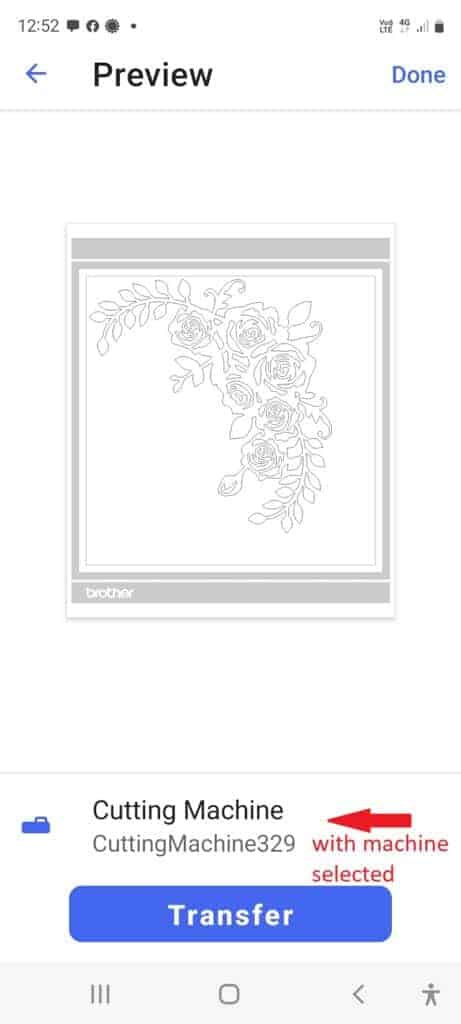
Photo 1 – After creating the design you can transfer the design to your cutting machine. In this screenshot, my cutting machine is still waiting to be selected so the transfer button is greyed out. I have two Scan N Cut machines registered in my Brother account. A CM900 and the SDX2200D. My theory is that if you only have one cutting machine registered it may simply pick that machine up automatically.
In the second screenshot, I clicked on the machine selection and highlighted my Scan N Cut SDX2200D machine. Once your machine is selected the transfer button is activated and changed to blue ready to send.
After clicking the transfer button you receive a successful message.


Using the embroidery feature
As I mentioned earlier, I had fun playing with the embroidery feature while I was checking out what the Artspira app could do. You are able to add a shape or design and change how it will sew out. Adding additional shapes and having them sew out within the same design is available to you as well. There are a few editing features to play with as you can see in the screenshots below.
Features not available for cut files
I could not find these features with the cut files which was disappointing. This may be added with a later update, as they would be a good inclusion.
There is a huge opportunity to create an applique cut file and match the embroidery data with it. Sadly, at this point, I could not manage to do this.
Maybe more practice on my part??
Or maybe it is not possible.
Another possibility is that it is in the development stage and where Brother is heading. Fingers crossed!
In the last screenshot, you are presented with the option to save an embroidery file. This too wasn’t available for me to choose within the app. The only options were to Transfer the data to your Scan N Cut or click on Done. The Done choice cleared the data and popped you back to the Create box.


Update for your Brother Scan N Cut
In alignment with the release of Artspira, Brother has released an update for the DX machines. The update takes you to version 1.70 and you should see the option to update when you start up your machine.
Note: The update version number for my machine may not be the same in all models or countries.
For more help with working through updating your Scan N Cut, you can follow this tutorial here.
Changes on your Scan N Cut after update
The most obvious one is the front screen.
Pictured on the left is the original screen to choose to import your design from Canvas Workspace over WiFi.
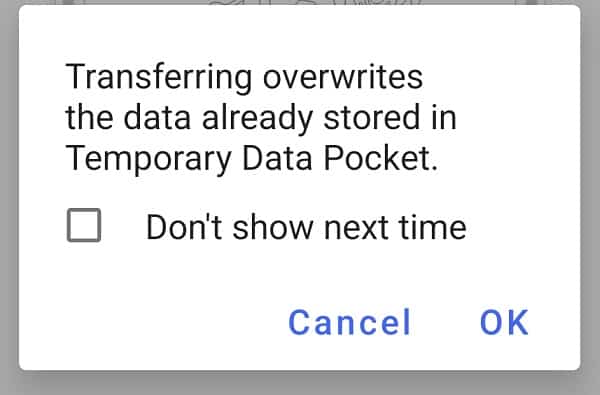
In the right-hand side picture is the Scan N Cut screen after update 1.70. The original icon used for importing designs over WiFi has changed to a cloud and pocket. This is the new icon to import data from either Canvas Workspace or Artspira
The cloud is reasonably obvious however I am not certain of the picture of the pocket. Not that obvious really. Certainly not as obvious as WiFi bars in the original icon. Ah well, once found…easily remembered LOL
UPDATE: pocket picture is solved….
After asking in my Facebook group for members’ thoughts on WHY the icon has a pocket included… John Bloodworth may have the correct reason.
He suggests that “the icon refers to what Brother is calling a data pocket which is essentially where incoming data will be stored until you retrieve it. This icon is now multifunctional as it retrieves data coming from Canvas Workspace and sewing and embroidery machines.”
John’s explanation makes good sense to me as there is a popup message that appears when you Transfer your design that talks about overwriting the Temporary Data Pocket. Thanks John!
As I said before NOT obvious LOL
This is the message that pops up when you go to Transfer your data.
My thoughts?
What are my thoughts on the new app?
Realistically for me, I doubt whether I will find it that useful. It didn’t have anything that I went “oh WOW” about or “I needed this”. I had the most fun with the embroidery side of the app and if I had a compatible sewing machine, I would certainly play with it to see what I could create.
For me, Canvas Workspace (downloaded version) is a fantastic tool for exporting your designs over WiFi to your Scan N Cut. It does a great job of creating, editing, altering lines from Cut to Draw, adding text etc. While it does have its limitations, overall it is feature-rich, especially considering it is free software.
Plus, I also use software like SCAL5 and Affinity Designer etc to create SVG files for designs I need to create in SVG format.
Is it for you? Give it a try!
I hope that you have found this post helpful and still encourages you to have a play with Artspira. Each of us has our own set of circumstances and you may find a great use for it. It may be just the app you need.
Have a play and let me know!
Canvas Workspace courses
Are you keen to get the most out of your Scan N Cut? I have a number of Scan N Cut and Canvas Workspace courses on offer. Check them out!


Like to learn how to use Canvas Workspace? You will find more information here!
Happy creating

Join me on Facebook
Join me in the Scan N Cut – Let’s Create With Sue Facebook group. The group is full of awesome craft friends sharing and caring.
I would love to see you there.
Did you know that this website has heaps of tutorials aimed at helping you along your crafting journey? Please take the time to wander around while you are here.
Feedback to improve the site is ALWAYS welcome and you can contact me at [email protected], I would love to hear from you.


Thanks for sharing, still struggling with the on line version and the download one , I will sign up for the lesson.
Hi Dalsia, you are very welcome. Sorry to hear that you are still struggling to use Canvas Workspace. The downloaded version has many more features and once you get the hang of it, easy to work with. Please use this discount coupon code SPECIAL to gain a $20 discount on enrollment in the course. This will help you along. Here is the link to the course page. https://create-with-sue-academy.teachable.com/purchase?product_id=1829439
Thank you.
Pleased that you have found the post helpful. Sue 🙂