Creating a Special Birthday Card for My Granddaughter
Hello, I’m Sue and today I’m working on something really special—a 9th birthday card for my granddaughter, Matilda. If you love making personalized cards with your Brother ScanNCut, this is a great project to try!
I’ve been designing age birthday cards, and this one is shaped around the number nine, making it extra fun and unique. The best part? You can grab the free SVG file from my resource library and make this card yourself!
Video tutorial for the 9th birthday card with full instructions
If you prefer to watch how to make this birthday card project, check out the video tutorial below.
Designing the Age-Shaped Birthday Card
For this birthday card, I wanted the number 9 to be the main focus, so I shaped the entire design around it. The cut-out elements, like the little hearts and the bold Happy Birthday text, add a lovely decorative touch without making it too complicated to assemble.
I always recommend checking your SVG settings before cutting, especially for detailed designs like this. Check that any Draw areas are imported as a Draw line, and any fold lines in your projects are set to either Dashed or Draw.
Download the Free File and Craft Along
This 9th birthday card is available in my free resource library, so you can make one too! Just head over to the Resource Library to download the SVG file.
Editing the 9th birthday card in Canvas Workspace
To edit the card, I usually import the design into Canvas Workspace first. Canvas Workspace provides you the option to use the “Eye” icon to hide the sections of the design that you are not ready to cut yet.
The design will cut fine if you prefer to import it directly to your machine. Keep in mind that all the pieces of the card will be imported. You can delete the objects that you don’t want to cut first, and when you are ready, import them again and cut them out.
Included in the SVG zipped file is a spare number 9 so that you can put your own spin on the card… perhaps create it for a boy? Check the size of the base card has imported correctly into either the ScanNCut or Canvas Workspace. Next, look for any fold lines that are either Dashed or a Draw line. If you have imported the design into Canvas Workspace, I recommend that you Group the dashed/fold lines to the main card. This will assist you once you have loaded the design into your ScanNCut machine if you need to move it or inadvertently move the shapes. It can be a bit of a pain if you have to re-align the fold line correctly with your base card.
There are ways of creating beautiful fold lines with your ScanNCut if you choose to change the dashed line to a Draw line. You will find a tutorial here on scoring lines. The tutorial demonstrates a couple of tools that could be used with your ScanNCut.
Cutting and Assembling the Card
Once everything is ready, it’s time to send the design to the ScanNCut and watch the magic happen!
Use the Draw feature when creating the card
First up, use the Draw feature to create any written text you have in your design. I used my Universal Pen Holder and the pink Ultra Fine Sharpie. The pink Sharpie matched the colors I chose for my cardstock. The full instructions on “how to use the Universal Pen Holder“ can be found here.
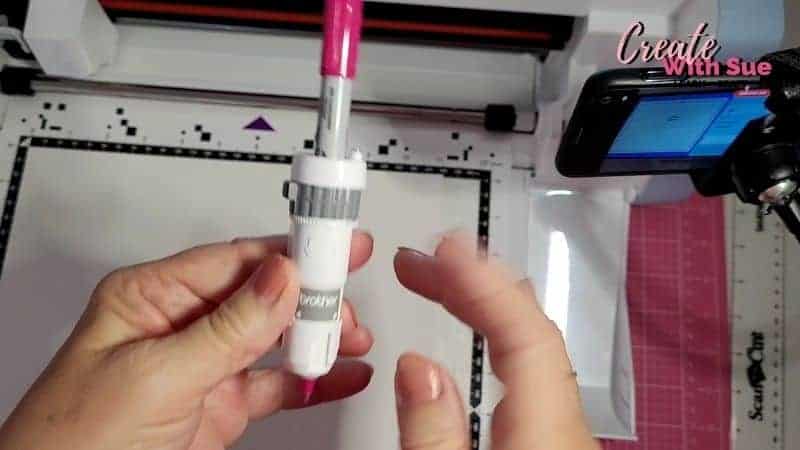
When the Draw items are completed, swap out the Universal Pen Holder for the cutting blade. Either the Black Top Auto blade for the SDX models of the ScanNCut or the blue Standard blade for the CM models.
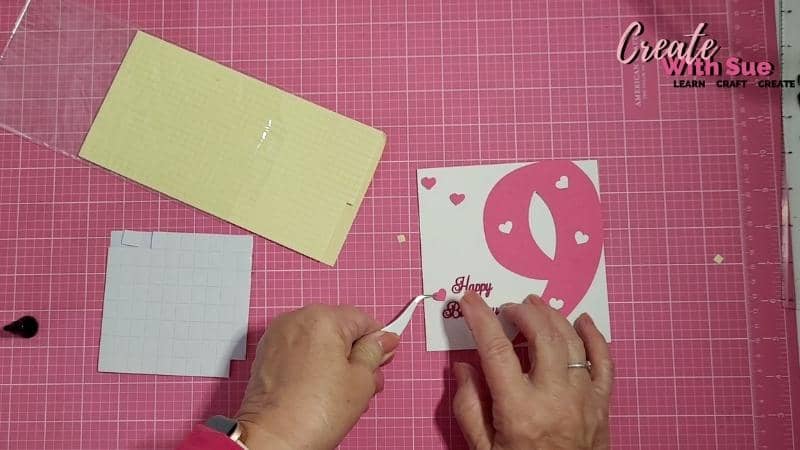
After cutting, carefully remove the pieces and start putting the card together. I love how the design comes to life once everything is in place.
Assembling the card
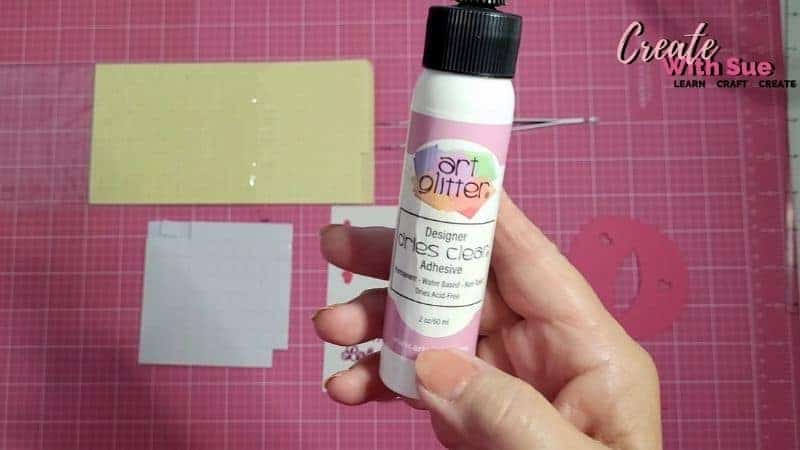
Lay all the pieces you have cut out in the order you plan to glue them. I often place them on the base card before applying the glue. This is a great way to see how the finished card will look. It also ensures I have all the layers and pieces correct.
In this project, I used Art Glitter Glue as I really like how it applies. It has a nice fine tip too. This is great for fine areas of the cutout designs. Keep in mind that it does dry fairly quickly, which doesn’t provide you much time to adjust the cardstock once you have placed the pieces down.
Add dimension to your card
If you want to add an extra special touch, you can use foam tape to give some elements a raised effect or add a bit of shimmer with glitter cardstock. It’s all about making it personal and unique!
I’d love to see your version of this card! If you make one, share a photo in the Create With Sue Facebook group or tag me on social media.

While making these cards, I hit on a bright idea about creating and adding a Money Pocket to my cards. SO, of course, I went about designing some and creating a tutorial.
Here is the tutorial for the Money Pockets. The tutorial will step you through creating your own in Canvas Workspace. Alternatively, you can simply download the Money Pockets that I have created. You will find them in the Resource Library.
Hopefully you have enjoyed this tutorial and it has inspired you to create your version of my 9th Birthday Card.
I’ll see you in the next tutorial!
Happy creating


Would you like to learn all about creating designs in Canvas Workspace? This course is ideal for beginners and intermediate users of Canvas Workspace (downloaded version)