This Easter mandala card is the ideal card for that special person in your life. If you are like me, you LOVE mandalas! This card is such an easy mandala to get you started. I have included the FREE SVG to get you started. You can make the Easter mandala card in any color that you choose plus change up the wording to suit.
Disclaimer: As an Amazon Associate, I earn from qualifying purchases. Links included in this tutorial may be affiliate links, Amazon or others, meaning I may earn a small commission at no additional cost. These commissions will help me continue creating content for you. Thank you for your support! Read my very boring full disclosure policy here.
What do you need to make the mandala card?
- Free SVG Easter mandala card design from the Resource Library
- 1 x sheet of cardstock – I used A4 that is around 220gsm (80lb)
- some different colored card – scrap is fine
- Cutting machine – I used my SDX220D Brother Scan N Cut
- Glue – your favorite. I like the Tombow 52180 MONO Aqua Liquid Glue
Download the FREE Easter mandala card
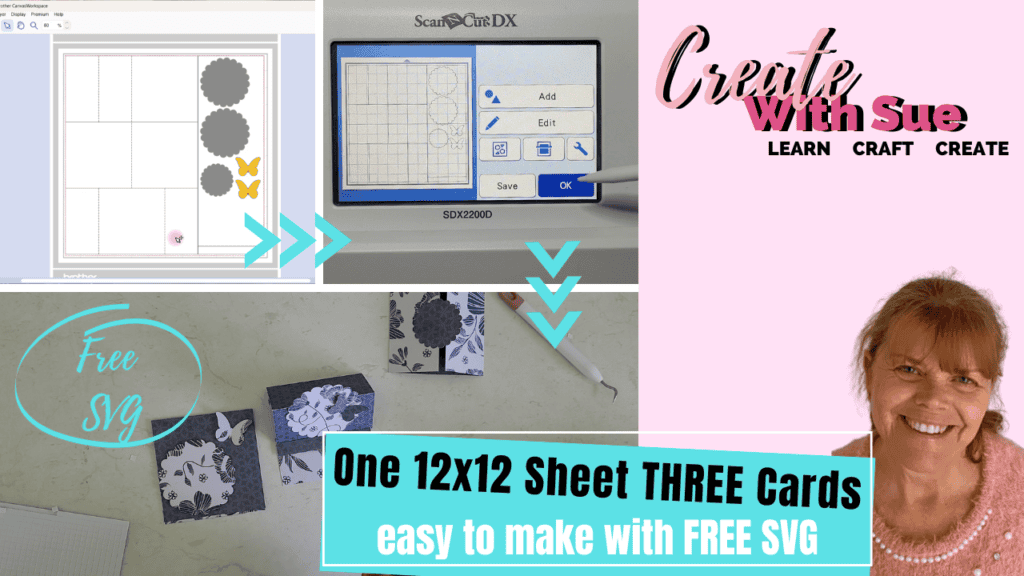
Head over to the Resource Library to download the free SVG file. You will find it in the card section of the Library. The file will be in a zipped format and if you need instructions on how to unzip the file on a PC you will find them here. It is easy to do!
Cut the card out
You can import the SVG file into Canvas Workspace OR upload the Easter design straight into your ScanNCut machine to cut out the card.
The advantage of importing the Easter mandala card into Canvas Workspace is that you can alter the wording if you would like. This can be achieved directly on your Scan N Cut too, just a little more fiddly.
Precision placement of your design
One of my favorite features of the Scan N Cut is being able to scan the cardstock on the mat to precision place the design. This is a great feature to use scrap cardstock! It allows you to place your design in the most strategic locations to maximize the use of various materials, especially if you have previous cutouts to dodge.
TIP: This is fantastic for using cardstock scraps up!

Above is the scanning icon on my SDX2200D Brother ScanNCut cutting machine. This icon will initiate a scan of the mat and show the location of the various materials on your mat for precision placement of the design.
TIP: Use the same thickness (or very similar) materials when cutting multiple colors or different materials. This is true for both the CM and the DX range of Scan N Cut machines. The auto blade on the DX usually only checks the depths just as it starts off. It will check IF it detects something amiss with the cut however do not rely on this.
How to move your design around the workspace
The below picture is showing the cardstock after the mat has been scanned. Compare the picture below with the one above. It is the same design, however, showing where I have placed the various pieces of cardstock.
The design can be grabbed and moved around the workspace to fit the shape of the cardstock.
To move the design or objects on the Scan N Cut workspace tap the object once and it will be highlighted by a red border. Once the border has been activated you are able to grab the design area and move into place.

Removing your design from the mat
Remove the design carefully from the mat. Cardstock will often weed itself as the smaller pieces stay attached to the mat. Poke out any of the remaining unwanted pieces of the cut file. I often use my little scraper that came with my machine to scrape the unwanted pieces from the mat and then give my mat a wipe with an alcohol-free baby wipe.
Sometimes I will grab a little scraper like this one, especially if the unwanted bits do not come off easily.
TIP: If you have any issues lifting the cardstock from your mat, try this tip. Unload your mat from your Scan N Cut machine and flip it over. With the cardstock facing downwards, you can kind of roll the mat upwards and peel the cardstock off.

Putting your Easter mandala card together
Now, this card is very easy to put together.
You should have a base layer of the card with the bottom layer of the mandala egg as part of it. Next, you will have the mandala egg shape in the color of your choice. Lastly, you will have your wording. If you used the words in the SVG file from the Resource Library then it will say “Easter”.
NOTE: Do not fold the card yet. It is much easier to complete the card and fold it when you have finished.
To offset the mandala design or not
You have the option to place the top layer of the mandala egg directly in line with the base card layer OR slightly offset it to show the 2-layer dimension.
In this instance, I chose to do the slightly offset option to add some dimension to the card.
Gluing your card
Using the fine end of the Tombow 52180 MONO Aqua Liquid Glue, add glue in a thin line around as many areas of the egg mandala shape so that it will adhere nicely to the base card. I recommend that you have a bit of a test run before adding the glue, placing the egg shape on the base layer to make sure that you have it the right way around and that everything fits where you want it.
Other recommended glues – Glitter Art Glue comes with a fine tip which is suitable for creating fine glue lines when needed. (Glitter Art glue does not contain glitter). Another one is Bearly Art Glue.
Mandala designs can be layered with double-sided foam tape between each layer to apply even more dimension.
Below is the top layer slightly offset on the white base layer

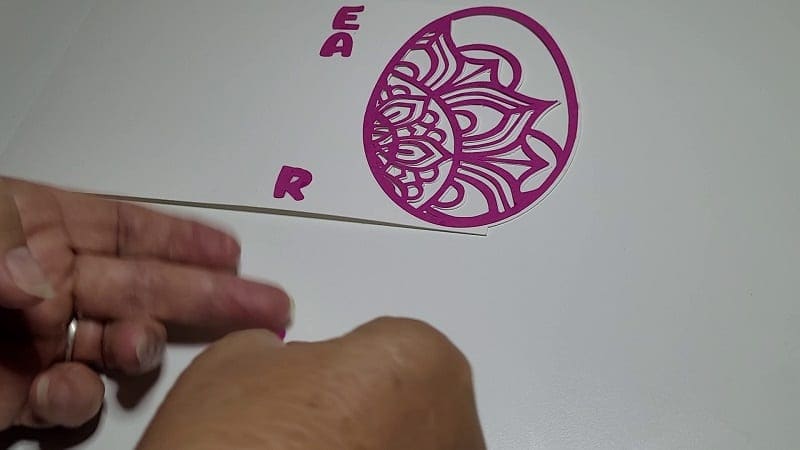
Add your wording. Ensure you work out the spacing so it looks even. You can also use very light transfer tape to keep the lettering placed as they were cut. Check that it will not adhere to the cardstock more than you would like and do damage.to the card.
I guessed mine.
Finishing the Easter mandala card
To finish off my card, I added some double-layered butterflies. I have included the butterflies in the SVG file. For my card, I cut out the base of the butterfly on the same card that I used for the top level of the mandala. Then added a contrasting top layer.
I can picture these cards in all different pastel colors. What colors can you picture them being made in?

On the inside of the card, you could add a colored insert. Writing a verse with your Scan N Cut will add that extra professional touch to it. Single-lined fonts are great for writing. On the SDX2200D and similar models, you will find the alphabet in a single-lined font. I have an entire tutorial on finding a using single-lined fonts. Check it out here.
Like watching on Video?
Join me on Facebook
Join me in the Scan N Cut – Let’s Create With Sue Facebook group. It is a group of awesome craft friends sharing and caring.
I would love to see you there.
Please feel free to ask any questions that you need.
Happy creating