You can create a Heart Tealight with your ScanNCut and Canvas Workspace in easy steps.
If you are wanting to create your own heart tealight, but are not sure where to start, this blog is for you! This heart tealight is one of the easiest to create with your ScanNCut. Plus, I have included an easy-to-follow tutorial and the free template to assist you in recreating this project with your Brother ScanNCut cutting machine. The tutorial will use the downloaded version of Canvas Workspace.
In the tutorial, I will focus on a few tips on how to use Canvas Workspace too.
Let’s get started!
This post may contain some affiliate links for your convenience (which means if you make a purchase after clicking a link I may earn a small commission but it won’t cost you a penny more)! Read my very boring full disclosure policy here.
What You Will Need:
- Brother ScanNCut Machine
- Cardstock – I used pink however I love black too. Choose your favorite color
- 1 sheet of Vellum – could be replaced with baking paper
- Glue
- Tealight candle -battery operated only.
- Free heart tealight template – can be found in the Resource Library
Download the heart tealight template
Head over to the Resource Library and grab the free template. If you do not already have access to the free library don’t worry. Simply go to the bottom of this tutorial and subscribe. An email will be sent with the password to the library straight away.
It is as simple as that!
The heart tealight template will need to be unzipped. If you need help with this step check out this tutorial for help.
Import the tealight SVG into Canvas Workspace
Open the downloaded version of Canvas Workspace.
You can use the online version of Canvas Workspace to create your tealight if you prefer. However, these instructions refer to the downloaded version.
Import the heart tealight SVG so you can create your own version of it easily.
There are a few ways to import SVG files into the downloaded version of Canvas Workspace. One of the easiest ways is to use the SVG icon highlighted below on the left-hand menu. The next is through the top File menu.
NOTE: SVG and FCM files types are IMPORTED into Canvas Workspace (both versions). If you use OPEN you will only be able to access CWPRJ projects. Read more about CWPRJ files here.

Additional heart to embellish your project
Included in the tealight design template is a separate heart. I have left this design object in to enable you to cut extra hearts and embellish the tealight with added colors. I can see it with some beautiful gold paper or perhaps a pretty, delicate print. So many options when you start thinking about how to add that extra oomph to your projects!
The heart will only fit on random matching hearts in the tealight.

Above you can see the parts of the template/pattern. At the top is the main section of the tealight. The next row down is the shapes to cut the Vellum to create the see-through tealight effect and then at the bottom is the extra heart shape that you can choose to use …or not.
The extra heart shape is optional for you to cut additional hearts and embellish your tealight with some pretty hearts that will pop.
Alter the dashed lines on the heart tealight
You have a few choices when creating your own heart tealight. One is what the fold lines look like. In the tealight template, all the fold lines are set as dashed lines.
Changing the dashed line to Draw
If you have a scoring tool or scoreboard, you can alter the dashed lines to a Draw line. This can be done in the Layers Panel by altering the Cut icon and changing it to the Draw icon. The Draw icon looks like a Pen. How handy is that!
Any cut line can be altered to Draw in Canvas Workspace (both versions)
Different Dashed Line
OR, you can change the original dashed lines to a different style of the dashed line. There are a number of choices in Canvas Workspace. Unfortunately, Canvas Workspace stubbornly brings the dashed lines in a default format which is quite fine. Fine does work quite well however it does make the card a little weaker at the fold.
You can change the dashed lines to your preferred choice of dash line in the right-hand menu Properties panel as pictured below.
There are two styles shown in the closeup picture of the heart tealight design. The one on the left is the default dashed line and the one on the right is a wider-gap dashed line from the Canvas Workspace selection.

Grouping the dashed lines first makes it easier
Often the easiest way to change all the dashed lines in a design is to first group the lines. Grouping can be achieved in the Layers panel by selecting each line, hold your Control key (PC)or CMD Key (Mac) down as you select each of the lines, to select multiple. At the bottom left-hand side of the Layers Panel, you will find an icon that will group them. I named my group so they were easy to distinguish. To rename just click on the default name. This will most likely be named “Group“.
You will find moving the objects around in your ScanNCut is much easier when they are grouped.
Using the Eye icon
Use the Eye icon to hide and unhide the various objects in your design. Anything that you have hidden with the eye icon will not be exported to your ScanNCut. This way you can send only the layers of the design that you want to cut in that pass. There are other ways to manage this process too and it will depend on your circumstances which is the easiest for you. I show another way that I use in the video associated with this tutorial. I mainly use this alternate methond when I can’t be bothered walking back to my laptop LOL. Ah well.
As I said, it will depend on your circumstances and what is easier for you.
Test cut and your ScanNCut
Remember to do a test cut when using different materials on your ScanNCut – even on the SDX ScanNCut range
Find the full tutorial on using the test cut here

Putting your tealight together
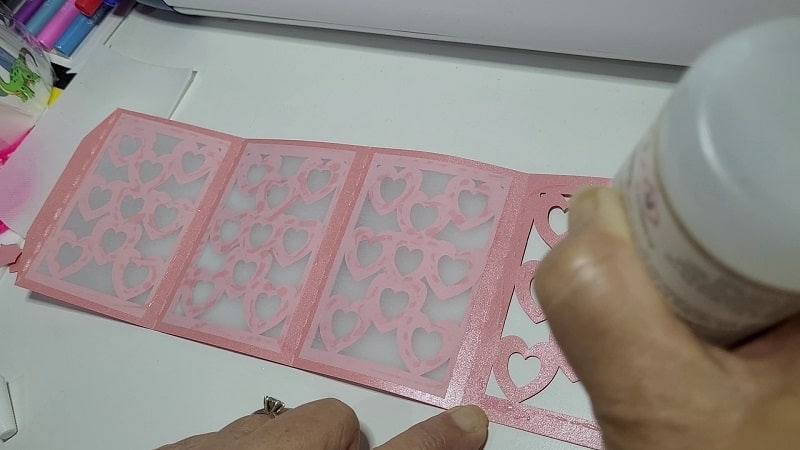
Once you have cut out all the pieces it is time to put the tealight together. This is the EASY part. Stick the Vellum rectangles onto each of the panels.
Now, I folded this tealight first as I was keen to check the fold lines. Normally it is easier to glue the Vellum while the tealight is flat and then fold it.
The last step is to glue the tab onto the other edge of the tealight to form a square shape. Give it a little time to dry and then pop your battery-operated tea candle into the center and Voila…. you have created your tealight.
Create A Heart Tealight Video Tutorial
Spot the difference between dashed lines
I tried to take a picture of the difference between the two dashed lines and, just quietly, I don’t think I did a good job. The best way for you to see the difference is to play with the dashed lines and see which one you like the best and use that one.
Advantage: Larger dashes and gaps – the card stays stronger
Disadvantage: harder to fold nicely
TIP: If you hate dashed lines another alternative is to use your Half Cut so the dashed line does not cut all the way through the cardstock. For the CM models that do not have the Half Cut feature, you can still do this too. Adjust your blade similar to how you would adjust it to cut vinyl.

Comparing the two different dashed lines to see which one you prefer. (hard to see isn’t it, sorry)
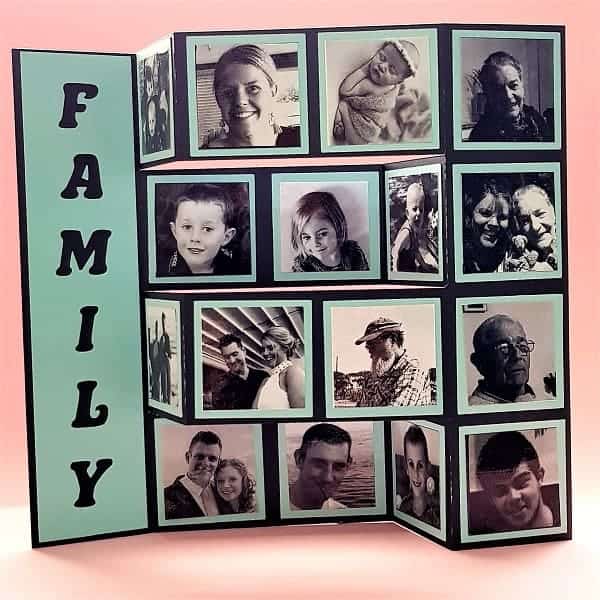
The finished tealight that I created
Creating a heart tealight has never been easier with this simple tutorial and free template! With just a few supplies and your Brother ScanNCut cutting machine, you now have everything you need to make one of these beautiful creations yourself—no special skills or tools are required!
So what are you waiting for? Get crafting today!

Heart tealight with battery-operated candle in the dark
I hope that you enjoy creating this heart tealight as much as I did. I would love to see what you make and you can post any projects that you make in my Facebook group Scan N Cut – Let’s Create With Sue. If you are not a member already you are more than welcome to join. It is full of awesome crafters just like you.
Happy creating.


Like to learn how to use Canvas Workspace? More information can be found here!