Ok, so it is Easter time again. Such a lovely time of year BUT…while the concept of Easter is great, the cost that seems to go with it is NOT! Let us make Easter on a budget fun.
AND there is a FREEBIE included.
Here we go…let’s make an EASTER BUNNY.
Free pattern and tutorial to make your very own Easter bunny which holds an egg for Easter. A great way to have fun with Easter on a budget.
Make sure you grab the FREE pattern.
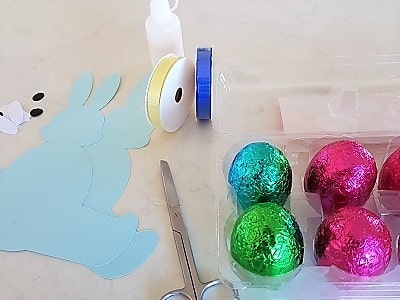
What do we need?
- FREE SVG/FCM File – included. Link is above AND at the bottom of this page.
- Three pieces of card-stock – Contrasting colors and reasonably thick so that it is sturdy. I used 220 gsm of pink with white contrast for ears, eyes, nose and feet with a small amount of black card-stock required for pupils, nose and mouth.
- Some small Easter eggs – The number depends on how many Bunnies you are planning to make. I bought the 1 dozen egg container – enthusiastic you say?? Nah, this is the most economical way to purchase in my area. (If I don’t make the entire dozen then the remaining eggs still make nice handouts to family or friends)
- Glue
- I used an electronic cutting machine however I have included a pdf file in with the download so you can print it and cut it out with scissors if you prefer.
- Narrow Ribbon approximately 20cms.
Easy!
Step 1 – download the template
Download the zip file to your computer and unzip it into a folder. You will find the link to the file at the bottom of these instructions.
Information if you are not sure how to unzip files the instructions for a PC is here.
Step 2 – upload to your cutting machine
Upload the file into your electronic cutting machine.
If you need help with this part let me know and I will create instructions for:
- Canvas Workspace for the Scan N Cut.
- Design Space for the Cricut.
Step 3 – cutting your Easter bunnies out
Place your main color onto your mat to cut the Bunny out. I cut the ears, eyes, nose and feet out of scrap white and black card-stock. On the mat there was room to place these smaller pieces as well as the main color so I cut them out as well.
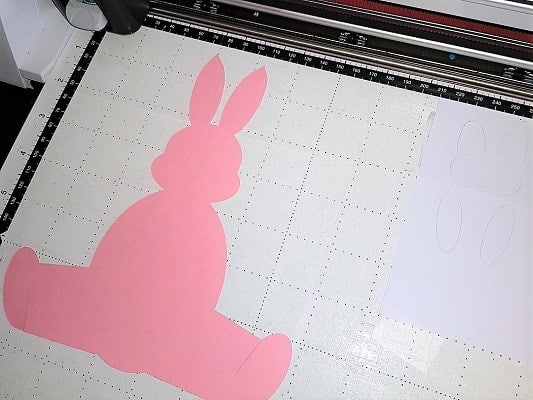
In this pic I have removed the waste card around the bunny so you could see it clearly. I have left the white contrast as it cut out. The Scan N Cut makes it so easy to use all your ‘bits’ of card.
I Love this:- The scanning function on the Scan N Cut is my favorite feature as it enables me to scan my paper and then place the pattern exactly where it fits. This was especially helpful to me for this project as I used a piece of black card-stock that I had mucked up in a previous project. (I had put a score line off-center and totally missed the mark. One of my pet hates is wasting card so I was really pleased to utilize it in this project)
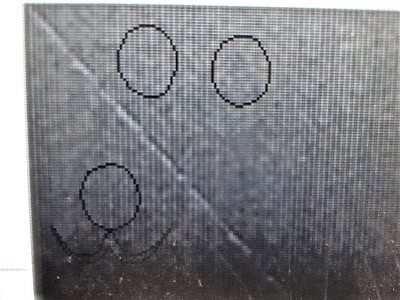
This picture is really hard to see however it is of the black card-stock that instead of throwing away due to mucking it up.
I was able to scan the piece of card and accurately place the eyes and nose which was great, as I was able to miss the score line that was in the card.
Note:- While I used white as the contrast, the design would look great with patterned card-stock for ears and feet. I also did one of the bunnies with goggly eyes. (I have no idea if this is the correct term).
Step 4 – let’s glue
Once all your pieces are cut then it is time to glue! Yay, we are nearly done!
Put a thin layer of glue on the contrasting colors and glue in place. The black pupil part of the eyes are especially fun as you can make up all sorts of expressions for the Bunny’s face. I rather liked the cheeky sideways look.
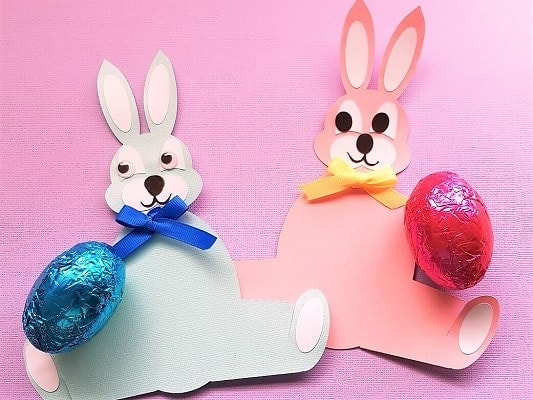
The pink bunny was made with the eyes from the pattern file and the blue bunny with the googly eyes. I think I rather like the pink bunny best still.
What do you think?
Step 5 – make the bow
After making the ribbon bows for my bunnies I then glued them in place.
Tip:- I always need an extra set of hands when making bows. I found that using a fork gives you something to tie to making it much easier. (or if you are lucky you could have a bow making tool.)
The fork idea is a cheap and handy way to do it. You can use either one or two prongs to tie around.


The yellow bow I used one prong of the fork and for the blue bow I used two prongs. One prong worked better for this size bow.
Step 6 – adding the Easter egg
Pull the two feet around to the front of the bunny and slide the top cut into the bottom cut.
THEN pop your egg in and you are done!!
How cool!
Such an easy way to celebrate Easter on a budget. The dozen eggs were so cheap, the bunnies are fun to make AND most of all… the kids love them.


I put the contrast white feet on the front part of the bunny before I hooked the feet together…..they need to go on the back! I am going to cut two more contrasting feet and glue them on the ‘front’ where you can see as I think they will look better there.
This was such a fun project so I hope you had as much fun making this as I did and I am sure whoever you give them to will love them. They would also be great novelties to sell at a craft market if you have the opportunity.
Happy creating.
Sue
If you would like the pattern…..
Click here for the FREE pattern.
P.S. Don’t forget to check out my other posts.
And I would love you to subscribe so that you don’t miss out on the new ones as they are released. (form is at the bottom of the post)

Remember to pop into our Facebook group and say Hi. I would love to see you there.