If you’re looking for something a little different to add to your cardmaking or papercraft projects, then embroidering cardstock is a fabulous technique to try. It adds a lovely tactile quality to your work and creates a beautiful contrast between soft thread and firm paper. Whether you’re making cards, tags, or art pieces, stitching on cardstock is surprisingly easy with just a few adjustments and it opens up lots of creative possibilities.
In this tutorial, I’ll walk you through the basics of machine embroidery on cardstock, plus some fun variations you can try with your ScanNCut or embroidery machine to get even more creative.
Why Stitch on Cardstock?
There’s something really special about combining machine embroidery with papercraft. Stitching onto cardstock gives your projects texture and depth, and it’s a lovely way to showcase embroidery in a new format. It’s perfect for handmade cards, journaling pages, decorative tags, or even framed wall art. You can keep things simple with a stitched border or go all-out with a detailed design.
Embroidery on cardstock combines the tactile beauty of thread with the crisp, clean look of paper. It’s perfect for:
- Handmade greeting cards
- Gift tags
- Scrapbooking embellishments
- Decorative framed pieces
- Journaling accents
The contrast between the delicate stitch and the firmness of cardstock makes each project stand out.
What You’ll Need
To embroider on cardstock, you don’t need anything too out of the ordinary. Medium-weight cardstock around 200 to 250gsm works well, and a sharp needle—something like a size 75/11 is ideal for piercing the paper cleanly without tearing it. You can use a sticky or tear-away stabilizer behind the cardstock to support the stitches as they’re being sewn.
It’s a good idea to float the cardstock on top of your hoop rather than hooping it directly, which helps prevent creases. Painter’s tape or low-tack washi tape is handy to hold it in place. As for designs, I recommend choosing lighter ones things like redwork, outline designs, or light fill stitching as dense embroidery can cause the cardstock to rip.
To get started with cardstock embroidery, gather the following:
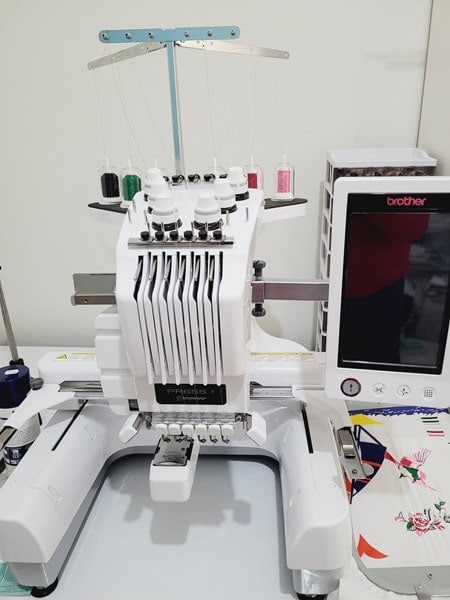
- Embroidery machine (I have a Brother M370 & PR655) OR you can hand sew the design
- Lightweight or medium-weight cardstock (200–250gsm is ideal)
- Sharp embroidery needle (size 75/11) – keep in mind that cardstock will dull needles very quickly. I recommend using an older needle or keeping a set for cardstock only. A bit like you keep scissors for fabric cutting only.
- Embroidery thread – any type depending on your project
- Stabilizer (preferably tear-away or sticky stabilizer)
- Embroidery design (outline, redwork, or light-fill designs work best)
- Optional: ScanNCut or cutting machine for pre-cutting shapes or hole punching

Choosing the Right Embroidery Design
Not all embroidery designs are suitable for paper. Look for:
- Outline-only or light fill designs
- Redwork or line art style patterns
- Applique – blanket stitch instead of satin stitch
- Avoid dense stitching or heavy fill designs – these can tear the cardstock
Tips for Machine Embroidery on Cardstock
There are a few simple things you can do to help your embroidery stitch cleanly on cardstock. First, slow down your machine. This gives the needle more control and reduces the risk of the paper tearing. Make sure you’re using a fresh, sharp needle, and keep an eye on your thread tension. You’ll want to avoid any thread loops or pulls that could damage the cardstock.
Also, try to steer clear of backstitching or high-speed trims—those can be a bit harsh on the paper surface.
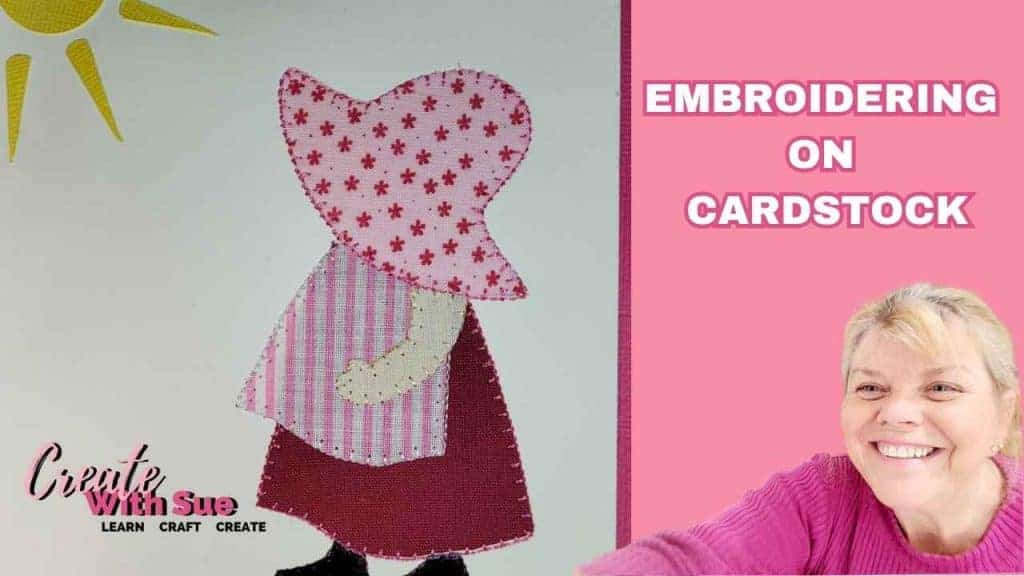
Adding Fabric Appliqué with a Blanket Stitch
One of my favourite variations is using fabric appliqué on cardstock. This adds another layer of texture and opens up so many design possibilities.
You can cut the fabric pieces with your ScanNCut, apply them to the cardstock using something like Heat n Bond Lite OR Brother Applique Iron On (I like this one), and then stitch around them using a machine blanket stitch. It works beautifully for focal points on cards or even bookmarks. Just make sure you’re using a light enough design that won’t overpower the cardstock.

Using the ScanNCut to Punch Embroidery Holes
Now this is a fun one! You can actually design embroidery patterns in Canvas Workspace and have your ScanNCut punch tiny holes along the stitch path. Then you can hand sew through those holes with thicker thread or yarn. It’s a great technique for bolder, graphic designs or even for simple shapes like hearts, stars, flowers or lettering. Because you control the hole size and spacing, it’s perfect for heavier threads that wouldn’t work with standard needle piercing.
Use your ScanNCut to punch small holes in a shape or pattern:
- Create your embroidery path in Canvas Workspace
- Use the circle shape to create the holes for your machine to cut. Adjust the size of the first hole to suit your thread and then duplicate as needed. If you have the Rhinestone kit for Canvas Workspace or have Sure Cuts A Lot (SCAL) you can convert an existing design easily for this project.
NOTE: Brother is no longer distributing the Rhinestone kit which is really disappointing. You may be lucky to find old stock in your area. - Cut your design out
- Hand stitch through the holes with thicker embroidery threads or yarn
Ideal for bold stitched designs, thicker threads, large-scale pieces, or even kids’ crafts.
Drawing Designs with the ScanNCut for Hand Stitching
If you don’t want to use your embroidery machine or you’re working on a more handmade project you can actually use your ScanNCut to draw the design first, then stitch it by hand. The draw tool works really well for sketching out stitch paths, and you can even pre-punch the holes before stitching if you like.
This is a lovely option if you want to sit down with some thread and a needle and just enjoy the process. Metallic threads or embroidery floss both look beautiful, and you can customise the design however you like.
- Create your embroidery path in Canvas Workspace
- Use the draw tool to mark hole positions or depending on the finish that you would like, you can draw the entire design.
- This method is great for hand sewing onto fabric and then adding to the card or directly onto card for very light weight embroidery designs. Optional to add holes for some areas of embroidery.
- Hand stitch with thicker embroidery threads or yarn
Embroidering on Fabric and Insetting into a Card
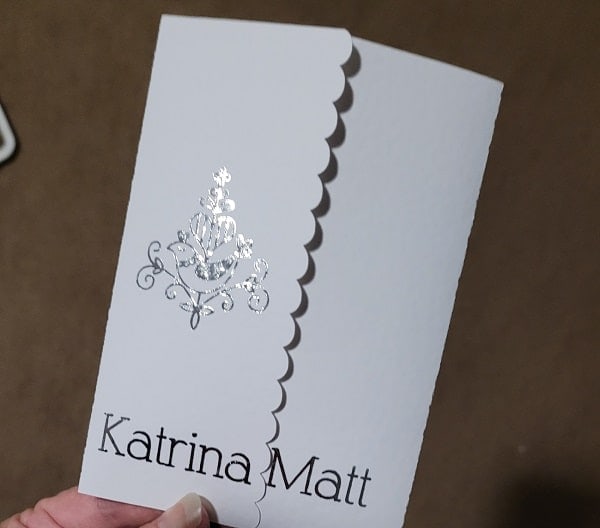
Another approach is to embroider your design on fabric first, and then inset that into a cardstock frame or cut-out. This works so well for more detailed designs that might be too dense to stitch directly onto paper. Once your embroidery is finished, simply cut a window into your card using your ScanNCut, and layer the fabric behind it. It looks really professional, and you still get the feel of embroidery on a handmade card without compromising the paper.
This is a beautiful and professional-looking option:
- Embroider your design on fabric (like linen or calico)
- Cut a window front section in your cardstock to place over your embroidered design using your ScanNCut
- Inset the embroidery into the front of the card using double-sided tape or glue
- Place the window front over the top. It will look like a beautiful picture.
This technique gives a layered, dimensional look while protecting your embroidery behind the card front.
A Great Kids Sewing Project
Looking for a kid-friendly way to explore embroidery? I created a fun sewing project for kids that uses the ScanNCut to punch holes in cardstock so children can practice hand stitching!
The machine cuts out shapes and punches holes so that children can sew through them with a plastic needle and coloured threads. It’s such a great way to introduce sewing in a safe and engaging way, and you can customise the shapes to suit any occasion or age group. I’ve put together a full tutorial for this project, which you can find here:
Read the full tutorial here:
Create a Kids Sewing Kit with Your Cutting Machine


Kids sewing project with larger hole to support a plastic sewing needle that is safe for children to learn to sew with and wool thread. This project used Eva craft foam however easily could have been cut from card.
This activity is perfect for:
- Introducing kids to hand sewing
- Developing fine motor skills
- Rainy day or school holiday crafts
- Birthday parties or creative kits
You can customise the shapes and thread colours to match any theme!
Finishing Your Embroidered Cardstock Projects
Once you’ve finished your stitching, gently remove the stabilizer from the back. I actually left the stabiliser on the backing and covered it with a piece of card.
If the cardstock has warped slightly, you can place it under a heavy book overnight to flatten it out. I often use double-sided tape or foam adhesive to attach it to a card blank or backing layer. I also like Art Glitter glue for my craft projects. Try to avoid very wet glue, as it can soak into the paper and cause wrinkling.
Mounting your finished piece onto a second piece of cardstock also helps hide the back of the stitching and gives your project a more polished, layered look.
Give It a Try!
Embroidery on cardstock is a fun and creative way to use your embroidery machine (or your hands!) in a whole new way. From stitched appliqués and hand-sewn designs to ScanNCut punched patterns, the options are endless. It’s a brilliant technique for cards, scrapbooking, and even framed artwork and once you start experimenting, you’ll find all sorts of new ways to use it.
If you do give it a try, I’d love to see what you create! Share your projects in the Create With Sue Facebook group and inspire others with your creativity.
Join me on Facebook
Join me in the Scan N Cut – Let’s Create With Sue Facebook group. It is a group of awesome craft friends sharing and caring.
I would love to see you there.
Happy creating