
Creating curved text in Canvas Workspace has been updated by Brother for the downloaded version and it is a GAME CHANGER!. Very exciting… I think it is even easier than if you did it in Inkscape. That makes it an even bigger game-changer.
I have left the previous instructions below as there may be an opportunity for you to need them… especially if you are using the online version. The video is of the downloaded version but it is a very similar technique.
Video tutorial of Canvas Workspace – create curved text
Creating curved text in the latest version of Canvas Workspace (downloaded) uses the new Fit to Path function and it is FUN! Watch and see!
Super fun isn’t it!
Video tutorial creating curved text manually
While it is possibly an option to create curved text on your Scan N Cut machine, it is much easier to create it in Canvas Workspace.
Below is a video showing a manual method of creating curved text in the downloaded version of Canvas Workspace. You can create it in the online version of Canvas Workspace as well…so don’t feel like you have missed out if you are working online.
The new Fit to Path method that has been included in Canvas Workspace 3.2.1 is much quicker however you may still find a use for the manual way.
Instructions step by step
Here are step by step instructions on how to create curved text manually. With the new Fit to Path function in Canvas Workspace, there would only be limited reasons why you may do it this way however I have left it available to you so that you can make up your own mind.
Step 1 – open Canvas Workspace
Open Canvas Workspace and then place a circle about the size of the arch you want. This could be a circle or oval, basically, it is used as a template. Stretch it to suit the shape arch that you are after.
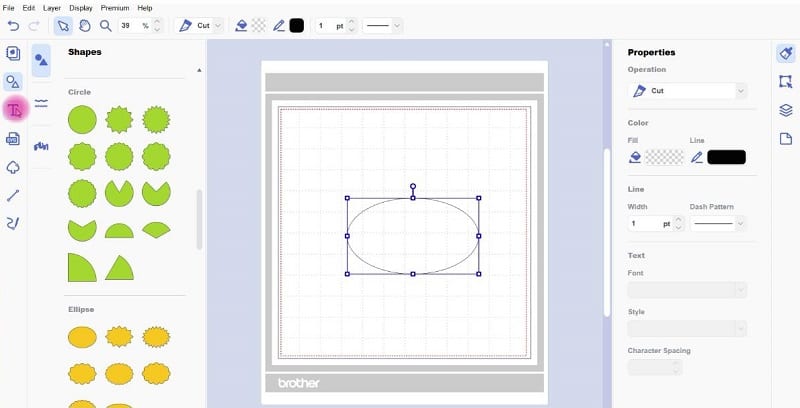
Step 2 – add text
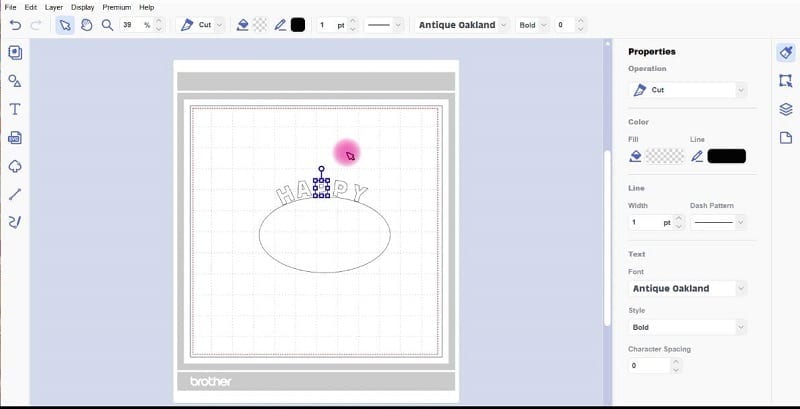
Next, add single letters and place them around the outside of the circle. You can place them on the mat singularly or as one word. If you place them as one word you may need to use the divide function to separate the letter to enable them to arch nicely. This would depend on the length of the word and the shape of the arch.
Step 3 – rotate the angle
Rotate each letter to suit the angle. You may need to move them around and even them out so that they sit nicely around the arch.
Remember, you can also use the alignment tools to distribute the letters evenly. Once you are happy with how it looks, delete the circle.
This is the view showing how to create curved text in Canvas Workspace. All the letters are now flowing nicely around the oval shape.
Finish your project
Once you have curved the letters around the arch you can group them together to make them easier to manage or use the weld function. If you would like them to cut out in once piece, ensure that each letter just slightly overlaps the letter next to it. Once completed you then weld all the letters together.
What else would you like to see?
I hope that you enjoyed “How to create curved text in Canvas Workspace” and found it useful. If you have any topics that you would like covered let me know.
While you are here don’t forget to check out the rest of the site as there are heaps of helpful pages.
Happy creating,

More tutorials for you here
- BIG Changes for ScanNCut Owners – You Need to Know This!
- Exploring the New Affinity Designer V3 — My First Impressions
- Cutting Cardstock: Tips for Better Results
- Rejuvenate Old Jeans with HTV and Your ScanNCut
- Embroidering Cardstock: A Creative Twist for Your Craft Projects
Join Me
Don’t forget to pop in and visit me in my Facebook group Scan N Cut ~ Let’s Create With Sue.
AND like my Facebook page Create With Sue

Would you like to get more out of your Scan N Cut?
Have you used your scan feature on your Scan N Cut?
What about where to look to set up wifi or calibration.
(Limited time only)
Are you just starting out or perhaps a little intimidated by your Scan N Cut? This course is for you!
This video course is a step-by-step introduction to using your Scan N Cut. It has been designed especially for YOU!
The course will show you how to use your Scan N Cut machine from the very start with minimal fuss and bother. This will allow you to create beautiful, cuttable designs.
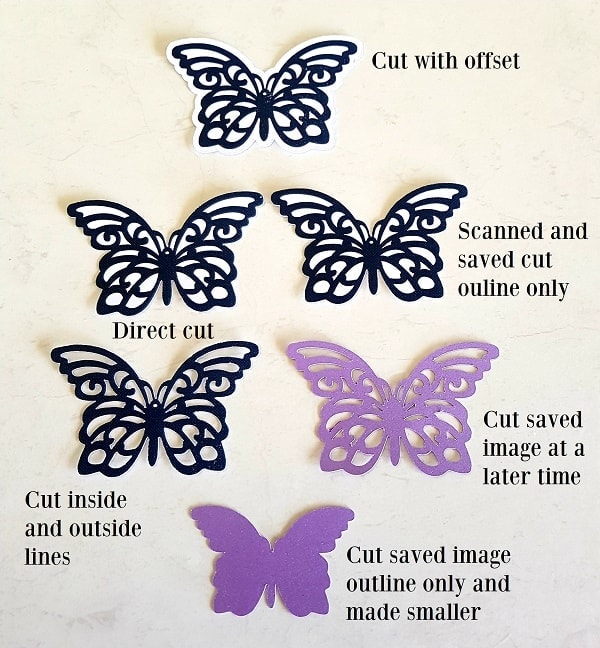
The butterflies above were cut from a free image that I downloaded from Pixabay.com. This image was printed out and then scanned and cut out, another option would be to use your stamps.
You can see the variations available to you using the Scan feature of your Scan N Cut.
The scanning feature is what makes this cutting machine unique!

Like it! Pin it!
#This post is a tutorial on how to create curved text in Canvas Workspace


Great information and so easy to follow. Thanks for sharing and for all your effort.
Glad that you have found it helpful, thank you 🙂
This has opened up a whole new idea for me. I knew I could do this in Word to print a curved word, but never thought I could do this in Canvas. Thank you !
Hi Audrey, so pleased to hear that! Enjoy.