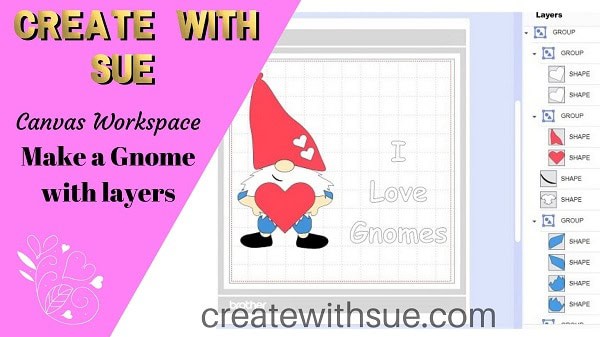
Have you thought about making a Gnome with Heat Transfer Vinyl? Gnomes are SO cute!
This post takes you through ALL the steps of finding and downloading the file and unzipping it. Then on to uploading it into Canvas Workspace and how to use the Layers Panel and finally making your Gnome with Heat Transfer Vinyl (HTV)
Disclaimer: As an Amazon Associate, I earn from qualifying purchases. Links included in this tutorial may be affiliate links, Amazon or others, meaning I may earn a small commission at no additional cost. These commissions will help me continue creating content for you. Thank you for your support! Read my very boring full disclosure policy here.
What materials do you need?
- Heat Transfer Vinyl
- Cutting Machine – I used my Scan N Cut, you could use a Cricut
- T-shirt or maybe a Tote Bag to place your Gnome onto
- Weeding tool, you can use your nails if you need to
- An iron or heat press
- The FREE Gnome SVG file created by Maggie Rose Designs – located in the Resource Library
Video tutorial for Canvas Workspace and Layers
Cutting your Heat Transfer Vinyl
First step – cutting the vinyl
Send each layer to your cutting machine and cut it out. Make sure the shiny side of your Heat Transfer Vinyl is mat side down.
Remember to mirror your HTV.
Set your blade to only ‘kiss cut’ the HTV or on the DX models a half-cut.
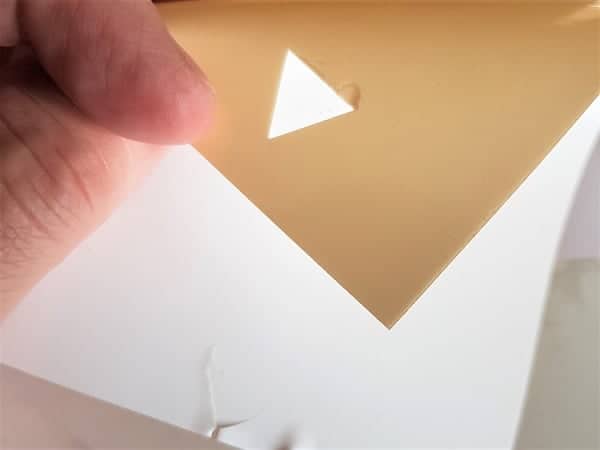
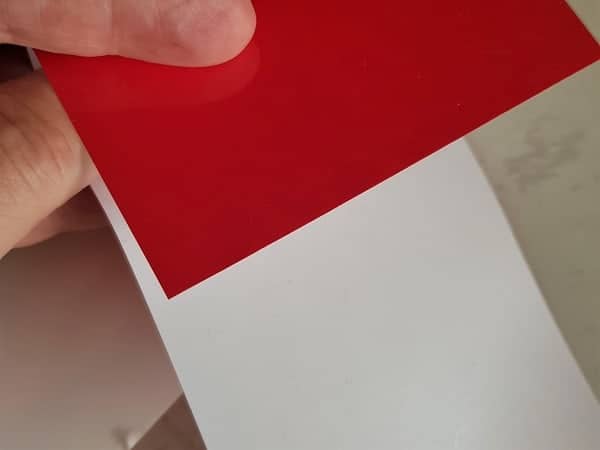
The beige vinyl has the shiny side as the beige side which makes it really quite easy to distinguish which side to place on the mat. You can also see the test cut it did prior to sending it through to the Scan N Cut.
I also tested the depth of the cut after cutting, PRIOR to unloading the mat from the machine. This is a little harder to do with HTV however if the blade hasn’t cut through the vinyl properly then you still have an opportunity to send it through the cutter again.
I only did these checks on the first piece of vinyl that I cut as the settings and vinyl thickness were the same for the following pieces.
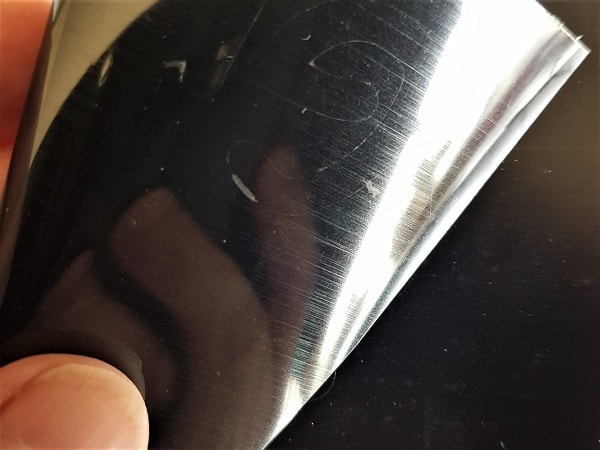
The black is still fairly easy to work out which side is the shiny side however the white Heat Transfer Vinyl is starting to be harder to tell. This does vary between brands.
For more information on working with vinyl check out my post beginner’s guide to working with vinyl for a complete run down.
Weed the Heat Transfer Vinyl
The next step is to weed all the unwanted pieces of Heat Transfer Vinyl away from the cut shapes for the Gnome. HTV is usually fairly easy to weed BUT can be hard to get started. Once you grab a corner and separate the shiny backing (built-in transfer sheet) from the vinyl you are off and running.
Weeding tools will help you, especially for more intricate designs. I have two favorites, the first one is the Cricut weeding tool. I noticed this set had a fine pointer as well. Very handy. Similar tools are available in other brands which should work equally as well as the popular branded one.
The next is one I waited a while to purchase (wish that I hadn’t lol) It is a pen tool also known as air pen..The pen tool is really handy for finer areas that need weeding. Occasionally the Cricut tools point is too thick to do a good job. Mine, the glitter is quite rough on the outside of the pen. This may be a little uncomfortable for some crafters although it does not worry me at all. I like that it does not look like a normal pen NO ONE steals it to use to write with LOL.
If you need a bit more information on weeding, check out this post
Sorting out the different layers of your Gnome
Now that you have all your Gnome pieces weeded you need to think about how they will layer. This little Gnome is holding a gorgeous heart so his hands need to be on top of the heart actually holding it when the design is completed. Of course, there are also obvious pieces like the hearts on the hat and the mouth.
You can have a practice run on your T-shirt by layering the weeded vinyl pieces on top of each other to see how they will look. Most HTV has a see-through carrier making the Heat Transfer Vinyl much friendlier to work with than adhesive vinyl in this stage.
Obviously do not apply heat while you are sorting the order of the design.
Iron the Gnome Heat Transfer Vinyl design onto the t-shirt
We are organized!! You have all the pieces weeded and sorted into the correct order. It is now time to place the pieces on your t-shirt starting with the hat.
I cut the heart out in the same layer as the hat however when I went to place the layers I realized that they needed to be ironed on separately so I simply cut the backing sheet into two so that they were separated pieces.
Check the heat and time settings recommended for the HTV that you have purchased. If you have no instructions (like my HTV) then start with about 15 seconds and then check. You can always place the iron or heat press on again for a few more seconds if required.
I used a Teflon heat protection sheet to protect your vinyl design from the additional heat, however, you could use baking paper or even a smooth tea towel if you don’t have anything else.
Make sure your iron or heat press does NOT come in contact with the actual vinyl as it will stick to your heating device and wreck your project.
Video tutorial making the Gnome with Heat Transfer Vinyl
I do hope that you have enjoyed this tutorial.
Until next time,
Happy creating


Join me on Facebook
Join me in the Scan N Cut – Let’s Create With Sue Facebook group. It is a group of awesome craft friends sharing and caring.
I would love to see you there.
OR say hello at [email protected] I would love to hear from you!
Would you like to learn the Scan N Cut Basics?
I have a free course on offer to assist you to learn some of the basic features of your Scan N Cut.
LIKE IT – PIN IT!


He’ll Sue can you do video on engraving please thankyou Debra
Hi Debra, took me a while but here it is. 🙂 https://www.createwithsue.com/zoom-engraving-tool/
This was really helpful. You are great.
Thank you so much Anabella 🙂
/sue,
I was so excited to be able to do the Valentine Gnomes with HTV. Howveer, I cant figure out how to download the svg file from Maggie’s Deigns. I have tried and so has my husband. Please tell me how to do it,
Hi Janet, I have been in touch with Maggie and she has kindly shared her lovely file with me. I have emailed it to you and will update the tutorial as soon as I get a chance. Enjoy making the Gnome. Sue x