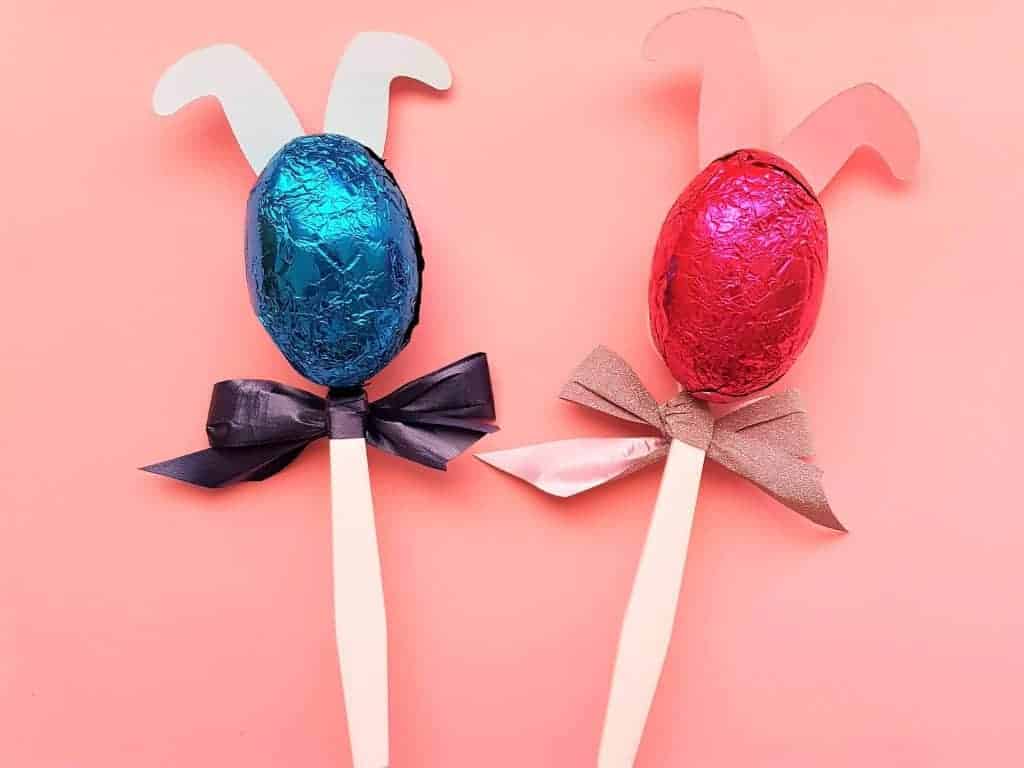
Are you looking for an easy Easter idea that is kid friendly? These Easter Bunnies are such a quick and easy Easter idea and the kids will love them.
AND I have included the FREE pattern for you in my Resource Library.
Disclaimer: As an Amazon Associate, I earn from qualifying purchases. Links included in this tutorial may be affiliate links, Amazon or others, meaning I may earn a small commission at no additional cost. These commissions will help me continue creating content for you. Thank you for your support! Read my very boring full disclosure policy here.
What do you need?
- Coloured card-stock ~ I used scrap
- Large plastic spoons ~ I used white to create contrast.
- Black vinyl ~ (yep scrap again) or black sharpie marker.
- Colored vinyl ~ needs to show up against spoons.
- Ribbon to make some bows.
- Tacky glue, and one of my favorite glues as it has two tip sizes Tombow Glue and then there is double-sided tape.
- A way to cut it out ~ I used my Scan N Cut but a Cricut or any electronic cutting machine or even scissors will be fine.
- Template ~ you can use mine from my Free library (get password below) Files are in fcm, svg, and pdf format.
Step 1 – upload the free Easter template
Upload the free template to your cutter. In this project, I used a lot of scraps that I had. I hate wasting the bits and pieces leftover from other projects so I was super excited to be able to use them.
There are some great techniques t to use up scraps using the power of your Scan N Cut. The scan function makes it super easy to place your files EXACTLY where you want them to make the most of your leftover craft materials.
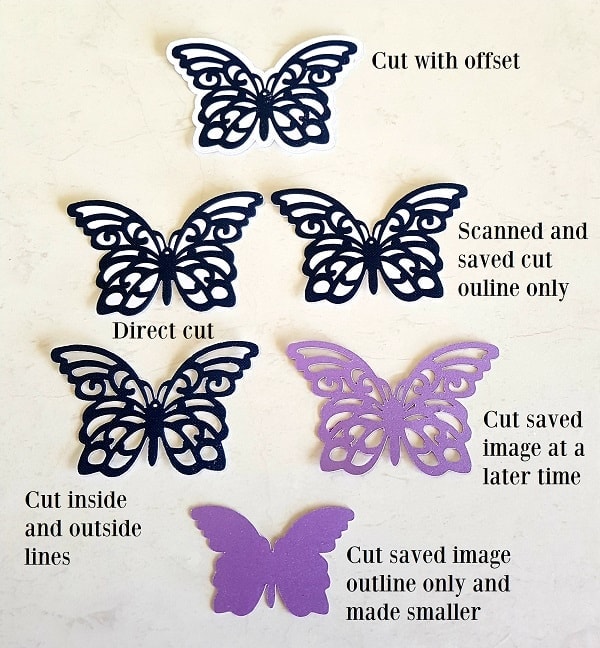
Scan your card-stock to make it easy to place the file. I cut the eyes and nose out first. When using vinyl remember to set your machine so that it only does a kiss cut / half cut (more info here).
Don’t forget to do a test cut!
Every machine is a little different meaning it will depend on how your blade is set in its holder and how worn the blade is. I only change my pressure if I encounter and issue so adjustment of the blade depth is all that should be required.
Tip: If you are unsure, start with a low number for your blade setting and increase 1 number increment at a time. You can use the same test file and just move it slightly so that it cuts in a different location. (I normally use the triangle)
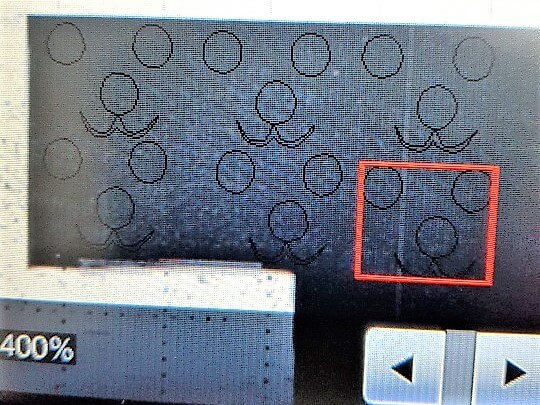
The zoom function is fantastic. Choice of 200% or 400%. This is the close up at 400% and you can see how close each of your images are and then adjust as necessary.
Note: Each pair of eyes and nose are grouped to make it easier to move around as a block.
Step 2 – duplicating with your Scan N Cut
Once you have cut out the eyes in black then place your next color vinyl onto your mat and cut it out. I was making 6 of these bunnies so I duplicated the pattern in the Scan N Cut settings. You may have already noticed that with the black pic. See pic 2 for the setting view.
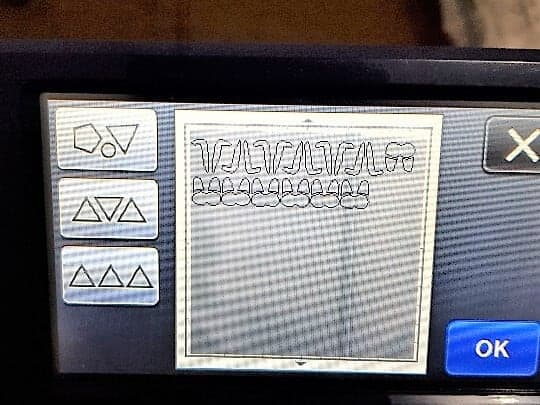
The GREAT thing here is that you have the ability to automatically place images so that they fit to maximize the use of your material.
The icons on the right provide options to do this. I used the three triangle one that has the red arrow pointing at it.
Note: You can see that the machine has automatically placed the pieces with some upside down to get the best fit. Check to make sure that your files are still within the area where your material is placed. I had to move my files down slightly so they still cut out of the vinyl as I hadn’t placed it right to the top of my mat.

Step 3 – cut the Easter bunny ears from cardstock
Next for the ears in colored card-stock. In the above photo, you can see that I used scrap card-stock. I scanned it in so it was easy to place the file where I needed it and then I duplicated the ears so that I had 6 pairs. I wanted 2 pairs of pink and 4 pair of blue. (yes, you guessed who I am giving them to, 2 girls and 4 boys LOL )
OK, let’s cut the ears out.
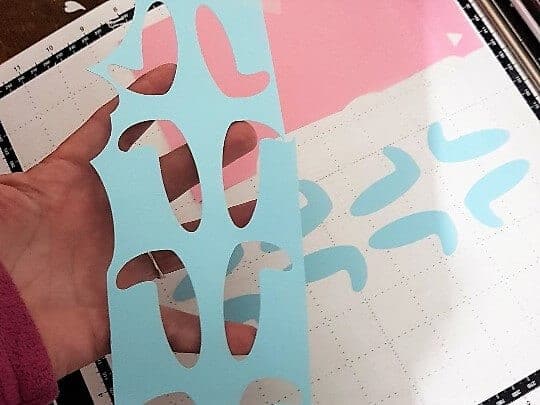
Because I used two pieces of different cardstock the auto-placement function on the Scan N Cut was NOT as useful. However, I only had to turn one pair of ears upside down and manipulate slightly so that I could fit them into the scrap piece of blue.
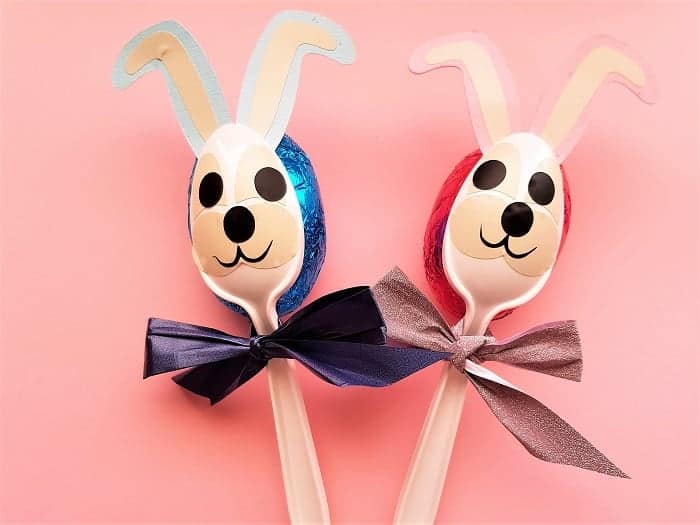
Step 4 – putting your easy Easter idea together
Ok…. we are ready to put these bunnies together.
I found the easiest way to put the Easter bunnies together was to put the light-colored faces on first. First up I had a go at using transfer tape (cause this is what I am used to doing) But NO.... absolutely so much easier just to pick the vinyl off it’s backing and place it on the backside of the spoon with your fingers.
Next, place your black eyes into place. I had great fun putting the eyes in different positions to create a new expression on each bunny.
After the face has been completed, it is time to put the double-sided sticking tape on the spoon’s inside so that the ears will stick. To save time I put the tape on for both the ears and the egg but left the backing on until I was ready to remove it.
Place the ears together and then stick them on.
Note: I usually use Methylated Spirits to clean the area I am going to place vinyl to make sure there is no greasy residue. Most people recommend Isopropyl Alcohol however that is not readily available where I live. The alcohol may be the best option if you have it. DON’T use Mineral Turpentine as that does NOT work.
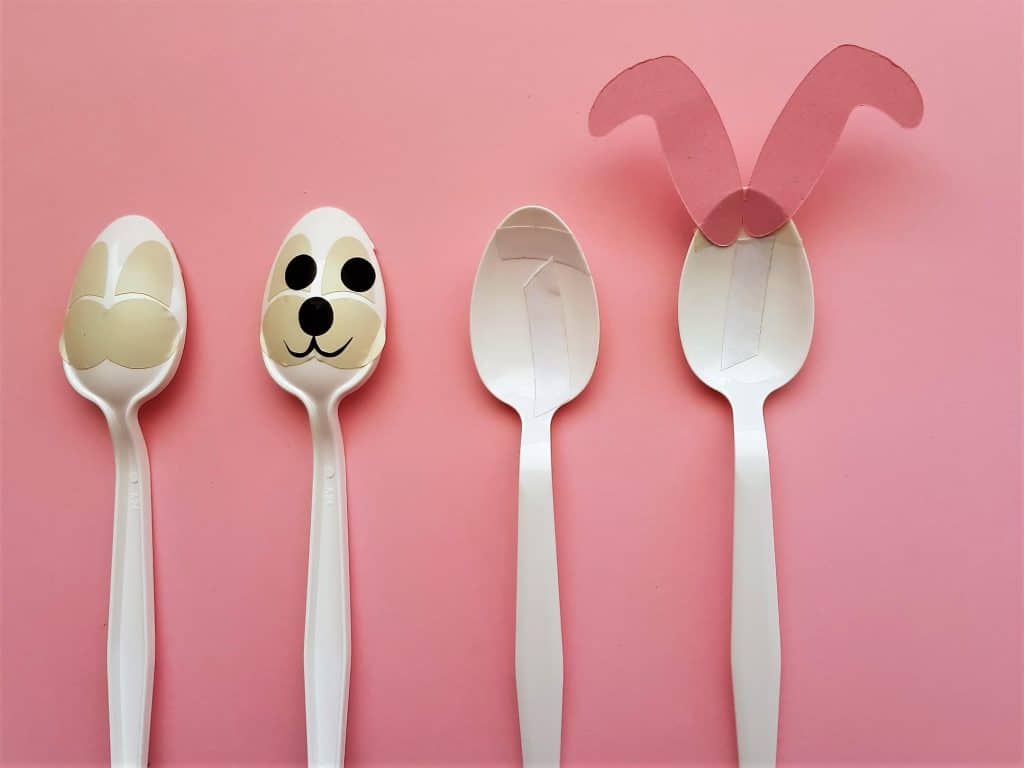
Above you can see the order I found the easiest to manage.
Add the bow THEN the egg…… too hard the other way around.
Wasn’t that fun
And we have finished the Easter bunnies! Aren’t they cute! The kids will love them.
Don’t look too hard at my bows…. bows apparently are not my strength LOL and the bow material I used was a papery type which I found a little difficult to get perfect. Perhaps I need to rummage through my stuff and find a material ribbon for the others.
Hope you have enjoyed this project and picked up some handy tips.
Happy creating,

If you would like the pattern…..
Click here for the FREE pattern.
Another easy Easter idea that you will love

Check out some of my other posts for more creations and tips.
- BIG Changes for ScanNCut Owners – You Need to Know This!
- Exploring the New Affinity Designer V3 — My First Impressions
- Cutting Cardstock: Tips for Better Results
- Rejuvenate Old Jeans with HTV and Your ScanNCut
- Embroidering Cardstock: A Creative Twist for Your Craft Projects
And I would love you to subscribe so that you don’t miss out on the new ones as they are released.

Join me on facebook
Join me in the Scan N Cut – Let’s Create With Sue Facebook group.
I would love to see you there.
Scan N Cut Basics Course
Would you like to learn how to use your Scan N Cut to gain the most from it?
A free course is available for you – check out what is on offer!
If you don’t already have the password to my Resource Library enter your details below and I will send it to you. Any issues send me an email at [email protected]