This post walks you through how to weed vinyl. The tutorial covers what is weeding, cutting tips and then how to weed and transfer your design to your project.
What is weeding?
What is weeding you ask? If you ask the neighbor in the street they might say “it is when you pull weeds out of the garden”. BUT….if you ask a crafter they will tell a totally different answer. You will hear them say it is when you remove the unwanted pieces of a design, potentially done in vinyl, after it has been cut out.
Unwanted pieces..HUH???
‘Weeding’ means to remove any of the vinyl that you don’t want!
I am mainly going to focus on weeding adhesive vinyl in this post. The other type of vinyl is Heat Transfer Vinyl and you can read more about what vinyl to use and where you can purchase it in the post Beginners Guide To Working With Vinyl.
This post may contain some affiliate links for your convenience (which means if you make a purchase after clicking a link I will earn a small commission but it won’t cost you a penny more)! Read my full disclosure policy.
Using a Scan N Cut, Cricut or Silhouette
There are designs created using an electronic cutting machine like a Brother Scan N Cut, Cricut (pronounced cricket) or maybe a Cameo Silhouette you can Kiss-cut (a what!!!! I will come back to it) a design onto vinyl and then transfer it to various items to make them special. Believe me, they can make some unbelievably gorgeous craft projects.
Positive or negative weeding
There are a couple of ways to weed. The first is removing (weed) either all of the outside pieces of your design. You might do it this way for a vinyl sign or writing.
The second way is to weed the inside of the design. A mandala or stencil could be weeded in this manner. It is often just personal preference as to which way you think the design looks better. These techniques are often referred to as weeding either the positive or negative space or reverse weeding vinyl. It depends on who you are talking to.
These techniques with Vinyl provide so many opportunities to create all sorts of projects from fabulous designer shirts and fabric type projects using Heat Transfer Vinyl (HTV).
Projects are also created using what is commonly referred to simply as Vinyl, which usually refers to adhesive vinyl. Adhesive vinyl can go on glass, metal, wood, a variety of plastics…. pretty much any hard surface you fancy creating something special out of.
I have put it on my car, made wooden signs, mugs, glasses, a lovely picture on the front of my laptop. You get the idea.
What is a “Kiss-cut”
Now let us step back a notch. Kiss-cut – I know you are still waiting with baited breathe to know what THAT means. Well, it is pretty simple really, it just means that the cutting machine only cuts through the first portion of the Vinyl leaving the backing uncut.
This allows you to keep your design in one piece on a fairly solid backing until you are ready to transfer it to your project. I hope that makes sense. Place a comment below if you are totally confused by that explanation.
To “kiss cut” with your Scan N Cut adjust your blade so that it only goes through the vinyl component. If you have a DX model then slect half cut – you may need to adjust the pressure if you have issues. Do a test cut before you make too many changes.
Cricut users choose the correct type of material on your Cricut machine eg vinyl and you should be right.
The Test Cut
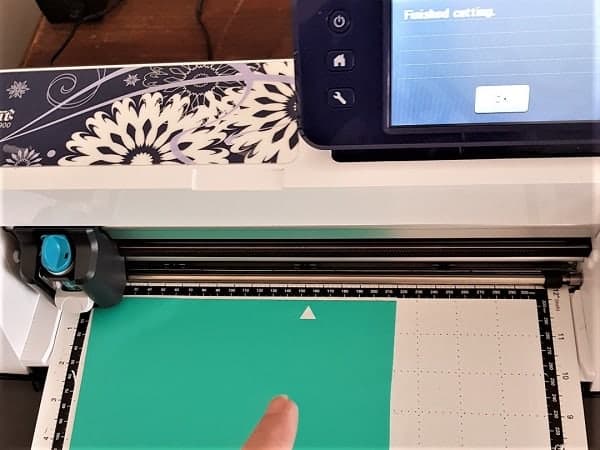
Kiss Cut
Above is an example of a test cut to test whether the cutting blade has been set to the right setting so that it Kiss-cuts the vinyl. I had the blade set at 3.5 for this cut which is just a guide for you, as each machine will be different. The newer DX Scan N Cut models need their blades set to half.
NOTE: The white area within the triangle is the backing paper of the vinyl and NOT the mat.
If your test cut isn’t quite right ie blade is set too deep or not deep enough make sure you adjust it slightly and do another test cut.
TIP: I always add a test cut when cutting every new design. The only time I don’t add a test cut is if I am cutting multiples of the same material in one session. Once I have turned the machine off or adjust the blade depth I add another test cut.
Tools for weeding vinyl
To weed vinyl, you can use pretty much anything you can think of that has a bit of a point on it to pick out the unwanted pieces from your design.
Suggestions include a thickish sewing needle, a toothpick, a cooking skewer to name a few. I have even used my nails. None of these are the best recommendation but certainly doable if necessary, your imagination is a wonderful thing.
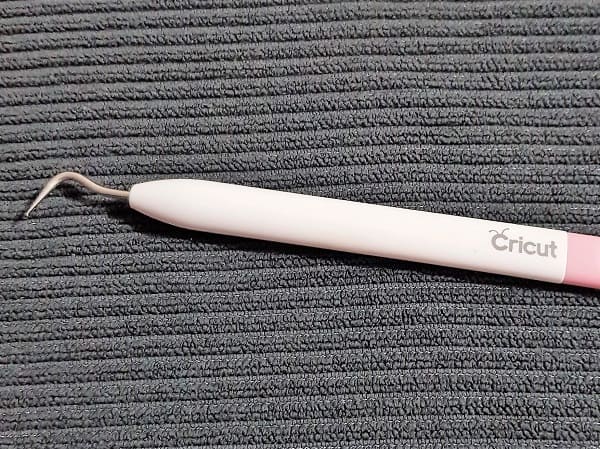
After thinking for a long while that I could manage without spending any more money I finally purchased a Cricut tool, the one with the pointy end. Oh sooo much easier with the right tool. I can still feel the relief of how much easier it was when weeding my first project after buying my new tool. I can highly recommend buying one, purchase online or through a craft store. There are other brands available that will work equally as well.
More tools to weed vinyl
While you don’t necessarily need this next range of tools, they can make life easier for you.
The vinyl weeding pen is a pen-like tool with a pointy end (sometimes two different ends) that is quite comfortable to hang on to when weeding. Another one is an “air release weeding pen” which I am not really familiar with at all. Sounds interesting! There are lots of choices.
You could also make your own by converting a wind out pencil…take the lead part out and replace it with a size 70 needle. I just use my Cricut tool but there are lots of options and as long as it works for you then you are set!
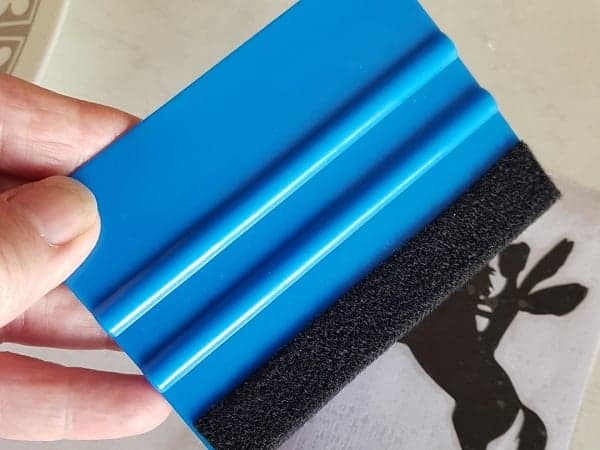
I recently purchased a squeegee tool. It is fantastic and was about $2. They have them on Amazon but I think you should be able to find them at the dollar store too. The one I purchased looks like the picture below…it has a soft side as well as a beveled hard side.
Another nifty little cheapie is the rubber nail polish holder. It sits on your finger like a ring. I had a look on Amazon however they were so expensive on there. Check the cheap shops as I think I only paid a few dollars for mine.
Purchase tools in packs with other useful tools or just on their own. Often the pricing is much better in a pack. Have a go at weeding Vinyl as you can make some wonderful projects with it and it is great fun.
Weed your design
Once you have put your vinyl on your cutting mat, set up your blade so that it only cuts through the vinyl and NOT the backing as well. (DON’T forget to do your test cut). Cut your design out….. we are ready to weed.
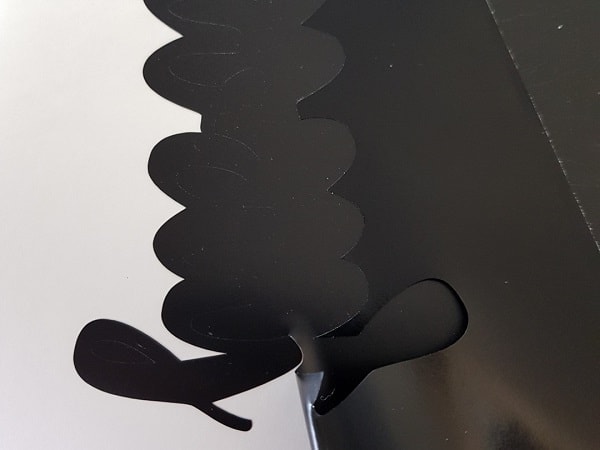
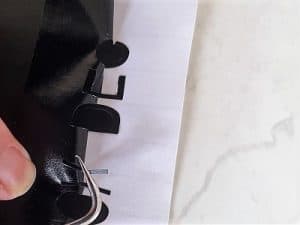
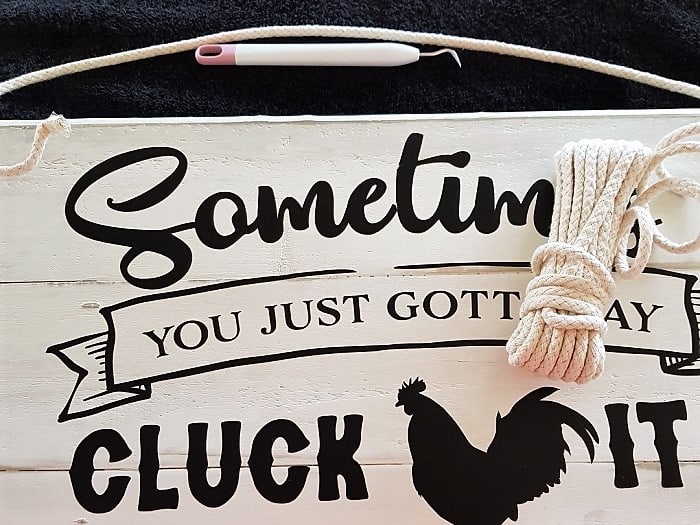
Look closely at the above picture. It is a picture of some lettering with the unwanted parts of the vinyl starting to be removed.
Step 1 – where to start
Start weeding your design at a corner, you will often find this the easiest place however it can depend on the project you are doing. I suggest the corner because this is the edge where the backing and the vinyl meet.
Peel up the corner and carefully lift the unwanted vinyl off the backing sheet ensuring that the design stays in place on the backing sheet. This can sometimes be a bit of a challenge if you have small objects that are part of your design.
NOTE: If you have trouble getting the vinyl to separate from the backing paper you can give it a tiny bit of force with your weeding tool in an unwanted area.
Keep removing the unwanted vinyl from your project. Use the weeding tool (or another object like a pen or your stylus etc) to hold pieces of your design onto the backing while you are lifting if you have trouble with them staying on the backing paper.
If you find you are working with too large a piece of unwanted vinyl, cut it off. It is scrap anyway and much easier for it to be removed as you go. It is really easy to get yourself into a sticky mess AND accidentally have some valuable small pieces of your design get caught up on the sticky waste vinyl never to be seen again.
Just ask me how I know THAT one! LOL
If that does happen, you can often fix it by cutting those pieces out again… or you can decide that you will never notice they are missing. It depends on the project you are doing. I have done both ways. I have also spent ages sifting through the screwed up waste vinyl hunting for the lost piece with occasional success.
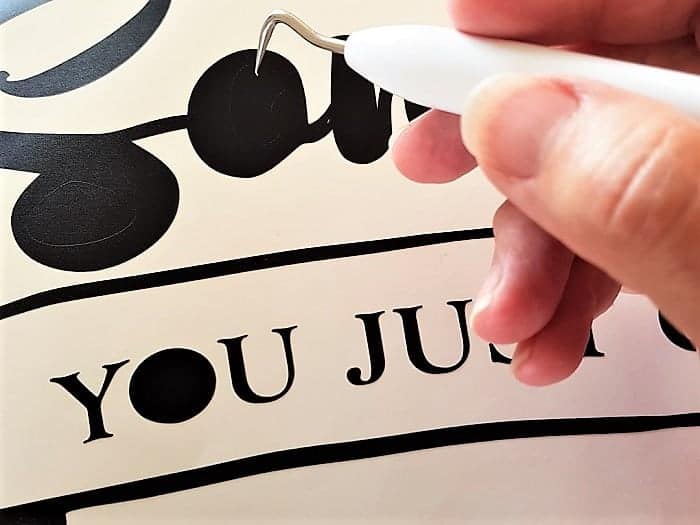
Step 2 – weeding alternatives
After you have removed the larger pieces of unwanted vinyl then start on the smaller parts. The picture below is showing the centers of the lettering about to be removed.
Now, I have suggested a way to tackle your weeding BUT there really is no right or wrong way to do this. As long as you achieve your end goal of the design being left on the backing paper and the unwanted vinyl in the bin.
Alternative ways you may like to do it is section by section or if the design is mainly small pieces, then all the small pieces first. You will get the hang of what works for you.
Tips
As you are weeding, find something to stick the tiny bits to. There are lots of cool ideas on this.
They include:
1. Taping a strip of masking tape around your wrist and sticking the small waste pieces to it. It is then easy to remove from your wrist to dispose of.
2. Finding a small plastic lid container and cutting a hole in the center of the lid and poking the bits into the hole as you go.
3. Make a bit of a ball of the first bit of larger waste vinyl and then sticking the small waste bits to it. (this is the one I use)
I am sure you can think of more ideas for this one 🙂
Some designs can be a labor of love, especially if it is a very intricate design. There are some absolutely magnificent mandalas, shapes, animals, people etc with beautiful patterns through them. So many choices and so many levels of intricacy. I recommend browsing and checking some of them out.
Various types of transfer sheet
Now that the design has all the unwanted pieces weeded from it then it is time for the Transfer sheet.
There are a number of types of transfer sheets and options of what you can use. I personally find with most vinyl projects that a really cheap, not too sticky, transfer sheet works best.
You can use cheap clear contact, cheap proper transfer sheet, Cricut transfer sheet are examples. The Cricut brand I find is stickier and can sometimes be harder to make the transfer happen. You can also use masking tape if it is a small enough design. Lettering is a good example of what you might be successful using the narrower masking tape to transfer with.
There are things to consider when you are choosing the ‘stickiness’ of your transfer tape. The main one is what type of vinyl your project is made from. For example, if your design is cut out in glitter vinyl, then using a stickier transfer sheet will be easier. Glitter vinyl is a bit harder to stick the transfer sheet to.
NOTE: Heat Transfer Vinyl (HTV) comes with its own transfer sheet built-in.
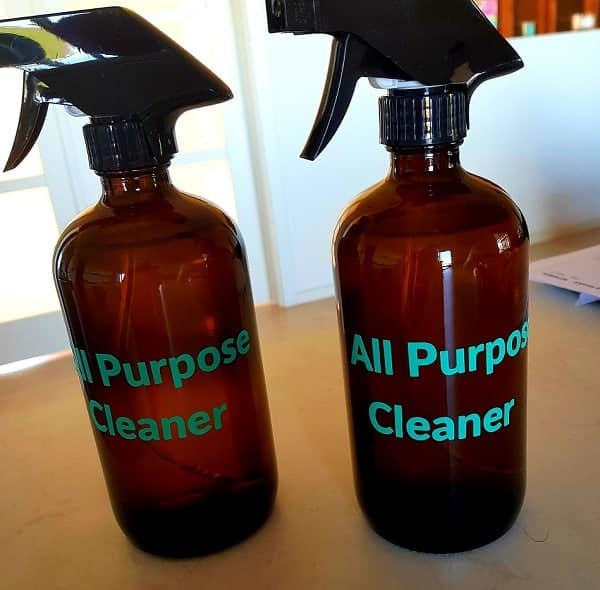
OH, and before I forget to mention – you can often use the transfer sheet more than once. I usually get at least two uses out of a piece of the transfer sheet. When I labeled the bottles below, I was in a huge rush… I found a small piece of left-over, already used once, transfer sheet and then used it FOUR MORE TIMES. It still worked great. Job done!
Step 3 – transferring your design
To put the transfer sheet on your weeded design is a little bit like when you cover school books with contact. You start in one corner and gently peel the backing off the transfer sheet, sticking and smoothing it down onto your project as you go.
If you see any tiny wrinkles or bubbles in the clear transfer plastic don’t worry too much, this will not impact your design when placing it on the intended project. Try not to get bubbles under the actual vinyl. Starting from one end and pressing the vinyl down as you move across the project helps. Smooth the vinyl down as best you can.
Press the transfer sheet down firmly onto your design. Once your design is fully covered can rub your hands firmly all over it or use a scraping tool from your tool kit. Some people have suggested using a credit card although personally, I haven’t had a lot of success with credit cards.
TIP: If you are putting your design onto a rounded surface then place some strategic snips into the transfer sheet so that it is easier to work your design around the curve.
Step 4 – two methods to do this
There are two ways to do this next step. Depending on the size of the project and which way you find the easiest. I use both ways but ONLY use method #1 if the design is small enough to be manageable.
METHOD 1. Carefully peel the design off of its original backing paper so that it is totally on the transfer sheet. If you have any difficult pieces that won’t stick to the transfer sheet, simply place the transfer sheet back over the problem area and rub it again. Repeat again if necessary. Sometimes there are pesky pieces.
OR
METHOD 2. Leave the vinyl backing paper on the design and work with it in the same manner as in step 3 as you put your design on your project.
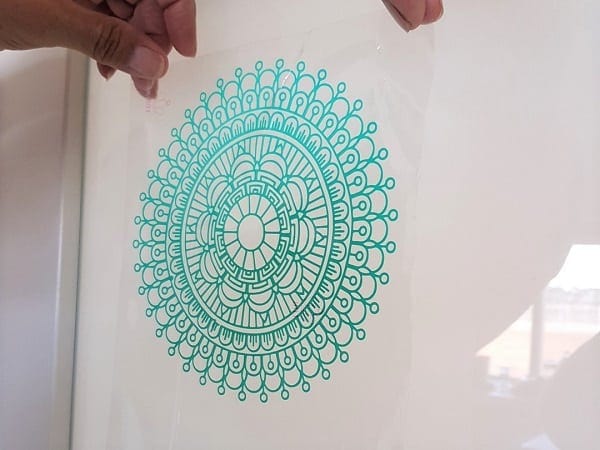
Here is the Mandela design featured on the laptop above after it has been weeded and had the transfer sheet placed on it.
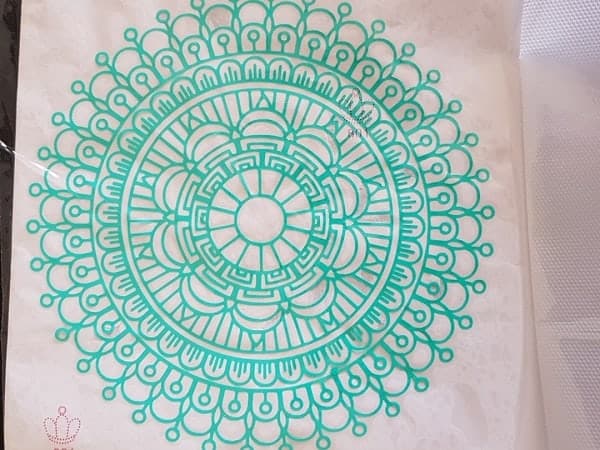
Note* In the above picture, you can still see the transfer sheet backing semi peeled off on the right-hand side of the photo.
Above is the Mandela design with only the clear transfer sheet left.
Step 5 – placing the design
The next step is transferring your weeded design onto your project. If you have used method 1, the back will be sticky so don’t let it stick in a spot you don’t want. Believe me when I say that it as it can be a pain to get off again.
Work out exactly where you want to place the design then place down one edge and work your way over your design, pressing it firmly down from the edge towards the middle.
Continue to the furthermost edge until the design is fully transferred. If you are happy with the positioning then you can rub your hands over the design pressing it down firmly with your fingers or a scraping tool until you think it is fully stuck.
Step 6 – peel and rub the vinyl
Once you are happy with it gently peel the transfer material from the design. I usually try to keep it at a fairly sharp angle as it seems to not pull on the design as much. If the design starts lifting with the transfer sheet, place it back down and rub again until you think it is stuck and have another go. Repeat that step until the design has been totally transferred.
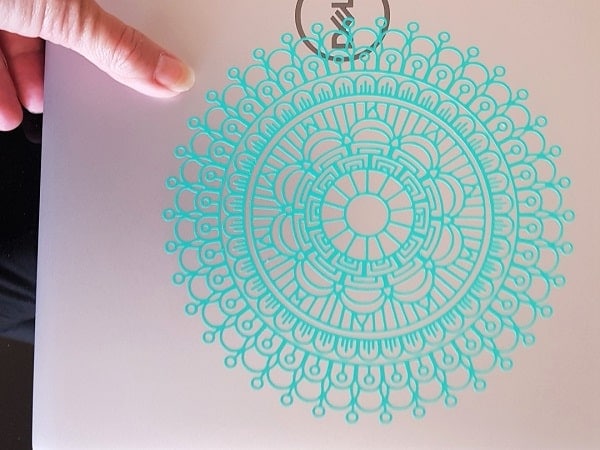
Here is the design on my laptop!!! I plan to add another design on the laptop so I have placed it off-center, though now that I have stuck it down, I wonder if it would have looked better placed directly in the center. That way the DELL logo would have sat right in the middle of the circled center. It certainly lent itself to that!
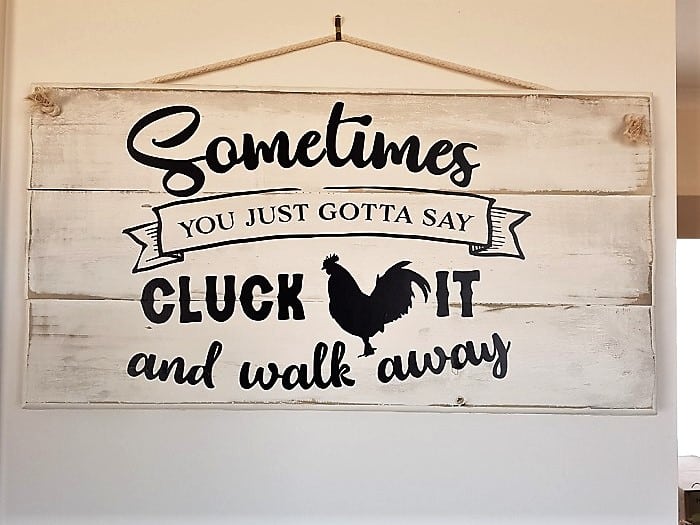

Above are the other two projects weeded in this tutorial. The ‘Home is where your boot are” SVG and FCM files are available in my Resource Library.
I hope you have enjoyed this tutorial on how to weed vinyl and how to transfer your vinyl design. Feel free to comment below… AND…. watch out for more “how to’s” coming!!
Happy creating.

P.S. Don’t forget to check out other posts on my site. There are lots of tutorials and ideas.
- Exploring the New Affinity Designer V3 — My First Impressions
- Cutting Cardstock: Tips for Better Results
- Rejuvenate Old Jeans with HTV and Your ScanNCut
- Embroidering Cardstock: A Creative Twist for Your Craft Projects
- How to Delete Saved Files on Your ScanNCut
Remember the Resource Libary has free files for you. If you don’t have the password yet, enter your details into one of the forms on the site and the password will be emailed out to you you.
Join Us
If you haven’t already joined my Facebook group Scan N Cut ~ Let’s Create With Sue, please do. You can share your amazing creations with the group, ask for assistance or simply get some additional tips and tricks.
#post how to weed vinyl


I am having such a hard time keeping the design down when peeling off the extra unwanted vinyl surrounding my design. Some of the letters actually seem sliced?? I am using glossy Oracal 651. I wonder if the matte would be better? Do you have any suggestions? Please and thanks!
Hi Marybeth, this can be difficult, and the smaller the design pieces the more difficult it can be. Oracle is a really popular brand and both the matte and shiny should cut ok. The depth of cut can make a difference to how easy or difficult your design is to weed. Tweak your settings so that the blade cuts cleanly through the vinyl BUT does not cut into the backing paper at all. This is definitely an issue with the Metamark brand, making it harder to weed.
You can also use your tools to help you hold the design down as you weed the unwanted areas away. Another tip is to cut off unwanted vinyl pieces as many times as you need while weeding to make it easier for you.
If very fine wording you can try to “reverse” weed. This is where you place the transfer sheet on the design and lift the lettering/design from the unwanted vinyl. Remove any unwanted areas from the transfer sheet. I found this took a bit more practice so do a bit of testing first.
Pop into my Facebook group and I can help you a bit more if you are still struggling.
Hi Sue
Ae you going to do anything on Rhinestones in Canvas Workspace?
It would be great to make your own templates.
Thank you for the great videos.
Regards
Caroline
Hi Caroline,
thank you, really pleased that you like the videos. That is great to hear and I will put Rhinestones on my to-do list. It is quite a large list…and growing LOL. I will see what I can do 🙂