
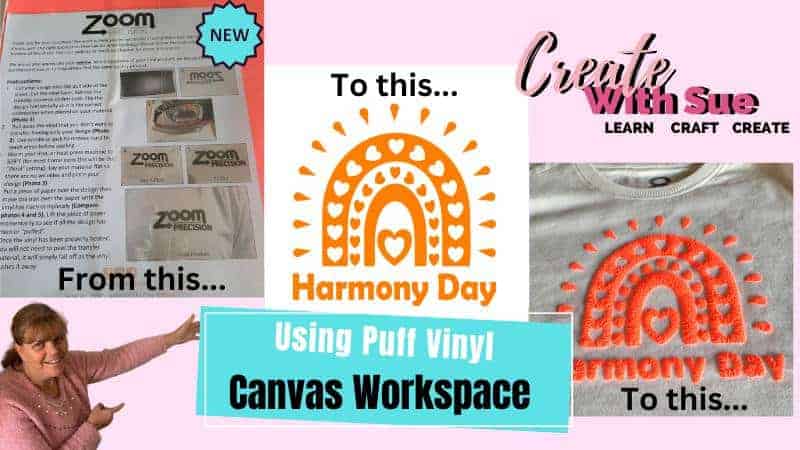
Make these easy coasters with your Scan N Cut or Cricut cutting machine. Included are 4 different free designs in my Resource Library in SVG and FCM format.
Now, I say “make coasters” however, while the tutorial is on making easy coasters, the included designs could create anything that you would like. I have already been picturing them on the front of cards with Valentine’s day approaching. What can you think of?
Let’s get started…
What do you need?
- Vinyl – I used plain colors
- Coaster blanks – Hexagon shaped acrylic blanks were used
- Free design from the Resource Library or you can use your own
- Transfer Tape
- Weeding tools – maybe? read on lol
- Rubber feet
- Cutting machine – Scan N Cut or Cricut
Download your design
Head over to the Resource Library and download the set of four designs. They will be in a zipped format.
If you need help with unzipping the designs check out this tutorial.
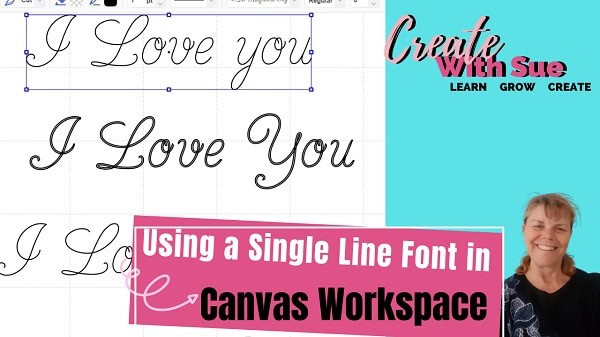
Once unzipped, you will see that there is an SVG file and also an FCM file. You can which file format to use and then add the designs into Canvas Workspace or your Scan N Cut. Cricut crafters will need the SVG file format.
If you are new and looking for information about SVG files check out How To Manage SVG Files. The designs for the Easy Coaster tutorial are labeled as either SVG or FCM however not all files you download will be labeled. What do they look like once they are unzipped on your computer? They can be confusing.
Do you want to alter your easy coaster designs?
This is where we will venture a little differently. Would you like to learn how to alter my original designs to make them your very own? This video will take you through some very easy steps to modify the designs.
This means you can make all sorts of projects using the free easy coaster designs.
Video demonstrating altering the design – Canvas Workspace
Bonus design
As you may have seen in the video above, there is ANOTHER design included. Yep, a bonus design that you can use either as shown in the tutorial above or however you choose.


Cut out your designs
In the tutorial above you will have been shown the steps to prepare and send your designs to your Scan N Cut. You can also transfer them via USB if you don’t have wifi. Import your design into your Scan N Cut set up to Cut.
For SDX models choose the Half Cut so that the blade only cuts through the vinyl top half and not all the way through the paper backing as well.
Tricky hack for the DX
Well, this hack worked for me on my DX. I haven’t tried it on my CM model as I have a 24″ mat for that machine and it never occurred to me to try LOL.
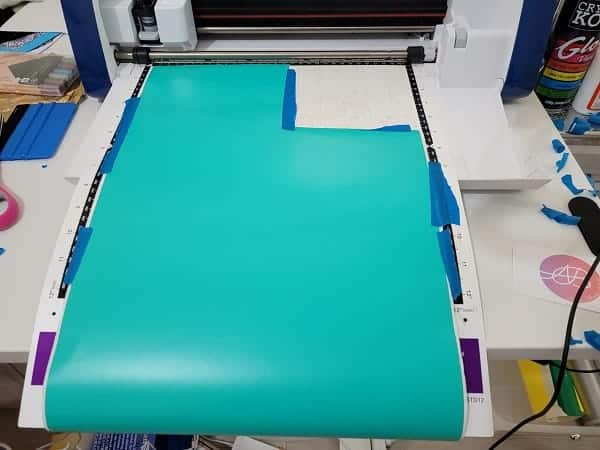
As you may already know, I am very careful with my materials. For this project, I had the pictured amount of vinyl left on the roll and did not want to cut off any of it and waste it. SO, I placed it on my mat as shown! You can see it extends further than the actual mat.
The tricky hack I used is that my SDX still scanned the vinyl even though the bottom barcodes and markers of the mat are covered. I needed to scan for precision placement.
I LOVE the placement scanning feature.
Scan your vinyl for precision placement
As you can see below, the designs needed to be placed on the vinyl in a different location than what they were imported into the Scan N Cut. Use your pointer stylus tool to touch the design and drag it to a suitable location. The design will highlight with a red border when you have selected it and it is ready to move.
Much better placement in the picture below and you can see I have added a test cut to make sure the settings are correct.

Test cut – the benefits
Remember, test cuts are your friend even if you own an SDX Scan N Cut cutting machine. I used two different brands of vinyl, one of which is very thin but is also metallic and a bit “tough” to cut.
The test cut for the aqua green-colored vinyl was perfect… NO adjustment was required. One would assume that the metallic vinyl should be fine too? Nope. Lucky I did the test cut.
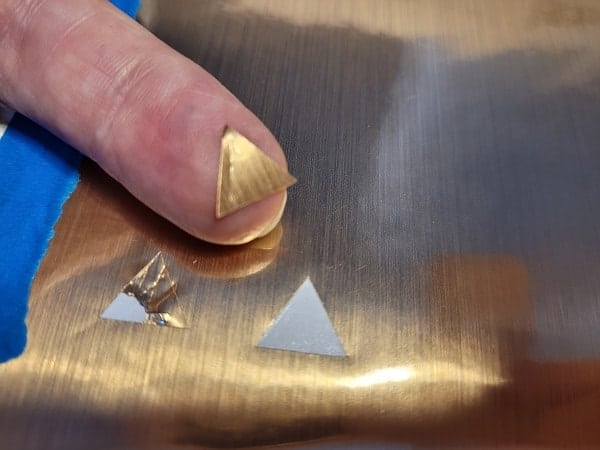
As you can see the test cut shows a bad test cut on the left and a good test cut on the right in the metallic vinyl. I was using my SDX2200D Scan N Cut. The cut on the left-hand side was still connected needed a strong pull action to remove it. AWFUL to try and weed out. Imagine trying to weed an entire project cut like that. You can see in the picture how much trouble I had trying to remove the test triangle whereas the right side one was a breeze.
That is what we all want – easy weeding.
How to adjust the settings in Half Cut
To adjust the settings you go into the tools icon after selecting Cut on your Scan N Cut.
Scroll past the Cut Pressure setting and on the Cut Pressure for Half Cut. This will adjust your pressure on your machine only when the Half Cut is selected. Note below the left-hand screen is set to Auto and boxed in black. The default setting is always highlighted in this manner on all the models that I am aware of.
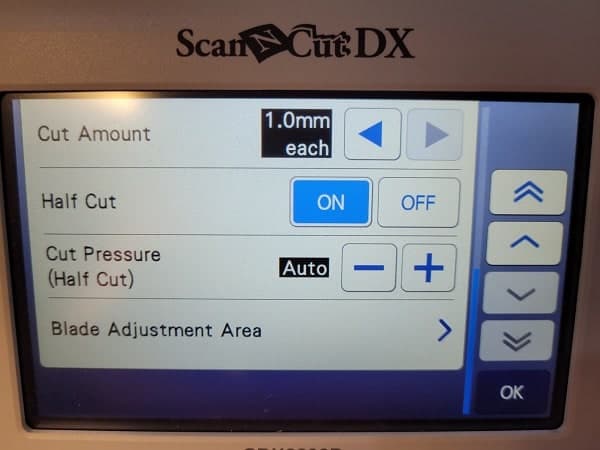

I used the setting on the left for the aqua-colored vinyl and the setting of 3 on the right for the shiny metallic vinyl. After cutting the metallic, I wished that I had tested the setting at 2 as I had a few spots that cut all the way through the backing. Not enough to cause me too much grief.
See that the Half cut setting cut all the way through the backing on sections of the below design. It was only in a few spots and was easy enough to weed.
Weed your design
There is a complete tutorial on weeding your designs which you are welcome to check out. This project I weeded slightly differently. How you weed will often depend on your design, the size of your design, and the type of vinyl you are using. Even variations in brands can make a difference.
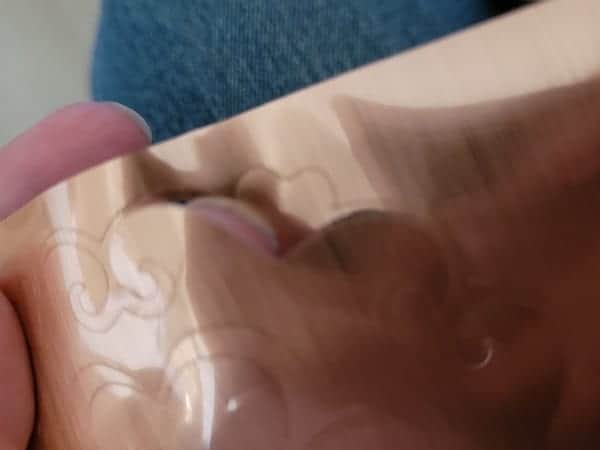
For these smaller designs, they were breeze easy to weed…. so easy in fact that I did not use my normal weeding tools. For this one, I used my thumbnail. With a bit of a fold of the backing paper and a flick of the nail, it was a very easy project.

You may have noticed there are extra hearts on the backing paper… ? I found a problem with the designs… they have LOTS of gorgeous little hearts that are weeded out… and I couldn’t bear to throw any of them away. sigh.
Well, actually I am not sure whether to laugh or sigh. 🙂
My solution was to save them as I was going along on the spare sections of the backing paper and then collect them up at the end on one piece of backing paper.
I am going to give them to my granddaughter for stickers. She will have lots of fun sticking them onto her books and drawings.
I wonder if you have this problem too?

Attach your designs and create the easy coasters
Now that you have cut your designs out with your Scan N Cut or Cricut, weeded them, saved the weeded hearts… it is time to transfer the design to your coaster blanks.
The acrylic blanks
Acrylic blanks were used in this project however any blanks that you choose should work ok.
Just before Christmas, I found an acrylic blanks outlet near me (60kms or 40miles away). Now, nothing is ever “near” me so this was exceptionally exciting for me.
The outlet is called Acrylic Blanks and had a great choice. They indicated that they ship internationally.
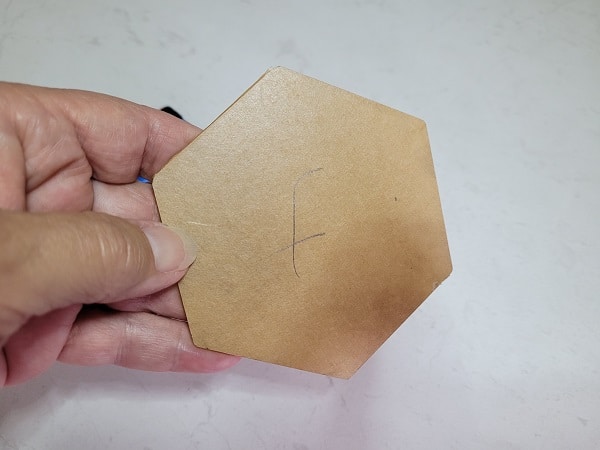
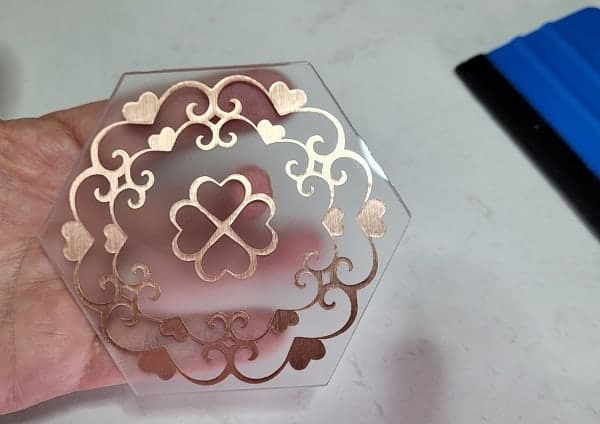
The above photo looks a bit ordinary, doesn’t it? Acrylic blanks come with a protective covering on each side of them. Sometimes it is a clear film and quite easy to miss and others it is obvious like the picture above.
The protective paper peels off easily. These revealed a frosted side and a shiny side. I had actually forgotten that I purchased frosted blanks so it was a nice surprise. I attached my designs on the shiny side of the blank with the design sitting on the top of the coaster.
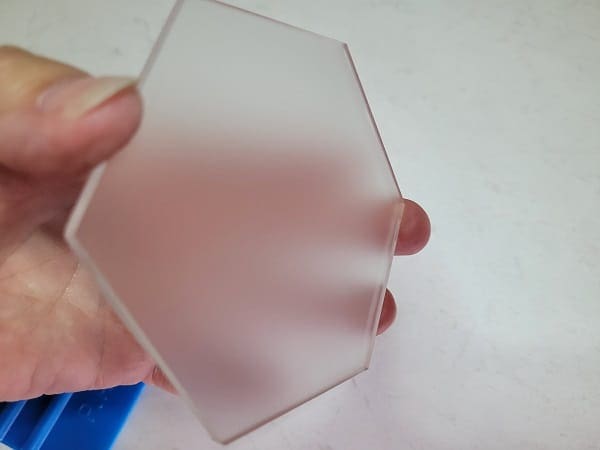
Other alternatives are attaching the to frosted side (it was smooth enough) or if you had clear blanks, you can attach to the underneath side of the blank so the design shows through.
Note: if you attach designs to the underneath side of a project, consider whether to mirror the design. For the included designs it will not matter, they are very symmetrical. It would be really important if you have any written words in your design.
Transfer tape
With smaller designs, it is really easy to be frugal with your transfer tape or sheet. See the picture below. This was all that was used for all eight coasters made plus, it was packed away for another day.
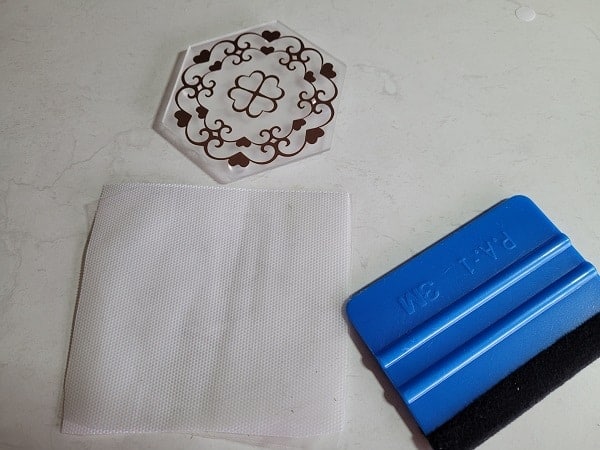
If you have a larger project it is not quite as easy. If you are anything like me, there will be a pesky piece that is determined to stick to itself.
Transfer technique
Small designs are usually quite easy to transfer. Placing the design directly in the center of the coaster is possibly the biggest hurdle.
Here is my technique, you may already have your own. There is NO right or wrong in crafting… just what works best or easiest for you.
Place the coaster in a direction that you can gauge the middle of the two outside edges. For the hexagon-shaped coasters, the two outside points of the hexagon were ideal points to align to.
Alternatively, use a ruler and pencil or sewing chalk and mark the centerline. This would be best on the opposite side of the blank if possible and will make it easier to rub off once you have positioned your design.
Bend up the two edges of the design so that the middle of the design bends down onto the coaster (like a half-circle). From there, rub the design down on one half towards the edge and then down on the other half towards the edge.
Press down firmly after you have positioned it where you want it. I always press hard while the transfer tape is still attached and then remove the transfer tape/sheet. You will find it is easiest to remove by peeling it back fairly flat against itself. This reduces the pull on the design and you will find it will stay on your project better.
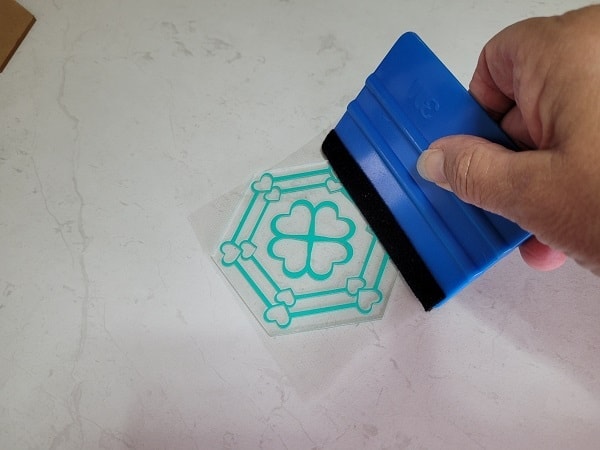
I really like this type of scraper as the fluffy side (black area) is soft and allows you to press quite firmly without causing any damage or scratching to your project.
Applying feet to your coasters
In the hardware shops, you will find small rubbery “feet” that can be used for the bottom of your coasters.
This project used the small ones around the outside edge. Two packets were required for 8 coasters as I placed 4 feet strategically on each coaster. Work out your balance points, they are usually in the four corners unless you are using hexagon blanks.
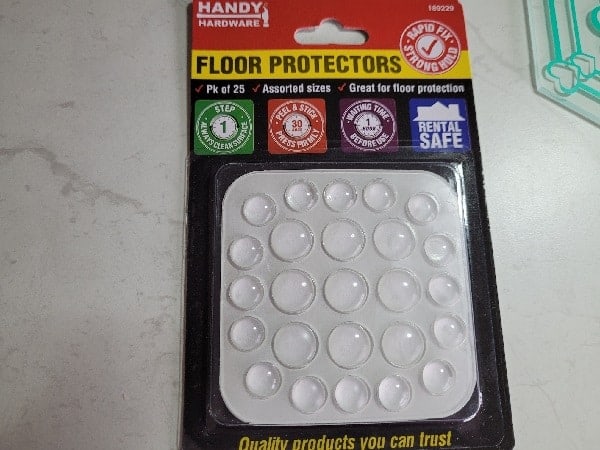
These feet had their own sticky. I often find that the sticky provided is not as good as the glue I would have used. View the product you purchase and make the decision from there.
Aren’t these easy coasters to make?
DIY feet
An alternative solution is to create your own feet using a hot glue gun (assuming you have one). On baking paper squeeze out a circular blob and let dry. If you are game, you could create them directly onto your blank. I definitely need to practice on baking paper first lol
This solution may not be quite as neat as purchased ones however will do the job.
Finished easy coaster project
Here are the finished coasters. This is a very easy set of coasters to make with your Scan N Cut or Cricut.
- You could make them with a matching design on each coaster in the set
- Each coaster a different color to make them a bit funky.
- Use rainbow or holographic vinyl to give them another different effect
OR
Make something totally different with the designs. They will resize up as large as you need. If you choose to resize smaller, check the thickness of the lines at the top of the heart shapes before cutting.

Hopefully, you enjoyed this tutorial on making easy coasters with your Scan N Cut or Cricut and LOVE the free designs.
Isn’t the one below in the metallic finish speccy. I love the shimmer!
Are you a member of our Facebook group? I would love to see what you make with the designs, it is always special seeing other use the designs creatively.
You are always welcome to join me in the Create With Sue Facebook where you can make friends, share your creations, and ask questions for additional assistance. I will provide any assistance that I can to help you use your Scan N Cut and Canvas Workspace.
Join me here in the Scan N Cut – Let’s Create With Sue Facebook group.
Happy creating,

# easy coaster with your Scan N Cut


So lovely! Thank you for all the details…seems each time I read one of your tutorials I remember what I have forgotten! Is it ok to print this
to have beside me while I work on my project? Thanks again! Guess you can tell where I head first some days when I turn on my computer. Covered with almost a foot of lovely fluffy snow here in Ohio so curled up with a cup of coffee and your tutorial…now need the coaster!
Hi Wendy, Thank you for such a lovely comment! A foot of lovely fluffy snow and a coffee sounds cozy. I will work on creating a download for you to make it easier. Thanks again, Sue
Sue do you have an .svg file format of a turtle popup card as it’s for my little nephews birthdaf
Hi Suzanne, I don’t however I have started working on one. Hopefully it is finished by the time you need it. 🙂