Creating a HTV Onesie is a great gift idea. This tutorial will go through sizing, cutting, and ironing on Heat Transfer Vinyl to create an awesome, unique gift.
Now, this project didn’t go completely to plan and I will cover what can go wrong and how I fixed my problem in this tutorial as well.
Disclaimer: As an Amazon Associate, I earn from qualifying purchases. Links included in this tutorial may be affiliate links, Amazon or others, meaning I may earn a small commission at no additional cost. These commissions will help me continue creating content for you. Thank you for your support! Read my very boring full disclosure policy here.
What do you need
- Onesie or T-Shirt
- Heat Transfer Vinyl – I used Cricut brand for this project however Siser is good
- Cutting Machine – I used my Scan N Cut however a Cricut is fine
- Heat Press (this is the one I have), or I know users who think that this one is also really good. If you don’t have anything else then you can use your iron – no steam.
- Weeding tool – I used this one however might buy this one as it is a finer design
- Design – I used a design from my Etsy shop
Additional items you may choose to use. - Teflon Sheet
- Heat Resistant Tape
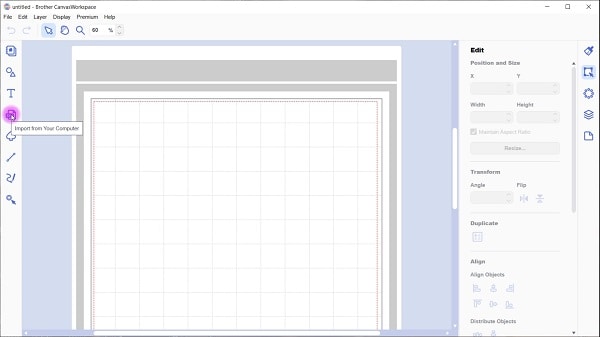
Upload your design
Upload your design into your cutting machine software. For Scan N Cut users this may be Canvas Workspace or you can upload directly into your Scan N Cut, and for Cricut users, it would be Design Space.
Cricut crafters – scroll down to the area in the post called “weeding your design” as the early section is Scan N Cut specific. My major oops is in that section too…see how I fixed it. Take a peek at the “Placement Guide” on your way.
Software Instructions are for Canvas Workspace
Included are instructions for uploading an HTV Onesie design into Canvas Workspace, the downloaded version, and exporting it to your Scan N Cut.
Add your design
Resize your design for your project
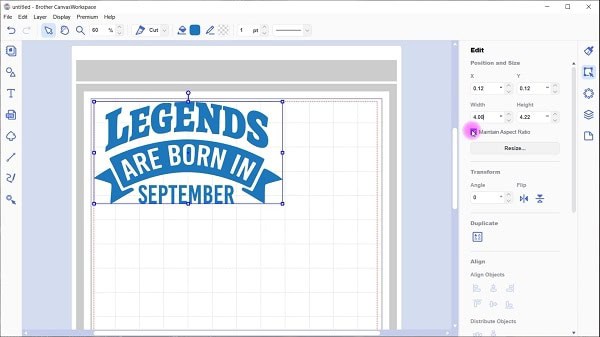
For a Onesie, you need to resize the design to be the correct size for such a small item of clothing. Yep, those onesies are pretty small.
First I moved the design away from the red edge of the mat. This reduces the risk of being over the red line and the design not sending over to your Scan N Cut. You can do this after if you prefer.
I resized my HTV design to be 4″ wide, keeping the size ratio the same. You only need to adjust either the width or the height…. not both to keep the scale exactly the same.
More information is below for other sizes that you may need
Placement guide for sizing
Working out what size to create your design for various HTV projects can be difficult so I created an approximate guide for you. It covers various clothes sizes that you may need depending on your project.
While the approximate sizes are mentioned in the guide, keep in mind that clothing can be labeled a particular size and two pieces of clothing labeled exactly the same size may differ significantly depending on the brand and fit. It is always wise to check the proposed size with a tape measure to double-check it about right.
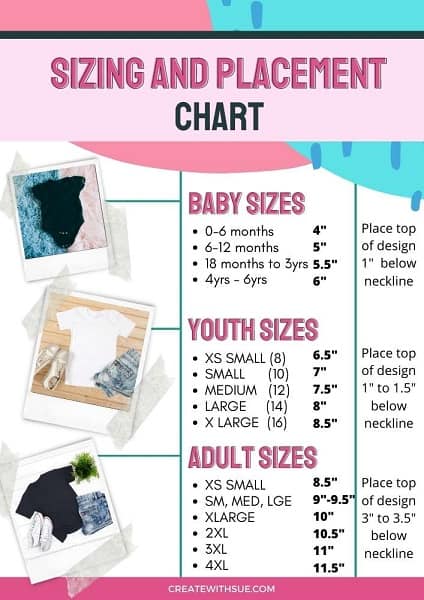
BONUS: You can find this Printable in my Resource Library so you have it on hand whenever you need it.
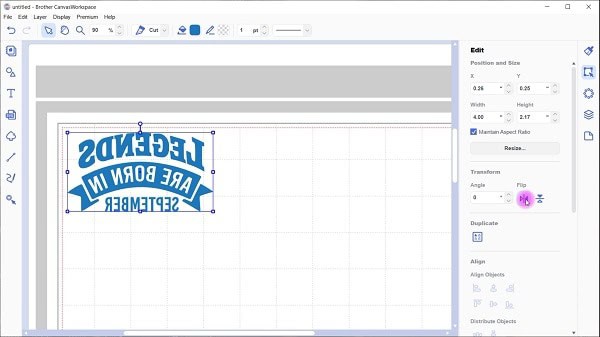
Mirror your HTV
This is one step that is so easy to forget to do!
Heat Transfer Vinyl is cut back to front and quite opposite to normal adhesive vinyl. Mirroring or flipping your design is particularly important if there is text on the design.
You will find the “Flip” option in the Edit panel on the right-hand side below the resizing area.
Export your design to your cutting machine
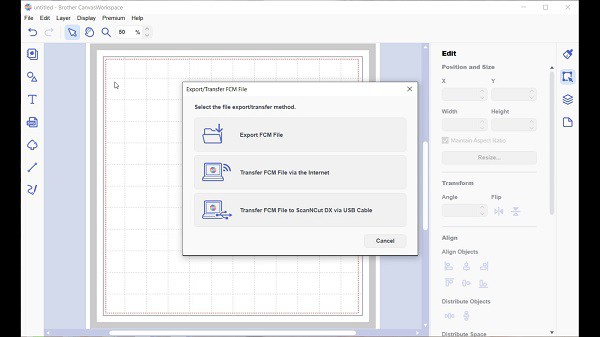
To send your design to your Scan N Cut machine, go to File then Export/Transfer FCM File and th below pop up will appear. I selected the middle option of sending via the internet however you can choose the option that suits you best.
Note: if you are transferring via a USB then select the top choice – Export FCM File, this will take you to where you can locate your USB and save to that.
Cut your HTV Onesie design
Place your HTV with the shiny side down on your mat to cut out your design. The shiny side is the carrier sheet and the softer, dull side is the actual vinyl which needs to be facing up towards the blade.
Load your mat once you have the HTV firmly on it. I only used a small piece of HTV so I chose to use painter’s tape to firmly stick it down and reduce the risk of movement during the cutting process.
Import your design into your Scan N Cut
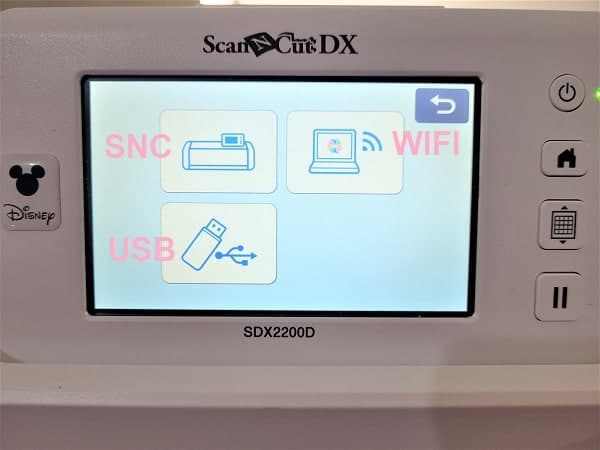
Import your design using the top right selection on your Scan N Cut if you transferred via the Internet. Alternatively, select the appropriate option to import your design.
Scan the materials on your mat
I love the scanning features of the Scan N Cut and my very favorite is the mat scanner. This is the BEST feature and allows you to use multiple colors and small scraps of materials and then precision place your design in exactly the correct spot.
If you need a full tutorial on how to use it check out this post.
Use the Zoom feature
Zoom in to perfectly place the design on your materials on the mat. As you can see in the picture below, I don’t leave much room to place the designs as I maximize my leftover pieces of vinyl and card.
View the video tutorial below for more details on zooming in.
Set the Half Cut setting
DX Machines
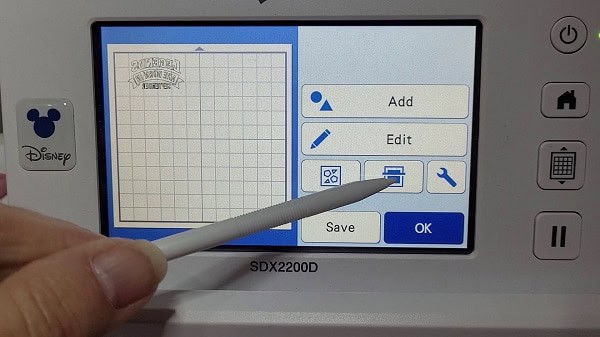
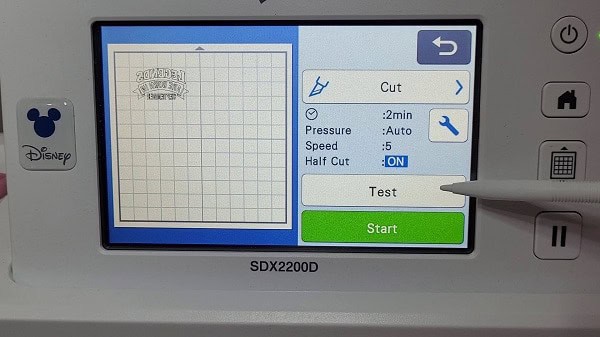
If you have a DX machine then utilize the Half Cut feature of the Scan N Cut. When you select “Cut” you will see the “Tool” icon. Use the Tools are to adjust settings as required.
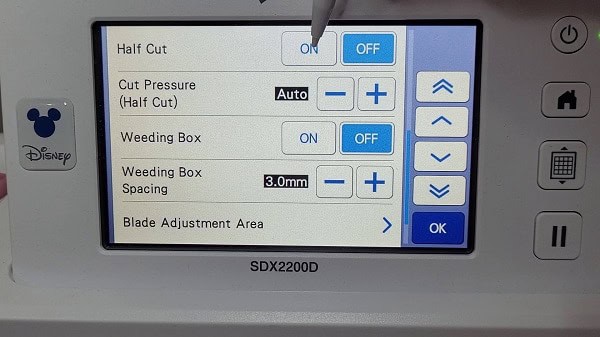
If your blade isn’t cutting deep enough then increase the Cut Pressure and visa versa. If you are cutting a little too deeply then try reducing the pressure.
Note: There is a Cut Pressure adjustment specifically for the Half Cut setting along with a setting for normal cutting. See pic below.
Speed is another setting that can be adjusted so if the design appears to be tearing a little as the blade twists and turns, lower the speed and check for improvement.
****Remember to do a test cut, even with the auto blade this is a really useful feature.
CM Machines
For those with a CM model, manually adjust the blade settings so that the blade only cuts through the vinyl and not the carrier sheet as well. Each machine uses slightly different settings however a guide may be around “2” on the manual blade.
Start Lower and increase in increments of one, test cutting between each adjustment.
Pressure and speed are adjustments available on the CM models for improved cutting performance.
If you are having issues with your cuts check further information here. Scroll down to about halfway through and it will go into a bit more depth.
I recommend doing a test cut
Haha, I think you may have received the message that I recommend doing a test cut. Many crafters with the DX model think that it is “auto” because it is an auto blade. While the DX does a fantastic job of recognizing the depth for the blade to cut automatically, it still may need a bit of a tweak to get your cut perfect.
It is much better to check before cutting and wasting your precious craft materials.
The triangle will place on the page in a generic position. Place your stylus on the triangle so that it is highlighted with a red box and slowly drag it into a position that will not impact the cut area of your design.
I personally like to place it at the bottom right-hand side of the materials so that it is easier to check WITHOUT removing the mat from the machine. You will be able to spot where I have placed it on my design in the picture below.

Video Tutorial
Here is a video tutorial for those who like to watch how to use Canvas Workspace.
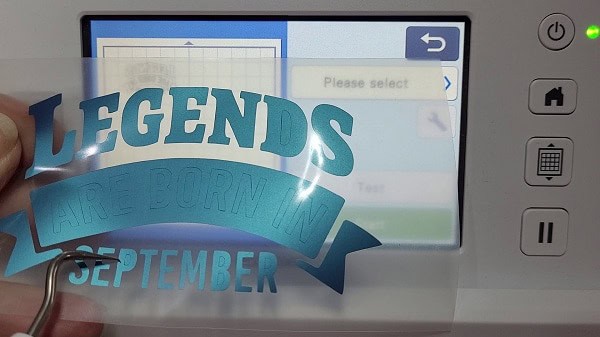
Weeding your HTV design
Weeding your HTV onesie design can be a lot of fun and depending on what HTV you have purchased, it is usually a lot easier than weeding the normal adhesive vinyl which can get into a bit of a sticky, sticky mess if you are not careful.
In the pictures below, I have weeded the larger areas first and then removed the smaller pieces of HTV that need removing.
Which way you choose to weed can be a personal choice however there are some designs that will be much easier if you weed the smaller pieces first. These are usually more intricate designs – food for thought when you tackle your weeding.
Unsure what “weeding” actually is? And NO, it is not the gardening type of weeding LOL. Here is a bit of an explanation if you need it.
I use a Cricut tool to weed with and have seriously been considering purchasing the pen-type which appears to have a smaller point for picking up the vinyl.
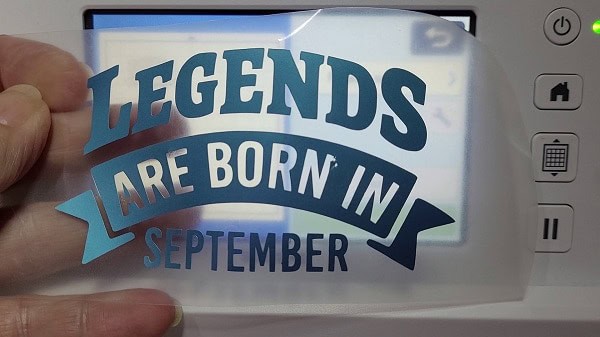
The picture below will show you why I am considering a pen-type. It can be hard to see where your cut lines are and actually grab them precisely. (even with my glasses)
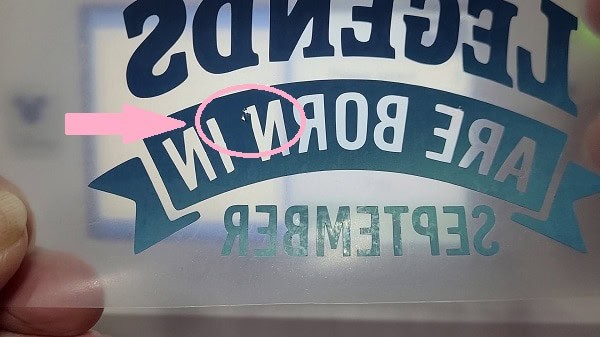
I did manage to iron this design on so that the error wasn’t noticeable HOWEVER then I had a major! Read on!
Heat Press your HTV onesie
My Heat Press is a large 12″x10″ which is perfect to create T-Shirts etc. I found it a little cumbersome to use for a tiny little 000 HTV onesie design.
To protect the onesie I used a Teflon sheet. I have used these for years now and love how they protect your projects from any unwanted heat.
Now, often your carrier sheet will lightly stick to your project and make it easy to keep in place while you apply heat.
This HTV did not!
It lifted and moved and was basically a pain in the patootie! It may have simply been because it was a smaller design or it could have been HTV brand related too.
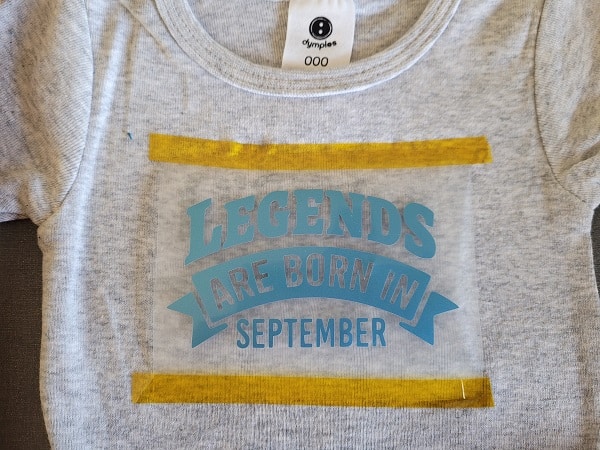
Solution? I went and found my heat-resistant tape and used that to hold it in place nicely. It worked a treat.
Below you will see a close-up of the tape that I used for this project. It was a roll that I purchased ages ago and was perfectly fine for this. Possibly due to it being material?? If you are planning to use the tape for sublimation I do not recommend the yellow tape and prefer this one.
The yellow tape pictured left yellow residual marks on my sublimated coffee mugs. Not good!
The other brand I like but find a little more expensive for me to purchase (may not be where you are) is the Cricut brand.
Well, until I had my major OOPS!!
Oops … let’s fix an error
Ok, so this one is a doozie of an error so you will be interested in how I resolved it.
Problem, The HTV was not ironing and staying attached to the onesie. So I pressed it a couple more times to get it to adhere which is normally a really good solution. In this case though, one of the tiny letters stuck back onto the carrier and not correctly! (wrecked it)
At this point, you are faced with a couple of choices.
- Cut the wrecked or missing object out singularly and carefully add it back into the correct location on your design. I have used this method and it does work a treat for some project oopses. This project was not one to fix easily like that.
- Look on in horror, carefully place the project in a drawer so no-one notices, and start again from scratch. (I have a few embroidery projects in which I have used this tactic LOL)
- While option 2 was one that I seriously considered, I decided to give this next option a try to see if that worked. Let’s face it, option 2 could be a backup plan as I had a spare onesie and spare HTV.
Option 3 is re-heating the design and removing the wrecked HTV from the onesie bit by bit. Not necessarily the quickest solution however I am pleased that I attempted it as the end result was worth it.
At this point, I bailed on my large, lovely Heat Press and resorted to my iron. A dry iron is an option for creating HTV projects if you don’t have a Heat Press and it is also a great option if you are working on a tiny HTV onesie design.
Pictured below is my project part way through removing the HTV design.
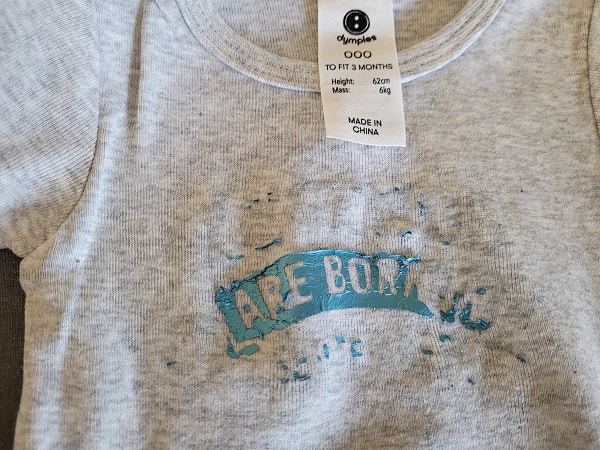
Here is the next milestone where it is looking more like the onesie that I started with before the stuff up.

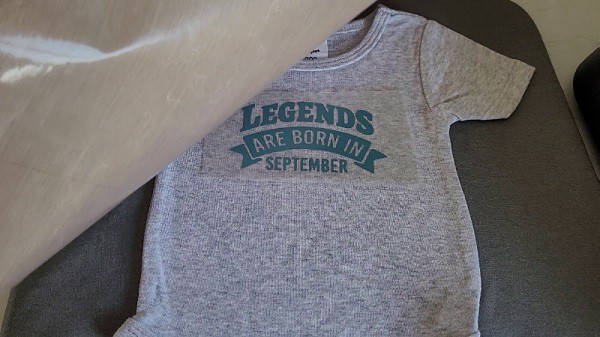
Now we are in business again. The new design has been ironed on successfully and it is hardly noticeable that anything went wrong at all.
Aim to line up the newly cut design in exactly the same place the previous design was ironed on. This was my aim, however, I missed by a small margin. It still looks fine. Crafters are always very critical of their makes… my advice is… don’t be! It is craft!
This onesie is for my new grandchild so I will check whether the slight mark disappears over time. If this was a design I was planning to sell, then I may not have attempted this fix.

I hope that you have enjoyed this tutorial, including the mishaps along the way.
Happy creating!!!

Join me on facebook
Welcome to Create With Sue facebook where you can make friends, share your creations and ask questions for additional assistance.
Join me in the Scan N Cut – Let’s Create With Sue facebook group.
I would love to see you there.

Exploring the New Affinity Designer V3 — My First Impressions
Today we are exploring the new Affinity Designer V2 software which was released on October…
Cutting Cardstock: Tips for Better Results
Cutting cardstock with your ScanNCut can produce beautiful results, but sometimes you may notice issues…
Embroidering Cardstock: A Creative Twist for Your Craft Projects
If you’re looking for something a little different to add to your cardmaking or papercraft…

How to Create a Money Pocket for a Card with the ScanNCut
Create With Sue Resource Library – How to Access it