Creating an LED light is great fun. I made this color-changing light using an Acrylic Light set using my Scan N Cut and it is a very easy project to do. This project can be made with either the Scan N Cut or a Cricut cutting machine. I have included an SVG Unicorn file for you that will suit either cutting machine.
Most of the instructions below are for the Scan N Cut however if you have a Cricut, pick out the bits and pieces of information that you need to create your own LED light.
Create a Unicorn LED light video tutorial.
Welcome to this comprehensive video guide on creating your very own Unicorn LED light! In this captivating tutorial, you will walk through each step, ensuring a delightful and enlightening experience. The video is accompanied by additional instructions in the post below, making it effortless for anyone to follow along. Get ready to bring a touch of magic into your life with this enchanting DIY LED light project!
Disclaimer: As an Amazon Associate, I earn from qualifying purchases. Links included in this tutorial may be affiliate links, Amazon or others, meaning I may earn a small commission at no additional cost. These commissions will help me continue creating content for you. Thank you for your support! Read my very boring full disclosure policy here.
What do you need?
- Adhesive vinyl – I used matte frosted vinyl for this project
- LED light – the kit included the clear acrylic circular upright and the light base
- Transfer sheet / tape
- Weeding tools
- Scan N Cut or Cricut
- A design – I have included the Unicorn featured in this design for free in my Resource Library
Where to buy the LED lights
Now, this may depend on where you are living. I purchased this LED light which has a wooden base at Acrylic Blanks in South Australia. You can view what they have available on their website here. When I checked with them they indicated that they shipped internationally. I have no affiliation with this company, however, I was very excited to find them and their range of blanks.
Next, I checked Amazon and was delighted to find these ones which, while a plastic base, were quite cheap in comparison to the wooden bases LED light that I selected. They came in a white base as well which would have suited Matilda’s room nicely.
While wandering around Amazon I discovered a number of different bases which looked great. There were some wooden-based LED lights and some interesting-looking crackled paint ones. When purchasing you will need to check whether the acrylic blank insert is part of the kit or needs to be purchased separately. The bonus of these lights is that they have a remote control… the one I used only has a manual button.
The vinyl I used
I purchased the frosted vinyl at Acrylic Blanks as well. It is the 3M brand which overall was very easy to cut. Something to consider is that frosted vinyl weeds easily, however, is a little harder to see when you are weeding the design. I will cover this a bit more later in the tutorial. On the plus side.. the finished results are AWESOME.
Here are a few that I located on Amazon. Be careful when selecting frosted vinyl as it varies greatly. I personally liked the matte look so check whether it states Matte or Gloss and that it is actually a frosted look once applied.
What else am I covering?
What else am I covering in this tutorial? Well, I made a couple of mistakes while making this project – OK, a number of them..LOL. I will cover how I fixed them and how you can avoid making the same mistakes.
Download the design
First up, head over to the Resource Library and download the free design. If you don’t have the password, it is very easy to sign up. Instructions are on the page.
Designs in the Resource Library are in alphabetical order. You will find this Unicorn design in the Resource Library under V for vinyl. The file will be in a zipped format and includes SVG, FCM, and SVG for Cricut format. If you need assistance with unzipping then check out this tutorial on How to Unzip on a PC.
NOTE: I have only uploaded the Unicorn and not Matilda’s name. You can easily add your own text if you want to include a name on your LED light.
You could also choose to use a design of your choice for this project… the steps will be the same for you to follow.
Once you have downloaded and unzipped the file, import it into Canvas Workspace. If you need more help with this step I have tutorials showing it in depth. This is for the downloaded version of Canvas Workspace and this one is for the online version of Canvas Workspace.
The picture below is using the downloaded version of Canvas Workspace. If you are uncertain about the difference between the two versions check out this tutorial for more information.

Create a template for sizing
Next, we will create a template that matches the size of your LED light acrylic blank. My blank was a circular piece of acrylic however this technique will work for whatever shape you have purchased your LED light with. Where I purchased mine they had a few to choose from, square, oblong, and circular are the most readily available. You will be amazed by the various shapes that are available once you start looking at LED lights.
Add the correct shape
Add a shape that suits your acrylic blank. Measure your acrylic blank and after highlighting the shape, head to the Edit menu and adjust the shape to match your measurements.
Ensure that the “Maintain Aspect Ratio” is checked on. This will keep the shape in the same proportions and resize accordingly.

Once you have resized the template shape, you can get ready to move it over the top of your design.
Add text to the design
In this section of the steps, you can add any additional items you would like to include eg personalizing the LED light with a name. (that was my favorite part, I love personal items)
My design had straight text added however the circular acrylic blank lends itself to creating a curved text name. Here is a tutorial on using the Fit To Path feature in the downloaded version of Canvas Workspace. I created a card in the tutorial however the Fit to Path will work for this project as well.
NOTE: If using Fit to Path, remember that the Fit to Path process will need to be separate from the circle template that we are creating in this tutorial.
Alternatively, straight text looks great too! If you want a joined effect make sure that you overlap each letter slightly and then weld them together to achieve a nice joined appearance. Some fonts load automatically joined together by still may need welding. Look closely at your text to see where the cut lines are.
Group your design to make life easy
To make it a little easier for you, select all the components of your design and Group them together. You will then be able to move either shape very easily around the mat and easily resize ALL the pieces of the design at once to suit the template. Selecting ALL the pieces of your designs will ensure that they resize in the correct proportion to each other.
You can group a number of ways in the downloaded version of Canvas Workspace. One way is by going to the top menu and then to the Layer dropdown. Select Group. Another way is at the bottom of the Layers panel once all the pieces of the design are selected.
In the picture below it is the icon where the pink mouse cursor is.

Resize your design to fit the template
Once you have completed your design to how you would like it then you can resize it to suit the template.
TIP: Using the lock feature in the downloaded version of Canvas Workspace will keep the circle template stationary in the location you are working while you adjust your main design. The Lock feature can be found in the box next to the Eye (Hide and Unhide) icon.
When resizing, allow plenty of room for the design to be placed on the acrylic blank.
Mistake #1 – This was my first mistake while making this particular project. I had the design the size I thought was great however it was a bit tighter fit than I planned and I didn’t quite allow enough room for the top of the “d”. My issue was that the top of the “d” hung over the edge of the circular blank by the tiniest piece… just enough to annoy me LOL. If I had placed the design slightly lower on the blank it would have been fine.
TIP: Check the lowest area where you can place the vinyl on your blank so that it will not interfere with the base of the LED light before you start to transfer your design to the blank.
The solution I took for this was to trim the excess of the “d” off which luckily looked fine and really hard to notice. Often when we make an error with crafting, we are our own worst critic. NO ONE else notices the tiny errors. It’s craft!

Weeding boxes
At this point, you can either transfer the templated shape to your Scan N Cut with the design and use it as a weeding box, delete the shape entirely, or simply use the eye icon in the Layers panel and hide the circle template so that it does not transfer to your Scan N Cut. See the eye icon in the Layers panel below.
Export the design
Export the design to your Scan N Cut by going to File and then down to Export. Choose the method that suits you to send the design over to your SNC. The options are shown below.

Lets cut the design for the LED light out
Head over to your Scan N Cut and import the design ready to cut out. I sent via the Internet so I selected the wifi icon to import my project. The options from left to right are – from your SNC, from wifi, USB bottom left, and directly connecting via cable on the bottom right.

Scan the materials for placement
I love this feature. Scan the frosted vinyl that you have placed on the mat using the icon shown below. This provides you the ability to precisely place anything… you can find more information about precision placement here.

The frosted etched vinyl is quite hard to see due to its coloring. You are able to change the background of the scan to make it easier to see the material you are scanning. This works great for really dark colors where you cannot see the design at all and light colors where it might be a little difficult to see the design for precision placement. More information if you need it here.

Using the Half Cut feature on the DX Scan N Cut
To cut the vinyl out you will need the Half Cut setting on a DX Scan N Cut. Select Cut and then go into the Tool icon. Scrolling down you will see the Half Cut setting and make sure it is on. You are also able to select a weeding box if you want to add one around your design. The weeding box does make it a LOT easier to weed vinyl design and is often a good option to choose.
NOTE: If you have already retained the circular template shape when you exported your design, you will not need to turn the weeding box on.

Weed your design
While the 3M frosted vinyl was really easy to weed…. frosted vinyl is quite hard to see. The 3M vinyl being a matte finish was interesting in that the backing paper was shiny and the actual design was dull and hard to see. My best tip for this is that before you weed too far, make certain you are quite clear about what is the backing paper and what is the design.

As you can see above it is hard to tell the difference. The fact that the frosted vinyl was difficult to see led to…..
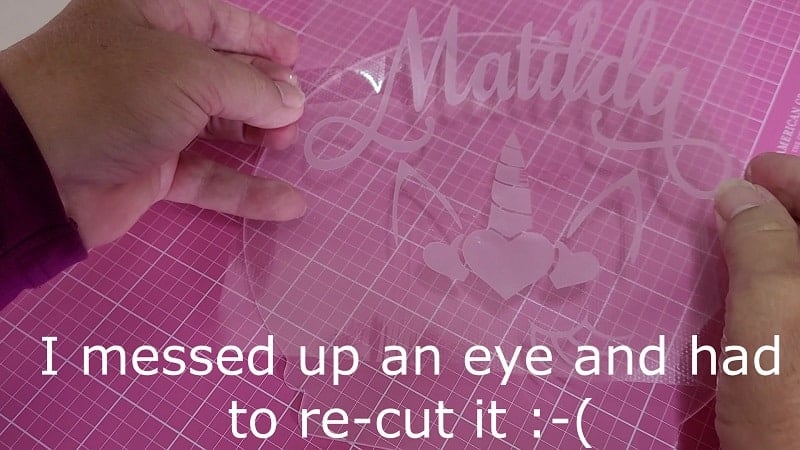
Mistake #2 – I wrecked one of the unicorn’s eyes (eyelashes?). Yep… really annoying. I went back to Specsavers after I did this and got some new glasses which may help with the next project.
The solution was to cut another eye out and once the design was placed on the acrylic blank, add the eye in the correct placement. It would have been much easier to do it all in one go however, with a little care it lined up perfectly.
Using the Transfer sheet
A light grip transfer sheet was perfectly fine to use as the 3M frosted vinyl picked up really easily and released onto the project well.
If you are having difficulty picking your vinyl up you may need to try either a medium grip or a strong grip transfer sheet. Glitter vinyl is one that often needs a strong grip transfer sheet/tape for transferring to projects easily.
Alternatively, if you are having difficulties with your vinyl releasing from the transfer sheet, use a less tacky one or pat your transfer sheet on a lint-free cloth to reduce the tackiness.
Creating your LED light
Ok, so we are getting to the exciting part of the project.
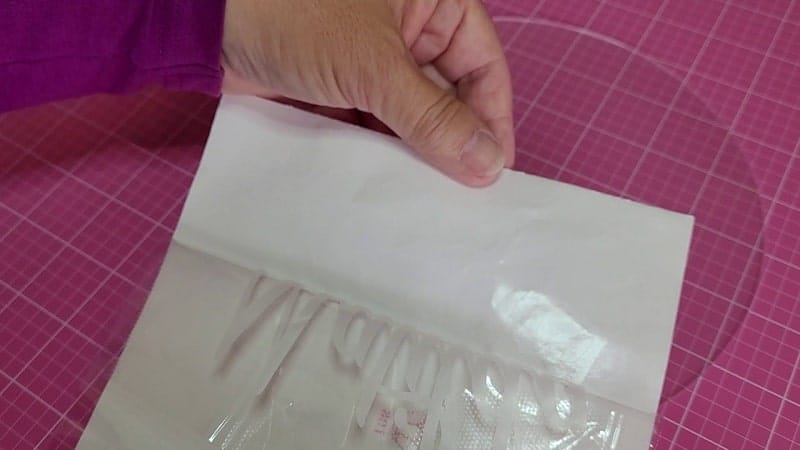
Remember to remove the plastic protective covering from the acrylic blank. Most blanks have some form of protective cover on them. Some coverings are clear plastic and others are paper-based. The paper ones are REALLY obvious however the clear plastic protection may not be.

Aligning your design on the blank
This part of a project can be a bit tricky. Alignment doesn’t always go to plan (remember Mistake #1)
Place your transfer sheet over the acrylic blank, lining it up the center of the design with the center of the blank. I used the grid pattern on my self-healing mat to assist me to a certain extent by lining up the grid with the center of the acrylic blank. Unfortunately, I had trouble keeping the project in the right place for the camera and moved it around so that you could see it.
Cricut also has a really nice self-healing mat however it does not have the grid pattern. (it is super pretty though)
If you look closely and you will see my missing eyelashes – Mistake #2
Press your design down firmly. I like using the scraper seen below as it has a really nice soft edge for when you want to add pressure but don’t want to gouge too hard. On the top side, it is a normal scraper that will apply a more rigid approach to pressing or scraping.

Finishing your LED light project
The unicorn looks pretty cute on the acrylic blank, doesn’t it? Have you spotted any more mistakes?
Mistake #3 – something happened to the middle part of the M. Can you see it looks a little different color? sigh… I had trouble wrangling the camera through this section of the project.
The solution was to use my Exacto knife to carefully cut away the piece that stuck up. Mine is like this one and comes in handy for all sorts of things. The repair turned out fairly well.
Mistake #4 – Looking closely at the left-hand long stretch of the M you will see a small line. The vinyl has a tiny crinkle in it. I considered using the Exacto knife and cutting a small piece out of it so that the vinyl sat flat again.
The solution I ended up choosing was to leave it alone. Some errors are better left than to risk wrecking the project. The downside was that when the light is on there is a tiny gap in the lighting at that spot. Ah well… Matilda did not notice nor care… she just loved that her LED light changed to pretty colors and that it had her very own name on it plus her favorite thing at the moment … A UNICORN!

The finished LED light
Doesn’t this LED light look awesome in various colors? The light kit also has the choice of white and yellow however these three colors were my favorite choices. The white with the frosted vinyl looked a little plain.


I hope that you found this tutorial helpful and enjoy making your LED light project. I would love to see what you make.
Join me on Facebook
Join me in the Scan N Cut – Let’s Create With Sue Facebook group. It is a group of awesome craft friends sharing and caring.
I would love to see you there.
Please feel free to ask any questions that you need.
Happy creating