Let’s have a look at the Scan N Cut tools. Many Brother Scan N Cut produced tools which include different cutting blades, a Brother pen holder, and a Universal pen holder that will hold other brand pens. Lots and lots of fun accessories to make your Scan N Cut more versatile and enable you to create magical projects.
- Cutting tools for your Scan N Cut
- Let's have a closer look at the standard tool
- Various Pen Holders and Accessories.
- Quick Guide
- Brother information
- Brother Pen Holder
- Universal Pen Holder
- Scan N Cut mats
- Foil Quill, Brother Foil Kit, and more..
- More Brother Scan N Cut Accessories
- Where to buy accessories for your Scan N Cut
- Interested in how to make your Scan N Cut mat sticky again?
- A video on how to clean your scanner
- Join me on facebook
- Other tutorials you may like
- Scan N Cut Basics Course
This post may contain some affiliate links for your convenience (which means if you make a purchase after clicking a link I may earn a small commission but it won’t cost you a penny more)! Read my full disclosure policy.
Cutting tools for your Scan N Cut
I will start this section by mentioning that there is more than one model of the Scan N Cut. I will cover the CM models and the DX models in this post.
IMPORTANT: The blade holders are not backward compatible between the CM models and the DX models. The CM cutting tools have a manual adjustment and the DX has an auto sensor in the tool. The DX models will accept the CM blades in manual mode…not in the auto sensor selection. The CM and DX mats are also not interchangeable.
Have a quick look here if you would like to find out a bit more information about the models.
Scan N Cut CM range
At this time there are two cutting tools produced by Brother. There is the standard blade and the deep cut blade. Often Brother will supply both when you purchase your machine however at the minimum they supply the standard blade.
CAHLP1 – Standard Cutting Blade for the CM models. It will fit both the CM and the DX models. Manual blade settings required.
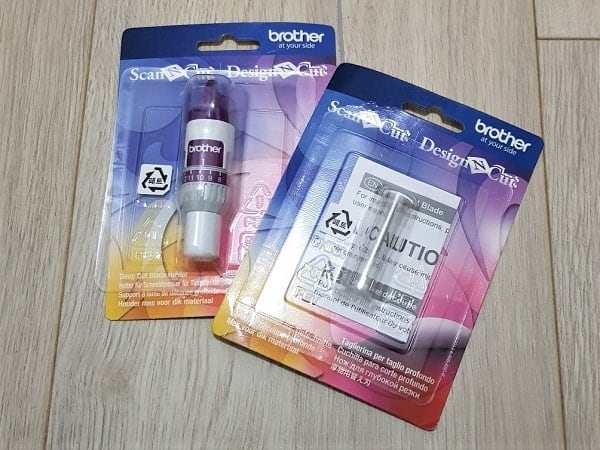
CAHLF1 – Deep Cutting Blade for the CM models. It will fit both the CM and the DX models. Manual blade settings required.
Scan N Cut DX range
The DX models have an Auto Blade Holder (on the left) and the Fine Blade Holder (on the right)
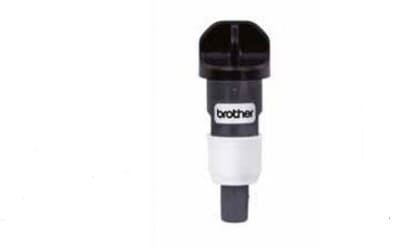
CADXHLD1 – Autoblade Holder for DX models only. Note the CADX in the coding.
CADXHLDQ1 – Thin Fabric Autoblade holder for DX models only. Note the CADX in the coding.
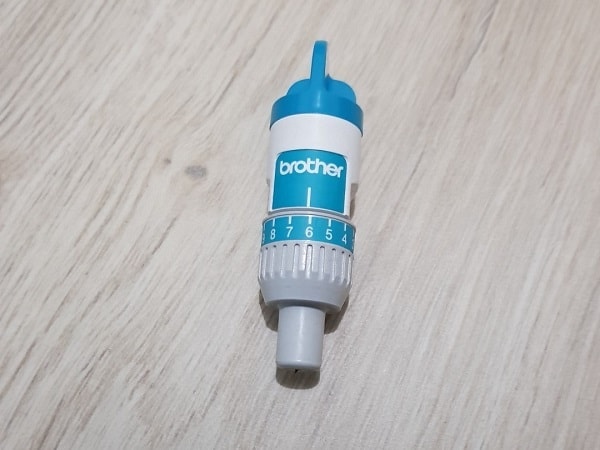
Let’s have a closer look at the standard tool
Various Pen Holders and Accessories.
If you mix up the various accessories and pen holders it can be a little difficult to work out which is which. Here is a quick guide to help you work it through.
CODE
Universal – Grey Label.
Small Universal – White Label
Calligraphy – Black Label
Paper Piercing – Pink Label
Foil Tool – Blue/Purple Label
Embossing – Light Blue Label
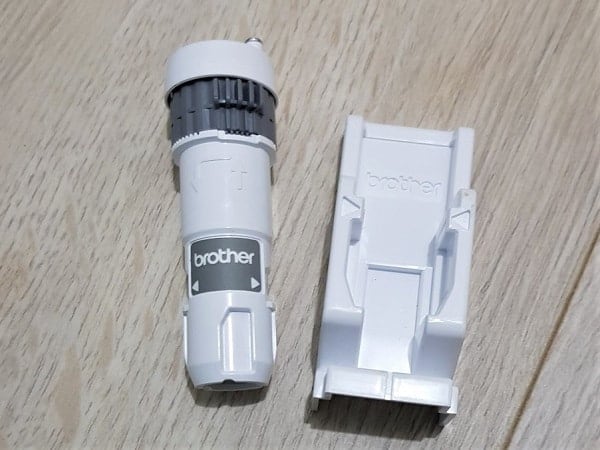
Universal Pen Holder
Grey Label
CAUNIPHL1 – works in both CM and DX models
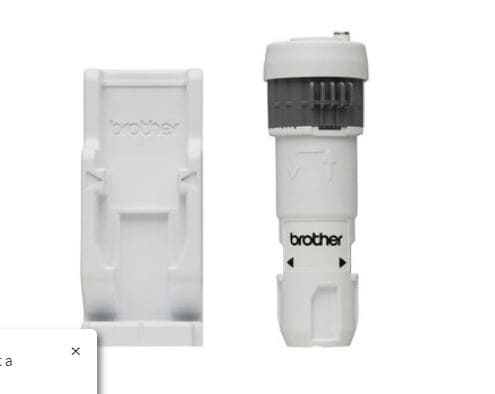
Small Barrel Pen Holder
White Label
CAUNIPHL2 – works in both CM and DX models
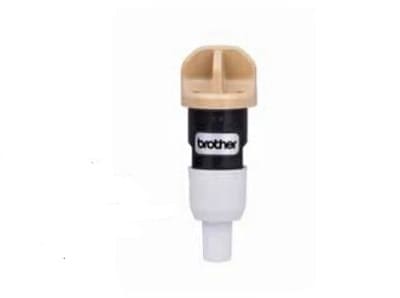
Calligraphy Pen Holder
Black Label
CADXCLGKIT1 – For the DX models only. Note the CADX in the coding.
Paper-Piercing Tool Holder
Pink Label
CADXPPKIT1 – For the DX model only. Note the CADX in the coding.
Foil Glue Pen Holder
Blue/Purple Label
CAFTKIT1 – Works in both the CM and the DX models
Embossing Tool Holder
Light Blue Label
CAEBSKIT1 – Works in both the CM and the DX models
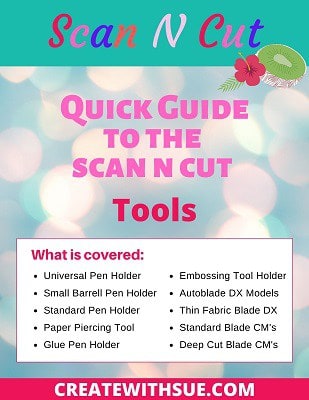
Quick Guide
I have created a Quick Guide that you can download to keep track of which tool is which. The download form is at the bottom of this tutorial.
Brother information
For more infomation and manuals you can check out the Brother site. They have a list of the Scan N Cut tools and accessories including their suggestions of where to purchase plus downloadable manuals for the accessories.
Australia
Here is the link to the Australian Brother website Scan N Cut tools and accessories that are available.
USA
And here is the link to the US Brother website for the Scan N Cut tools available.
Canada
Canadians you will need to move around this link a little to see the accessories section.
UK
I really like the UK site. This link will take you to a page that you can enter your model and it will sort through and find the accessories to suit.
Downloadable Brochure
And then there is this downloadable brochure. It has all the accessories which seem to correlate across the countries but please check properly before purchasing any codes from it.
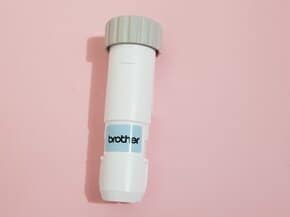
Brother Pen Holder
The Brother pen holder is another tool that normally comes with the Scan N Cut. The addition of these accessories I am showing you does depend on what model you purchase and where you purchase your Scan N Cut from. Look around for the best deal that includes the accessories that you are interested in. Often dealerships will create an enticing package to attract buyers. Even some of the online sales create enticing bundles which may include a sample range of vinyl to get you started and additional Scan N Cut tools.
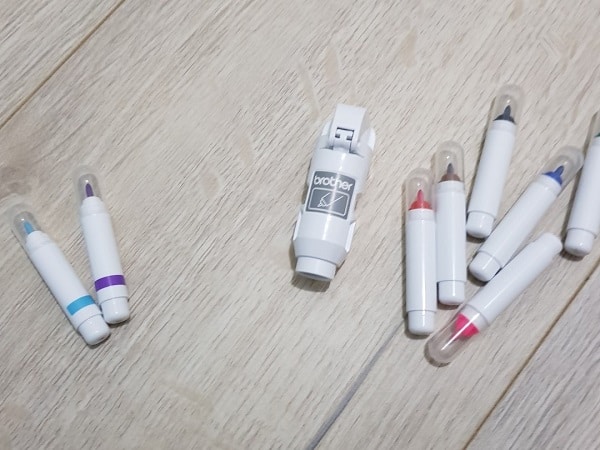

The pen holder works in both the CM range and the DX range of Scan N Cuts which makes life a little easier. It comes with a small range of colored pens and there is also a small range of erasable pens available. The pens in the picture with the stripe at the top of them are erasable ones. All these pens are fully enclosed inside the Pen Holder when in use on the Scan N Cut.
Universal Pen Holder
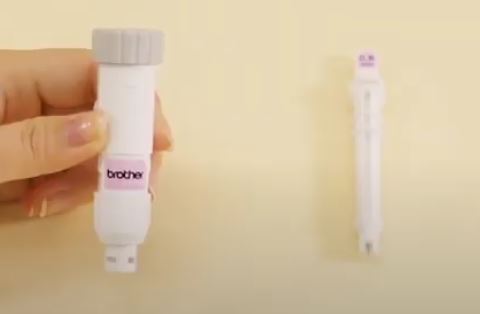
The Univeral Pen Holder has been designed to take other branded pens. It is a handy additional tool and one that I would recommend as it opens up more opportunities for personalizing your projects, particularly paper-based projects. Brother has also released a Small Barrel Pen Holder which can be used with narrower pens.
Universal Pen Holder (diameter of pen barrel 9.6 mm and 11.4 mm)
Small Barrel Pen Holder (Diameter of pen barrel 7.8 mm and 9.6 mm)

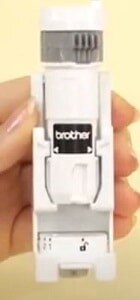
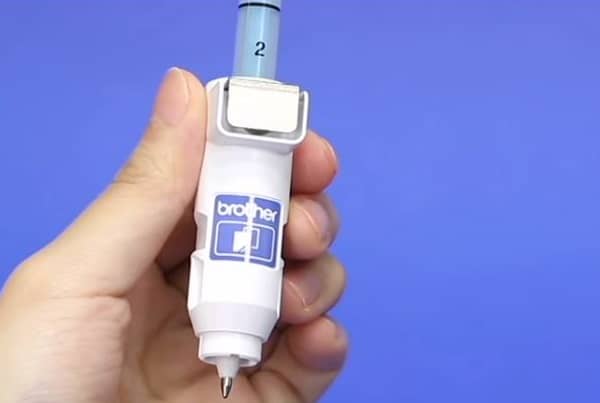
This Scan N Cut tool is very easy to use. You give it a twist at the top to open the gap wider and place the pen into the barrel. Then place the main piece into the guide to set the depth of the pen correctly. While in the guide you twist the top closed so it holds the pen firmly at the correct depth. It then pops into your Scan N Cut the same way the cutting tools do.
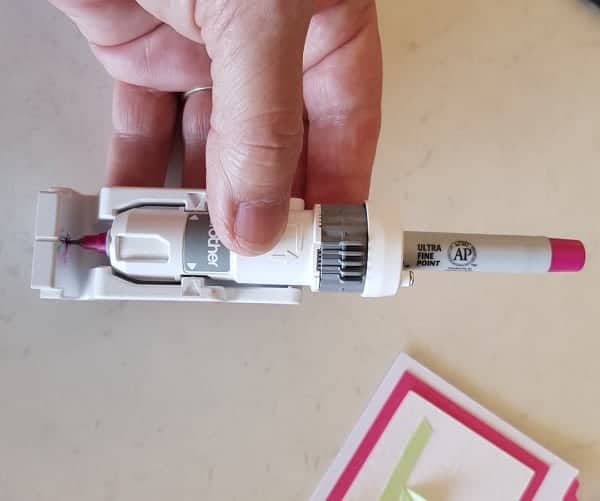
Here is the Scan N Cut Universal Pen holder with the pen in place. You can see I have matched the pen to the cardstock I used. The pen is an Ultra Fine Sharpie.
Note: the fine Sharpie’s that I have found do not fit into the standard Universal holder. The barrel of the pen is too thick for the holder. While you could grind them down to fit, it is much easier to purchase Ultra Fine instead.
If the pens you purchase are too narrow and don’t grip properly you can add masking tape or similar around their barrel to make them thick enough to fit firmly. I have done this will a set of Gel pens quite successfully. Alternatively, purchase the Small Barrel Pen Holder which works just the same as the Universal however, it is suitable for narrower-barrelled pens.
Video on how to use the Universal Pen Holder
Scan N Cut mats
There is a range of mats for your Scan N Cut. I will go over them in this section. The most important thing about the mats is for you to know that the mats that suit the DX range of Scan N Cut’s WILL NOT WORK in the CM range of Scan N Cut machines.
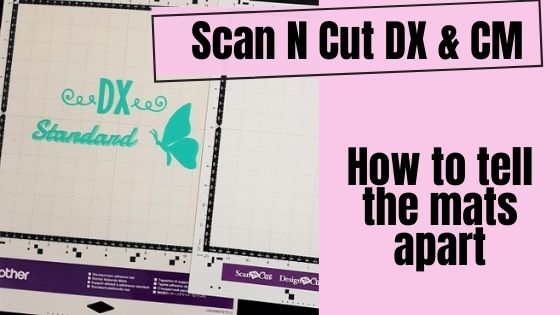
Here is a guide on how to tell the mats apart.
TIP 1: The mats for the DX range all have an X in the code for the mat. eg Brother CADXMATSTD12 which is the Standard Tack Adhesive Mat 12 x 12 Inches purchase code. If you have a DX look for the X.
TIP 2: The mat for the CM range can be inserted into your Scan N Cut from either end. This is great for maximizing your sticky areas on your mat or if you have a problem with a damaged corner etc. As I have mentioned before I have had the same mat that came with my Scan N Cut from the beginning. Unfortunately for DX owners, the DX mats only load one way.
TIP 3: If you accidentally cut through your mat you can use packing tape to tape the cut up from the back of the cut (on the backside of the mat)
Tip 4: the mats lost their stickiness very quickly. You can re-glue the mats with repositionable glue. I use Zig however Aileen’s Tack it Over and Over or Pinflair Stencil glue are also supposed to work well. Here is more information on how to re-stick your mat.
Types and sizes of mats for your Scan N Cut
What size does the Scan N Cut mat come in
The most used size is 12″ x12″ however, I love my 12″ x 24″ mat when I need to do something a little longer. The larger size is great for vinyl signs in particular. Not all Scan N Cut models will accept the 12″ x 24″ so make sure yours will prior to purchasing this size.
Cutting mat types for your Scan N Cut
Now, there are low tack and standard tack mats. As you have possibly already found out, the sticky does not last long on these mats which is a little … OK, really disappointing. I know I only had my mat for about 3 weeks, cut cards etc out, and boom .. no sticky left. Fortunately, there are ways to resolve this and I have a whole post on how to manage your mat. I am STILL using the same one I started with a few years later.
Do you need a scanning mat?
There is a mat available that is ONLY for scanning and cannot be used to cut your design out on. I personally don’t use my scanning mat as I mainly scan and cut however I do know that a number of crafters find that their stamps or similar scan much better due to the very white, clean, background. The scanning mat also has a clear attached cover on it which sits nicely over whatever you are scanning. Great if you are scanning something that you do not want to be damaged by sticking it to a mat.
You can certainly use your normal cutting mat to scan. It will scan even if your mat looks a bit cut and scratched and ordinary. (mine looks like that, I like to think of it as well-loved)
If you don’t want to buy a scanning mat and having trouble scanning you can always place some bright white card on your mat first and then use either some temporary spray adhesive on the back of what you are planning to cut or masking tape to stick it down. You need to still make sure what you are scanning is secured to the mat. DO NOT get spray adhesive on the edges of your mat where it goes through the rollers.
Embossing mat for the Scan N Cut embossing kit
Yep, there is a mat for embossing. The embossing mat is a bit thicker with a slightly padded feel to allow the embossing tool room to make an embossed dent in your project. I have more information on the embossing kit further down the post.
Using your cutting machine for fabric
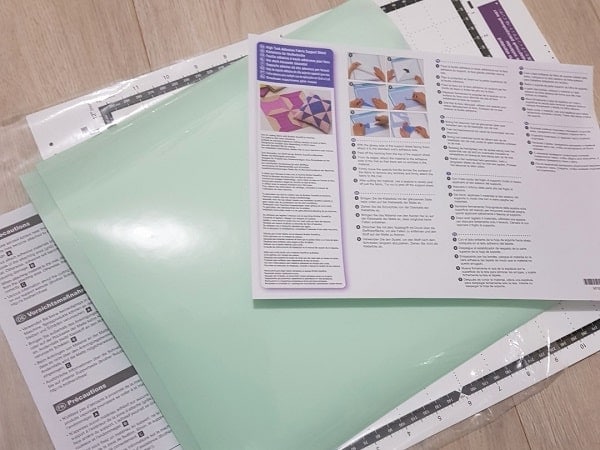
I have high-tack fabric sheets. I don’t really use mine however if you need extra tack then they are certainly an option to look into. They have been designed to assist with holding sewing fabrics down however you may be better off using Terial Magic or if it is for applique I use web bond or Heat n Bond which is like very fine interfacing except that it irons onto fabric and is a bit like double-sided tape only the fabric version. This is an iron-on product.
The advantage of Terial Magic is that it can be sprayed on and washed out again whereas the web bond retains a little stiffness and is more suitable for applique.
I found this video on Terial Magic and have included it for those who are interested.
Foil Quill, Brother Foil Kit, and more..
There are a few non-Brother accessories created for the Scan N Cut. I have the We R Memory Keeper Foil Quill which I love! It comes in a kit with adaptors to suit the Scan N Cut and other cutting machines like the Cricut and the Cameo Silhouette. I have written a post that shows you a little more about the Foil Quill.
Since initially purchasing the Foil Quill, I have bought the Brother Foil Kit and really like this kit also. The advantage of the Brother kit is that there is no heat involved.
Here is more information and a tutorial for the Brother Foil Kit
There is also a company called 3DFunprintz that has developed its version of the Univeral Pen Holder. While I haven’t used this pen holder it apparently will hold a thicker Sharpie pen.

And I keep finding more accessories for the Scan N Cut. I recently spotted a Chomas Precision tip for the Scan N Cut which is an Engraving tool. This newly released tool fits into the Scan N Cut like the other tools. Amy Chomas has a website that shows more information about the tool. If you are into engraving check it out. NOTE: this is a NON-Brother authorized product.
More Brother Scan N Cut Accessories
Embossing and Rhinestones
Brother has released more accessories for the Scan N Cut. Download the brochure above and you can flick through some of them. They include the Scan N Cut Embossing Kit and the Scan N Cut Rhinestone Kit to name a few. When you purchase additional kits and activate them they add additional features (depending on the kit purchased) to both your Scan N Cut and Canvas Workspace. Pretty cool really.
The embossing kit will enable your Scan N Cut to create line embossing and region embossing. While the line embossing is quite nice, note that creating a very detailed project using the region embossing can be quite time-consuming.
There is more information about embossing with the Scan N Cut (left) and using the Rhinestone kit (right) below in videos from Julie Fei Fan Balzer. Julie is a Brother representative and produces some great videos tutorials.
Calligraphy and Paper Piercing
Another new accessory is the Brother Calligraphy Kit which has been released specifically for the DX range, (sorry CM users) You will note that it has an X in its purchase code. The starter kit includes:- Calligraphy pen holder and support.- 2 pen holders.- 3 calligraphy dual tip pens. – Card with different calligraphy fonts.- Activation card.- 30 calligraphy templates.
The Calligraphy set looks fun.
And then there is the Paper Piercing Kit. This too is only for the Scan N Cut DX models.
Printable Sticker and Stamp Starter
Lastly, I will just mention that there is a Printable Sticker Kit and a Stamp Starter Kit. Both of these kits work with all Scan N Cut models. While I have the Printable Sticker Kit, it was one of the first kits that I purchased however, to be honest, I haven’t really used it a great deal. Stickers are very easy to create without the kit.
Videos of more tools
Where to buy accessories for your Scan N Cut
It can be a bit of a challenge finding the accessories for your Scan N Cut. If you have checked out the links to the accessories on the Brother website you will have noticed that there are some suggestions on the site.
Other places to look are:
USA
Amazon is a great option particularly if you do not have a dealership within easy access. I will include some easy links for you. ALWAYS DOUBLE CHECK THAT THE ACCESSORIES WILL WORK WITH YOUR MODEL.
Embossing Kit – can be slow to create detailed region embossing designs, it can do a great job with paper.
Printable Sticker Kit – did not find this very useful. While it has some quite nice templates that come with it, you can make sticker shapes up very easily yourself.
No brand fusible webbing – I have included this one, it looks a little different to the one I have been using (mine is unbranded too though) however might be worth giving a go.
US Ebay is another great option.
I will include a link to scan N Cut accessories on Ebay although I noticed a lot of them are sourced from Australia… Weird hey! It may just be my search for them because search engines are smart and they know where you live LOL. Try your own search as well using the term… Brother Scan N Cut and then the product you are looking for.
Australia
Now, this is just my personal opinion however I have found that Amazon Australia is very expensive. My recommendation would be to shop Amazon US and use the above links. If you want to bypass shipping costs then look into joining Amazon Prime. This will often give you free shipping and a bit quicker too. It is like VIP shopping.
Echidna Sewing. I have a soft spot for Echidna Sewing as this is where I purchased my very first Scan N Cut a few years ago.
Blackmore & Roy. This is another site that seems to stock a good range of accessories for your Scan N Cut.
Spotlight has an online presence that services Australia, New Zealand, and Singapore and also stores across Australia. I am not certain if they have stores outside of Australia however if someone knows please let me know.
Ebay.com.au is a much better choice than Amazon for Aussies.
UK
Ebay and Amazon are both options to consider especially if you don’t have a local dealership.
Craftelier website is another option for both UK and Europe. I believe it is based in Spain and they have been set up to service the UK market. Worth checking out. Thank you to Nikki for this information. Nikki writes “The Unofficial ScanNCut UK Blog”.
Create and Craft has a lot of Scan N Cut products however I don’t have any personal experience with them and I have heard a few complaints about their service. Their website seems to have lots of useful information on it, however.
Plus, do not forget your local sewing centers. If they stock Brother sewing machines they should be able to place a special order for a Scan N Cut machine of your choice. Worth checking out.
I hope that you have found this tutorial useful.
Until next time,
Happy creating,


Interested in how to make your Scan N Cut mat sticky again?
A video on how to clean your scanner
Join me on facebook
Join me in the Scan N Cut – Let’s Create With Sue facebook group.
I would love to see you there.
Other tutorials you may like
- Baby Card ~ Romper
- How to choose a Scan N Cut to buy
- How To Manage SVG Files
- Glitter and Embossing Techniques
- How To Use The Foil Quill
LIKE IT……PIN IT

Scan N Cut Basics Course
Would you like to learn how to use your Scan N Cut to gain the most from it?
A free course is available for you – check out what is on offer!


Hi Sue,
I noticed you have featured my 3DFunPrintz pen holders on your site but say you haven’t tried them. Firstly, thank you. features like this really do help me so I really appreciate it. Carl
You are very welcome Carl. I have emailed you, not certain if you received it. Sue
Hi my scanncut dx1200 cut of line with direct scan and cut…almost 3mm to 5mm from the outline.. I tried to fix it by put a white paper without line on my mat and the machine had to cut crosses and stuff but still it doesn’t cut on the lines. What do I do wrong… thank you
It sounds like you have tried to re-calibrate your Scan N Cut. This would be the correct solution. Have another go at re-calibrating. Pay very close attention to where you are pinpointing the calibration marks and mark precisely. If this still produces a 3 to 5mm variance see if you can compensate during the calibration process.
I’ve had a stroke which has left me not being able to read. I am dictating this. One of the problems that I have is that i have mixed up my blades, I have four but one us the rotary, which is an obvious one. But among the other three is a vinyl and two standard, i think. Is there a photograph of them all together? I’m not talking about the housing for the blades but the blades themselves.