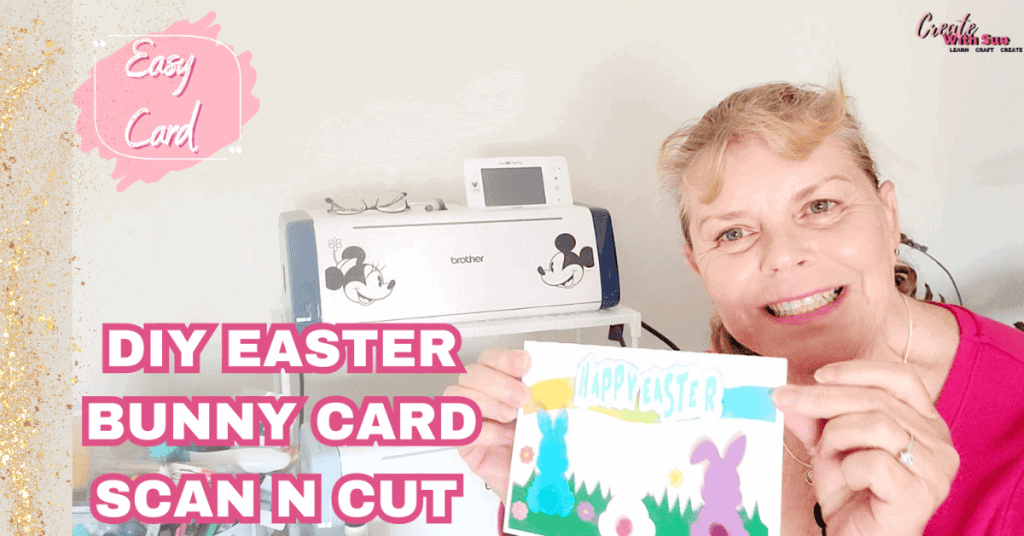
In this tutorial, we are creating a Mandala Bell Tag using the Scan N Cut cutting machine and Canvas Workspace. I have included the FREE SVG design in my Resource Library. This design has a beautiful mandala design on the front, a small hole at the top for threading a cord, and includes the option to cut an extra backing layer that swings freely. The addition part of the design is perfect for adding a name or sentiment.
The instructions are very similar to the mandala Christmas Tree tag, therefore I will go through them fairly quickly.
Let’s get started!
Disclaimer: As an Amazon Associate, I earn from qualifying purchases. Links included in this tutorial may be affiliate links, Amazon or others, meaning I may earn a small commission at no additional cost. These commissions will help me continue creating content for you. Thank you for your support! Read my very boring full disclosure policy here.
Mandala Bell Video Tutorial
Make sure you are subscribed to my YouTube channel so that you don’t miss out on new videos as they are released. Watch the video and use the written instructions below to create this lovely bell design.
Download the Free SVG design from the Resource Libary
To begin, head to my Resource Library, where you can download the free Mandala Bell Tag SVG. You will find it under “C” and scroll down to the Christmas section. The design is ideal for Christmas, Weddings, Anniversaries or any other memorable event. My daughter suggested even back to school.. (school bell)
Included in the zipped folder is the SVG for both the ScanNCut and Cricut cutting machines. If you need help on how to unzip you will find a tutorial here.
While you are there, why don’t you grab one of the other free designs in the Library? You will find a link to their tutorial to help you create them.
Importing the Design into Canvas Workspace
My preference is to use the downloaded version of Canvas Workspace however the design will be fine if you wish to import it into the online version of Canvas Workspace or directly to your ScanNCut.
Here’s how to bring in the design:
Open your downloaded version of Canvas Workspace. Use the top menu and the File menu tab. Scroll down to Import from your Computer (or from your ScanNCut). Alternatively, use the SVG icon in the left-hand menu. Both ways work well.
Adding a hole to your project
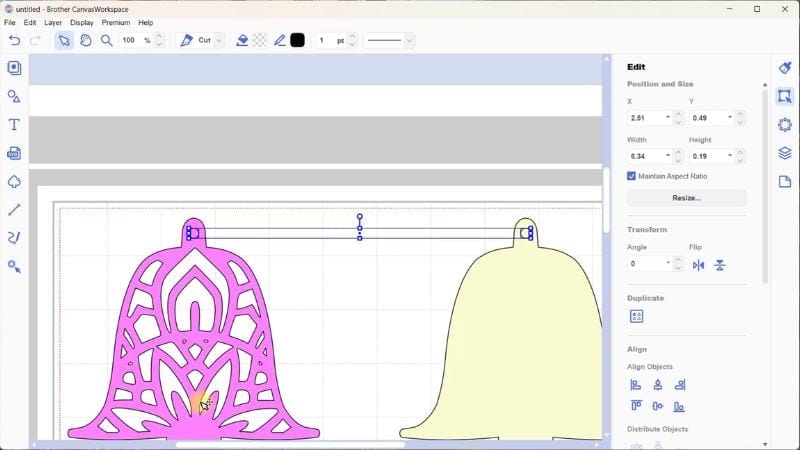
In the video, I show you how to add the hole accurately to match more than one object. The steps are to add a circle from the shapes menu. While selected, grab the corner handle with your mouse and drag it down to the size you require. You can also use the size field in the Edit panel on the right-hand menu.
This circle was sized at .19 inches. I have been successful with circles smaller than this size however you need to create the hole to suit the medium that will be threaded through it.
After sizing the circle for your project, position the circle where you want it. For this Christmas bell project, I aligned both bell pieces to the top edge first. Then, I placed the circle near the top center of each piece. To ensure proper alignment, I selected one bell shape and, while holding down the Shift key (PC), also selected the circle for that shape. I then aligned the circle vertically with the bell shape.
Repeat this for the other bell shape. Make sure each bell has its circle positioned vertically in line with its shape. Then, select both circles and confirm they are horizontally aligned with each other, as shown in the picture below.
Once you are happy with the position of your circles, ensure the circle is the top layer above the bell and use the Subtract feature to create the hole.
Preparing the Design for cutting
I have edited the Christmas Bell design SVG to include a hole at the top, perfect for threading a ribbon or cord, and added another copy of the backing design. All you will need to do is prepare it for cutting:
- Move the bell design to the center of the mat for easy viewing.
- If you’d like to personalize the swinging layer with text now, you can add it in Canvas Workspace using the Text Tool. Make sure it fits neatly inside the backing bell shape. To write the text instead of cutting it out, select the text and set to Draw.
This can be done by locating the Cut icon next to the shape and dropping it down to choose the Draw icon (download version). You will also notice it lives in the top menu and is visible when the text is selected and hidden when it is not.
Note: A box appears around shapes once they are selected. To select multiple shapes you can draw a pretend box around the shapes/text you want selected. Alternatively, in the Layers panel, you can select the shapes.
I have tutorials for creating innovative text designs. Make sure you check them out when you get a chance.
Exporting the Design to Your Scan N Cut
To send the design to your Scan N Cut, you can use Wi-Fi, USB, or a direct computer connection. For this tutorial, I’ll be using Wi-Fi.
- Export the design from Canvas Workspace.
- Retrieve the file on your Scan N Cut machine.
- Double-check that the design has been imported correctly.
Cutting the Layers for the Bell Tag
Now it’s time to cut the layers for the Mandala Bell Tag. I’ll be cutting three layers:
- Backing Layer 1: White cardstock (this forms the solid backing). I also cut one from some shiny silver cardstock which complemented the design. ( I loved this version)
- Swinging Layer: A duplicate backing in contrasting cardstock for writing a name or sentiment. I used white cardstock again.
- Mandala Front Layer: Intricate bell design cut from brightly colored cardstock or glitter cardstock. It looks gorgeous in the silver glitter cardstock however make certain you use encapsulated glitter cardstock. I also used a pretty Christmas red.
Step 1: Cutting the Backing Layers
Start with the backing layers:
- Secure your cardstock to the mat. I often add a piece of painter’s tape (masking) to add a little extra security.
- You can use a brayer to ensure the cardstock is firmly adhered if needed. Caution needs to be taken with a brayer if your mat is sticky. The cardstock may stick too firmly and not lift off the mat nicely. If you have trouble with your mat I have a heap of tips that will help. You will find them here.
Cutting Tips:
- Make sure your mat isn’t too sticky to avoid tearing the cardstock.
- Use long strips of tape for better hold during cutting. Longer strips are less likely to come adrift during the cutting process and also much easier to locate if it accidentally gets caught up.
Once the backing pieces are cut, duplicate the cut process for the swinging layer using a different cardstock color. Lift the pieces off the mat carefully by bending the mat slightly and flicking the design free.
Step 2: Cutting the Mandala Front Layer
For the intricate bell mandala design, I’m using darker green and some glitter cardstock.
- Delete the backing layers from the mat layout in Canvas Workspace, leaving only the mandala design.
- Duplicate the design as needed to cut multiple tags at once. The + icon in the top center is the one to create duplicate shapes. You simply select how many shapes you need.
- Arrange the designs manually or use the Auto Layout feature to optimize placement on your mat.

Pro Tip:
If you’re cutting from multiple cardstock colors, place smaller cardstock scrap pieces on your mat and use the Scan feature on your Scan N Cut to align your cuts perfectly.
Once the cutting is complete, carefully peel away the excess cardstock and remove the mandala pieces.
Assembling the Mandala Bell Tag
Now that all the layers are cut, let’s assemble the tag:
Glue the Mandala Front Layer:
Use a precision glue like Art Glitter Glue to attach the intricate mandala design to the main backing layer.
Ensure you add glue to all the smaller pieces, especially the delicate edges that might lift.
For this project, I found it easiest to leave the Bell tag on the table with the glued section facing upwards and place the backing down onto it.

Attach the Swinging Layer:
Thread a piece of silver stretchy cord through the hole at the top of the backing layer and tie it securely.
Place the swinging layer behind the main tag so it can move freely. This is where you can write a name, message, or sentiment. If you did not create it in Canvas Workspace, you can add it using your ScanNCut.
There are multiple options for hanging your tags and decorations. These include fine macrame rope, Faux leather jewellery cord, regular string, ribbon (nice), and pretty much whatever suits your project.
Optional Embellishments:
Add extra sparkle with glitter cardstock, rhinestones, or small embellishments. The glitter cardstock is SO pretty, isn’t it!

Final Touches for the Bell Tags
The completed Mandala Bell Tags look beautiful and versatile. You can customize them further by using different cardstock colors, glitter accents, or ribbons.
Here are a few ideas for using the swinging layer:
- Write a recipient’s name for a personalized gift tag.
- Add a small sentiment like “Merry Christmas” or “With Love”. Even a Bride and Groom’s name and wedding date would be lovely.
- Use these as table place cards for festive dinners. So many uses.
Finished Mandala Bell Tags
These tags are perfect for Christmas gifts, Wedding gifts, cards, or decorations. The added swinging layer gives them an extra touch. The glue is still not dry in the photo below, the glue will dry nice and clear.

More Christmas Fun
You will find two more projects similar to this one. The mandala Christmas Tree card and the machine Christmas Tree tag design. A pop-out Christmas Tree card… and… this super cute threaded string design which lends itself to different beads, embellishments, or a great project for the children in your life.
In each of my tutorials, I aim to cover how to use the various features and tools in either Canvas Workspace, your ScanNCut, or BOTH! Stay tuned for more Scan N Cut tutorials.
Join me on Facebook
Join me in the Scan N Cut – Let’s Create With Sue Facebook group. It is a group of awesome craft friends sharing and caring.
I would love to see you there.
I hope that you have fun creating these Christmas designs. Please feel free to ask any questions that you need.
Happy creating


Would you like to learn all about creating your very own designs in Canvas Workspace? This course is ideal for beginners and intermediate users of Canvas Workspace (downloaded version)
You can find more information here!