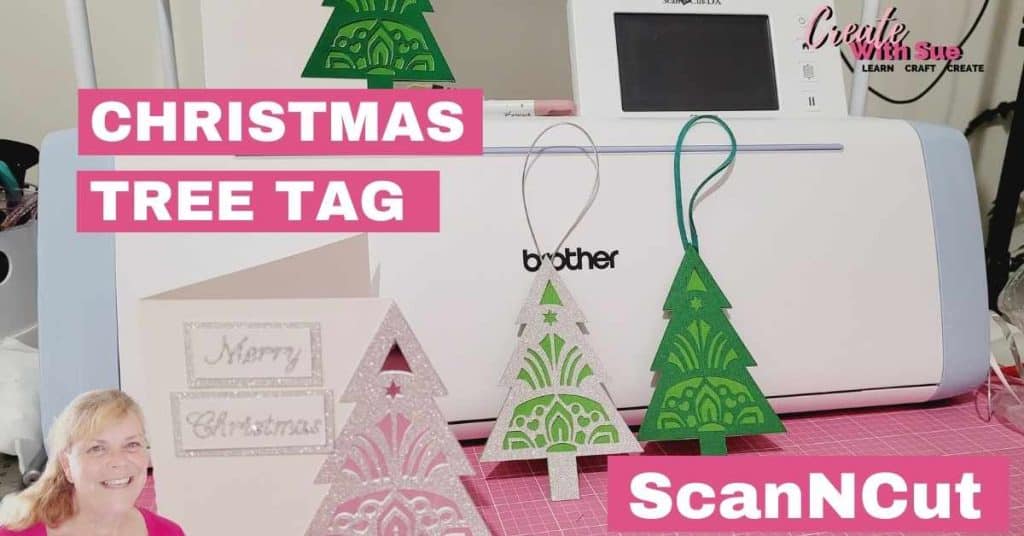
Creating a matching Christmas Tree Tag for the mandala Christmas Tree card with your ScanNCut is so easy. This mandala Christmas Tree tag matches the mandala Christmas Tree card. You will find that tutorial here.
BOTH projects include the free SVG in my Resource Library for you to enjoy.
In this post, I have included the video and written instructions so that it will be super easy to follow.
Disclaimer: As an Amazon Associate, I earn from qualifying purchases. Links included in this tutorial may be affiliate links, Amazon or others, meaning I may earn a small commission at no additional cost. These commissions will help me continue creating content for you. Thank you for your support! Read my very boring full disclosure policy here.
Video Tutorial for the Mandala Christmas Tree Tag
Check out the video on how to make this super fun Christmas Tree tag.
Download the Free SVG file from the Resource Library
To begin, head over to my Resource Library, where you can download the free Mandala Christmas Tree Tag SVG. You will find it under “C” and in the Christmas section.
While you are there, why don’t you grab the free Mandala Christmas Tree card? (I know the names might be a little confusing for you …I didn’t think that through properly) The Tag and the Card match… how cool! You will find the tutorial for the Mandala Christmas Tree card here.
Included in the zipped folder is the SVG for both the ScanNCut and Cricut cutting machines. If you need help on how to unzip you will find a tutorial here.
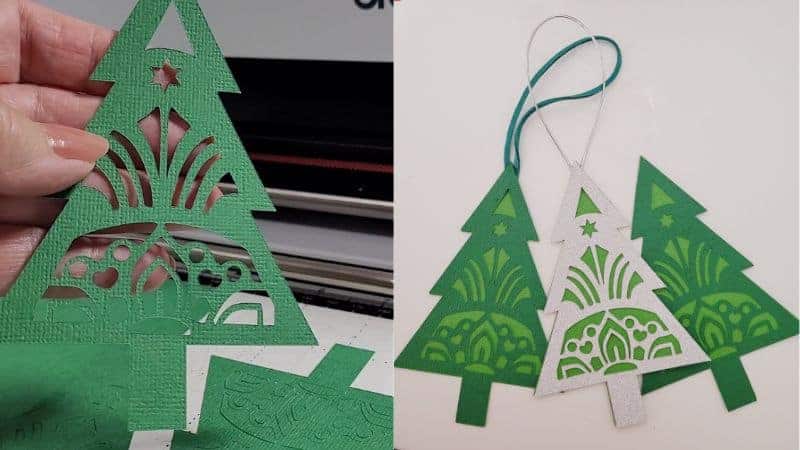
The picture shows the cut-out mandala on the left and the completed tags on the right. The project is very easy to make.
Using Canvas Workspace – Optional
For this tutorial, I will use the downloaded version of Canvas Workspace, and we’ll bring in the design a little bit differently for this project. There are a few ways to bring your FCM or SVG file into Canvas Workspace. The most common ways are using the top menu and the File menu tab. Scroll down to Import from your Computer (or from your ScanNCut).
The next way is using the SVG icon in the left-hand menu as this is a very easy method.
I’m going to show you another method. Open both the Canvas Workspace software and your File Explorer (PC) as shown below —this is where you’ve likely unzipped and saved your design.
All I’m going to do is drag and drop the design from File Explorer straight onto the Canvas Workspace mat.

The drag-and-drop method works just as well and is a very easy method.
I’m planning to make several of these tags. To do this, you can duplicate the design in Canvas Workspace or directly on your ScanNCut. Both ways are very easy. I often demonstrate duplicating in Canvas Workspace, so in this tutorial, I’ll duplicate the design directly on the Scan N Cut.
If you want to add a hole for threading ribbon or string, now is a good time to do it however I’ll also show you different methods for finishing your tags without adding a hole.
Exporting the tree design to your Scan N Cut
Send the design to your Scan N Cut, you can use USB, Wi-Fi, or a direct computer connection. I’ll be exporting via Wi-Fi. If you need assistance setting up and using WiFi you will find a tutorial here.
Importing it into your ScanNCut and cutting the project
I am using my ScanNCut SDX1000 however you can create this project on any model ScanNCut.
Retrieve the design and bring it onto the Scan N Cut screen. You will be presented with four choices on the main screen, select the option that you brought the design over with. I have highlighted the USB. Choose that if you have connected a USB device to your ScanNCut. I brought mine over via WiFi which is the top right “cloud and pocket” icon.

You’ll see the design appear on the screen, ready to edit.
Using the Edit Icon
Now, I want to cut multiple tags at once, so I’ll duplicate the design now it is in the ScanNCut machine. You do this by going into the Edit Icon and then selecting the design.
If you have multiple components of the design on the screen and don’t want to cut them just yet, delete the extra sections of the design. For example, I am deleting the front part of the mandala Christmas Tree tag first and duplicating the back section first. It won’t matter whether you do the front or the back first, it’s just how I did it.
You can bring them back in when you are ready OR you can cut multiple colors at once if you can fit all the pieces on the mat. I am only going to fit the back and then the front.
Object Edit to edit further
In this section, you will find numerous edit options. Your machine can do a lot!
Select the Object Edit icon to access the options. To duplicate the design as many times as you need, choose the icon in the middle at the top of the selection. It has a little “plus” sign to indicate adding more. The duplicate icon is pictured below. Click on that and you will see the option to increase the number of the selected shapes as many times as you need. The only restriction is what will fit on the ScanNCut mat. If you increase by too many you will receive a message indicating this.
NOTE: you will need to select the shape you want to duplicate. The red box around the shape denotes the shape selected.

For this project, I’m cutting 6 tags. The Scan N Cut will bring the multiple shapes onto the mat in a big heap so I’m going to manually arrange them to fit the cardstock neatly. To align them this way will maximize your space and cardstock.

The picture shows me manually moving the tree shapes around the mat to fit them precisely. use the rotate option to so your design fits with the other pieces nicely. I have rotated the trees by pressing 90 deg twice. This worked best for this design however there are other options to choose from to suit other projects.
You can also use the Auto Layout feature if you prefer, which will automatically space them for you.
To fine-tune the position of each tag, use the crosshair movement tool in the Edit panel for precise adjustments.
Once the layout is complete, proceed to cut.
Cutting the Backing Layer
For the backing of the mandala tree section of the tags, I’m using a lighter green cardstock. I’ve secured it to the mat using blue painter’s tape, which works well because it’s inexpensive and easy to find. Alternatively, I recently noticed that Brother now sells its own tape with ScanNCut written on it specifically for this purpose.
You can also use a brayer to press your materials onto the mat more firmly. Adhering your materials, particularly in the case of cutting mandala designs, is crucial to prevent the materials from moving during the cutting process.
Here are some tips for cutting:
- Use long strips of painter’s tape (masking tape) if you need to secure your cardstock so it’s less likely to come loose.
- If you’re cutting intricate designs like this mandala tree, ensure your mat isn’t too sticky to avoid tearing the cardstock.
- Use a brayer to press the cardstock down for extra adhesion.
After cutting, bend the mat slightly to help release the cardstock, and flick the design away from the mat gently.
Cutting the Front Layer
Next, I loaded the darker green American Craft Cardstock to create the mandala layer. The process is similar to the first cut, but this time I’ll delete the backing pieces from the design and only keep the mandala shapes. I’ll duplicate them as needed and arrange them on the mat.
If you’re using glitter cardstock, make sure it’s encapsulated glitter. This type has a protective film over the glitter, which is better for your cutting machine and prevents shedding.
If you want to cut the front layer from multiple colors, you can scan your mat and place smaller pieces of cardstock in specific positions. Use the Scan feature to align your designs perfectly. If you need assistance with that you will find the tutorial here.
Note: when cutting different materials in the same cut, aim to keep the thickness and type of materials similar. Having one color with a thicker texture can cause the ScanNCut to misjudge the depth of the cut. If this happens, you send any items that have not cut through correctly on a second pass. Do not remove your mat if you plan to do this.
I’ll stick to a single color and cut the mandala designs. If you would like to cut multiple color Christmas Tree tags at once, you will find the instructions here.
Once the cutting is complete lift off the excess cardstock. Then carefully remove the mandala tree designs by bending the mat slightly.
Note: Before you remove your mat from the cutting machine, check that all cuts are clean and the design comes off easily. This way, if there is a problem, you can send the design through for a second cut. This is more difficult to align again once the mat is removed.
Assembling the Tags
Now we’re ready to assemble! I’ve also cut another mandala tag from glitter cardstock for extra sparkle. Here are a couple of choices to attach hangers to your tags:
Method 1: Silver Metallic Stretchy Cord
This is my favorite material to use for hangers. The stretchy cord is a little fiddly so I used double-sided tape to help me manage. Place a small amount of double-sided tape where the cord needs to be attached. It holds the cord in place beautifully while you grab the pre-glued mandala tag top layer and place it on the bottom layer. GREAT trick… made it so much easier.
You can adjust the length of the tag hangers depending on how you plan to use the tag. This is just personal preference.
Method 2: Ribbon
Ribbon is a good choice for the hanging section of the tag. Select a color that compliments your tag and cut to the length you need for your project. I applied additional glue into the top of the tree shape to secure the mandala layer at the top more firmly.
Method 3: Jewellery Leather Cord
Now, I am not 100% certain whether my jewellery leather is real leather or faux leather. I think it is faux suede leather and I purchased it in a pack like this one. Not sure it matters whether it is faux or not as mine is quite sturdy however it is possibly not the cheapest choice. I have heaps of it in all different colors so it wasn’t a problem using some for the tag.
Once again, select a color that compliments the color you use for your project. I inserted more glue into the top of the tree design between the two layers to give it a bit extra strength.
I thought the finished tag looked nice with it.
Final Assembly Tips
Use Art Glitter Glue for this project. It’s perfect for attaching intricate designs like this mandala tree as it has a very fine tip plus you can add a metal attachment for an even finer finish.
Apply glue carefully to ensure all the small pieces are secure, especially any points that might lift.
Use tweezers to position delicate layers more easily.

The picture above demonstrates gluing the tree design, attaching the stretchy silver hanger with double-sided tape, and using tweezers to apply the top layer to the bottom layer.
Finished Tags
Here are the completed tags! You can use different cardstock, ribbons, and hanging methods to customize them for your projects. These little tags are perfect for matching with the mandala Christmas Tree card project, attaching to gift boxes, or hanging as Christmas decorations.

Pictured is the finished mandala Christmas Tree tags with various options for the hanger. Which one is your favorite? Mine is the silver metallic cord.
Share Your Creation
Once your Mandala Christmas Tree project is complete, share it with loved ones or display it proudly as part of your holiday decorations. Handmade items are a wonderful personal touch that simply cannot be replicated.
Don’t forget to visit the Resource Library for more free SVGs and crafting inspiration. Thanks for joining me!
Happy creating,


Scan N Cut Courses
Would you like to create your very own designs? It is easy to learn. Check out my courses and cheat sheets that are available to help you with your crafting journey. You will find more information about them here
Remember to check out my Facebook group Scan N Cut ~ Let’s Create With Sue. There you can share your awesome creations with the group, ask for assistance or simply pick up some additional tips and tricks. I would LOVE to see you there.