
This tutorial is showing you how to set up your wifi on the Scan N Cut DX series. It includes a video tutorial and step by step instructions. The method is very much the same for the DX series Scan N cut and the CM series Scan N Cut so read on regardless of which model you have.
This tutorial is part of a series of brother scan n cut dx tutorials I have put together in the “How To” series. These tutorial have been created using the Brother Disney Scan N Cut DX 2200D model.
Canvas Workspace and your Scan N Cut Wifi
One of the BEST features of the Scan N Cut is the ability to connect Canvas Workspace via Wifi to your Scan N Cut. All the Scan N Cut DX models have this feature and a number of the Scan N Cut2 CM models too.
I love being able to create a design on my computer and then at a press of the mouse, seamlessly send the file to my Scan N Cut for it to be cut out. So easy !!!
And you will find working through the tutorial that it is pretty easy to set your Wifi up. Let’s go!
What do you need
- Your Wifi capable Scan N Cut machine
- Canvas Workspace – either the online version, downloaded version or why not set up both
- A Wifi home network
- The SSID (the name of your Wifi network)
- The password for your network
- A Brother Canvas Workspace/Scan N Cut account
The Tools icon
There are some handy icons on the Scan N Cut and the Tools icon is definitely the handiest. It looks like a little spanner or wrench and where ever you see it you will have the option to change some settings.
To set up your Wifi on your Scan N Cut go into the wrench or Tools icon. See me pointing at it in the picture below. You will be able to alter lots of settings in here.
Go into your Scan N Cut settings section
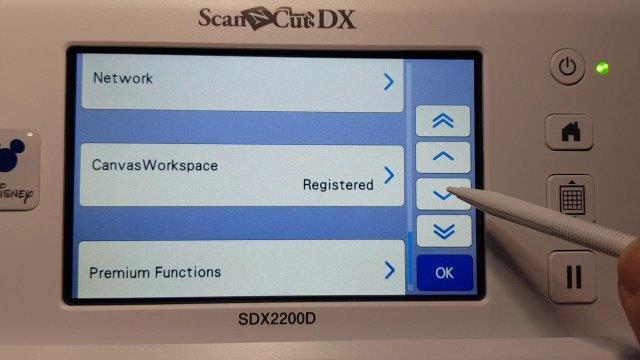
We want to go to the wifi so once you are in the settings section, scroll down. Keep scrolling until you see the option called Network. The double arrows on the right of the screen will take you to the beginning of ALL the selections or to the end. The single arrows take you through the choices one screen at a time.
In the picture below you can see Network selection at the top of the screen, which is where you set your settings.
Notice that you can register or link your machine to Canvas Workspace just below the area to set up your Wifi. To connect your Scan N Cut to Canvas Workspace you will click into this section and you will see a Code or Pin. Write it down ready for when we connect them later in this tutorial. You will need to connect your Network first and then register your machine.
Set up your Wifi on your Scan N Cut
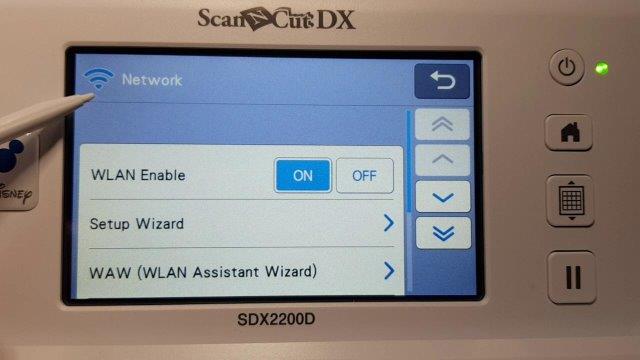
In the next screen below you can see the Wifi symbol and you can see that mine is already set as it is blue. The Wifi is not blue if it has not been set up yet, disabled, or is not working properly.
You have the option to turn it on or off (enable). AND there’s a setup Wifi wizard. I LOVE wizards as they make it super simple to set things up and in this exercise, we will choose the wizard.
So if we wanted to add a new network, go into the new SSID. The SSID is just short for “Service Set IDentifier” and simply means your Wifi name. These things always look scarier than they really are.
If you are interested in techy stuff like me, or just curious, then you can read up more here.
Next go OK and your DX Scan N Cut may go off and search for your SSID or Wifi Network
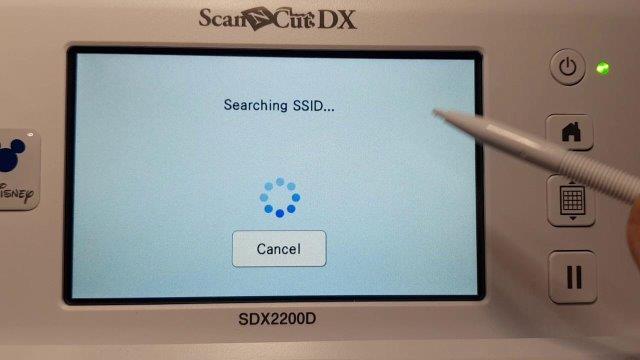
While often the search will find the name of your Wifi you may need to add it manually. This may be if you are having a little trouble with your Network being found OR you wish to connect a second Network, maybe your are visiting someone and have taken your Scan N Cut with you. (cause we love to play).
TIP: If you are having trouble getting your machine to see your Network(Wifi), and you have a Network device that is portable or has a portable secondary box try moving the box closer to your Scan N Cut. Alternatively, you can move your Scan N Cut closer to your Wifi until it is configured.
Adding your SSID information
Your Wifi Network will have a name in the form of the SSID code. Add your network’s code as seen below.
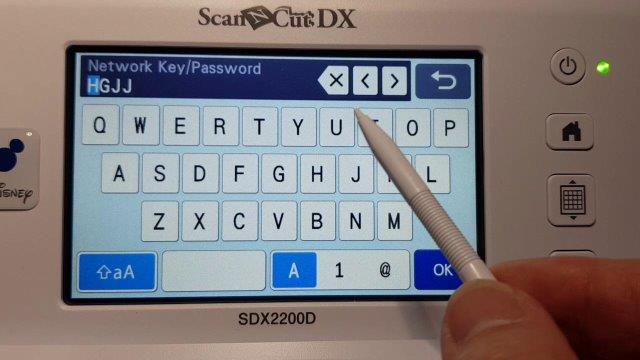
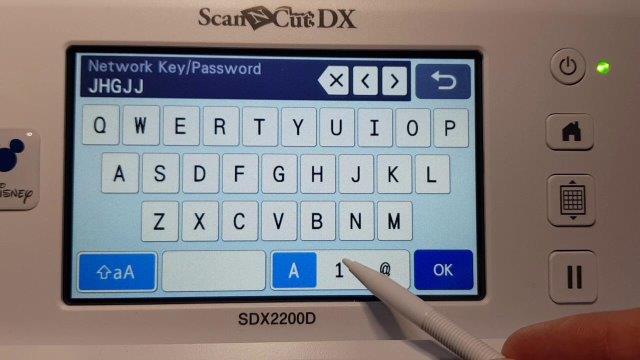
You will notice that there is a big X to delete any typos and left and right arrows that will move you forward and backward through the information that you have entered so that you can fix any mistakes. In the lower section of the screen, you can see the options to change your letters to either Capital or Lower Case, and over to the right is where you can choose numbers. Press on the 1 and it will take you to the screen to select numbers.
When you are ready select OK.
Password for your Wifi set up
Next, it’s going to ask for your password and you can usually locate your password on your Network device. If your device does not have a display you will have been provided the password during the installation of your Network. Enter your password in a similar way to how you entered your SSID.
Note: These are all the same settings you would have used to connect your computer to your Network and it is normally a number or a series of letters.
Add them in and then go OK.
Now you have set up your Wifi
Once you are connected it will look similar to the below picture with the name of your Wifi Network and a green connectivity dot to indicate that is the Network that you are hooked into. (this is handy if you have set up more than one Network)
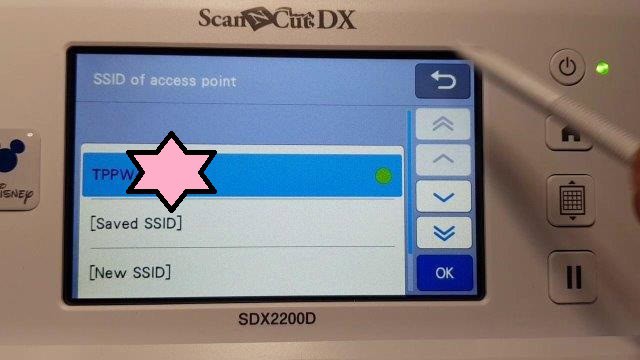
There we go. Very easy. And you can turn it off if you don’t want it to be connected to your network. You just press the on or off in the Wifi enable setting that I mentioned previously, however, I leave mine on all the time.
Connecting to Canvas Workspace
There is another section to do while adding your network and that is to register your machine with Canvas Workspace.
Downloaded versionof Canvas Workspace
This is canvas workspace, the downloaded version. If you are uncertain which version you are using or want to use check out my tutorial on Which Canvas Workspace to use. Personally, I quite like both however the downloaded version provides more features.
Go to the Help on the top menu bar, click on it and go down to Account Settings. Once you’re in that section, you’ll see a couple of options. One of the options is for machine registration. It also appears over on the left-hand side, exactly the same.
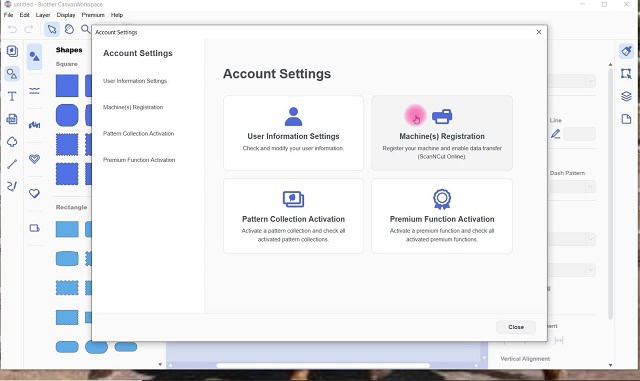
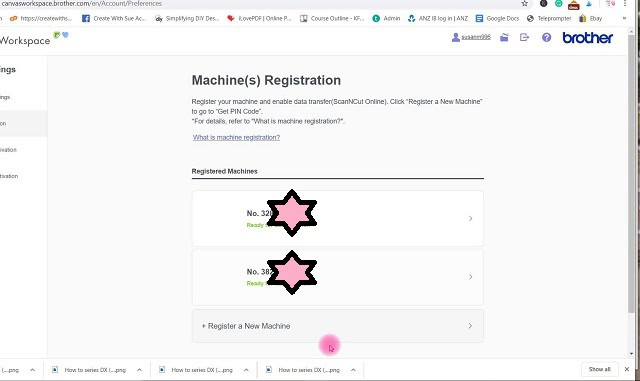
When you click on Machine Registration you will be presented with the following screen. It shows you any machines that you already have registered and also has the option to add a machine.
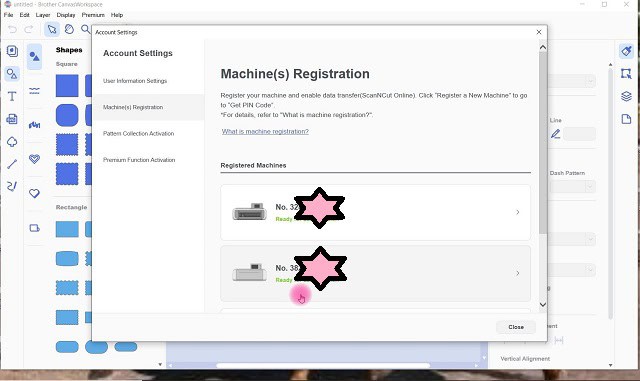
Click on the Machine Registration button. In the picture below you will see that I have two machines registered, This is what it looks like once they’re registered.
Down towards the bottom, there is the Register a New Machine,. Click on that.
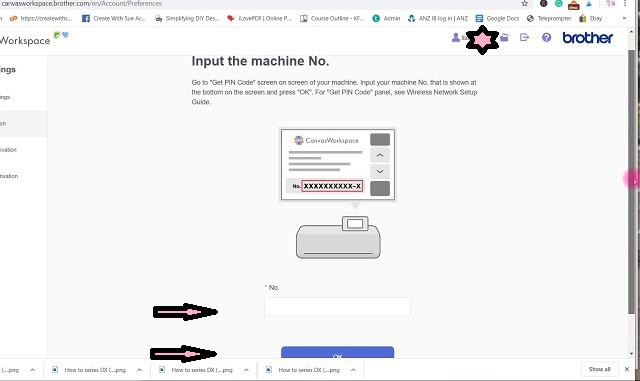
Your ScanNCut will give you a Pin code and that’s what you need to add in here. (you may have written it down from earlier in the tutorial)
NOTE: you will need to be connected to your Wifi to complete these step successfully.
Click OK and you are connected !
Online Canvas Workspace machine registration
Next, we will follow the same steps in the Canvas Workspace online version.
In this version, you go up to where your login ID is which is the main difference between setting up the two versions. When you click on your login ID it is then the same deal as the downloaded version of Canvas Workspace, it takes you into your Account Settings.

Once again you’ve got the machine registration to choose from, and the selections are duplicated on the left.
You can see the same two machines are registered (funny about that), and beneath that there is the Register a New Machine button. Click on that.
You will see that there is a place to put the pin code which you get off your ScanNCut. It’s usually a four-digit code, enter it into the box and just go Ok.
And you are connected ! If you had already completed this registration in the downloaded version you would have already been connected.
Both versions of Canvas Workspace are very easy to set up.
How to set up your Wifi video tutorial
Here is the video of what I have described if you prefer watching videos..or you may like to watch the video and come back here to follow the steps. Which ever way makes it easier for you.
Please click on the like and subscribe when you are watching any video of mine in Youtube. I will really appreciate it.
I hope that you have found this tutorial really useful in setting up your Wifi on your Scan N Cut. Wander around my website while you are here and check out some of my other tutorials, they have all been designed to help you as much as I can.
Happy creating,

P.S. Don’t forget to pop into our Facebook group and say hi. I love hearing from you! The group is full of awesome crafty friends like you and it is where you can share your creations and any issues you might have. I am always happy to help !


This did not connect my machine to my WiFi. It gave me ERR-04 instead and referred me to the “setting up your WiFi”. Section of the manual. No idea why, my cm900 works on the very same wifi. So frustrating!
Hi Di, the ERR-o4 is usually an error with the SSID code that you entered. Check that you have this correct in the first instance. 🙂
hi what is the SSID code and where do i find it , thsnk u
Hi Steph, the SSID is a unique network name/code associated with your router. Usually the SSID number is located on your router or you may have received a document with it on. Check your router first. 🙂 Sue