Creating multiple shapes with your Scan N Cut is super easy. Your Scan N Cut will automatically place the shapes neatly in alignment on the Scan N Cut mat BUT what if you add more shapes?
This tutorial covers how to duplicate shapes or create multiple shapes and then use the Scan N Cut feature to automatically place the shapes.
This is a cool feature so you don’t have to manually move each piece individually. SO much easier than selecting each shape and moving them into position one by one. Your machine will do it automatically.
What a time saver!
This feature is great to maximize the use of the materials you are cutting the shapes from.
The auto-placement feature is available on both the CM models AND the DX models. I have videos for both.
Note, some earlier CM Scan N Cut machines may not have this feature
Create Multiple Shapes – DX Scan N Cut Video
The DX machines are very clever and do this so easily. If you prefer watching what to do and you have a DX model, check out the video below. Filmed using the SDX2000D which is my favorite Scan N Cut.
Below this video is another one created on the CM900. The technique is very similar.
How to start creating shapes
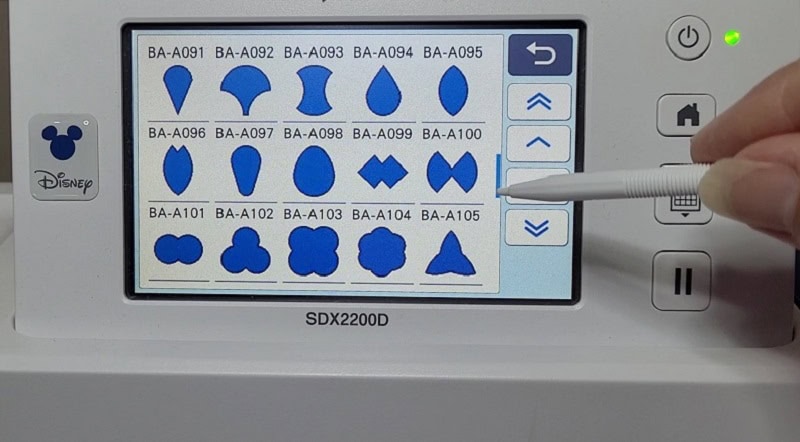
Head into the Shape icon on the front screen of your Scan N Cut. You will find many shapes in there ready for you to create your projects with.

Selecting your shape
The Scan N Cut has many built-in shapes right inside the machine ready for you to create your awesome projects.
Select a shape that you like. I chose a flowery star-shaped object that looked like it could be turned into a flower and placed on a card. Scroll through all the shapes and see what is available for you to use. There is a lot to choose from.
Duplicate the shape
Next, choose how many shapes you want to cut and what size you would like them.
Creating multiple shapes is really easy and there are a couple of ways to acheive this.
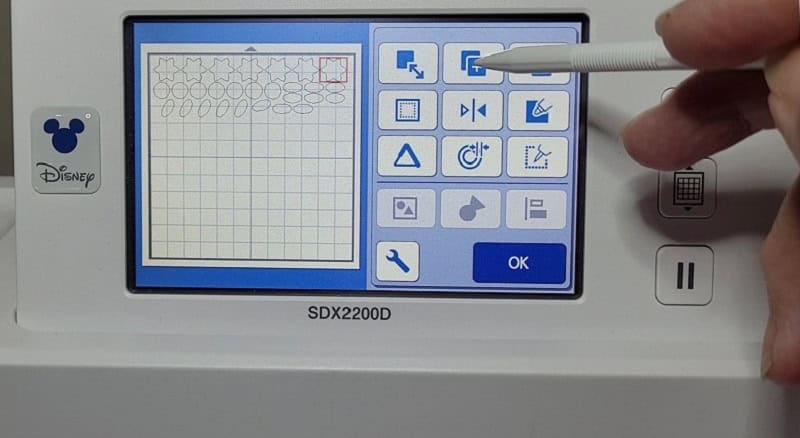
Below is a picture of the panel that will allow you to create the size shape. Note in the picture, I am pointing to an icon with arrows pointing horizontally and vertically.
When this icon is highlighted you can change the height and width of the shape separately. When the icon is not blue… the shape will retain its size ratio perfectly.
For this demonstration, I reduced the size of the shape to 40mm or approx 1.57 inches.
This area also enables you to choose how many shapes you want in your project. Select as many as you need. The machine will pop up a message if you choose too many to fit on the canvas. Then you can go back in and reduce to a number that will fit.
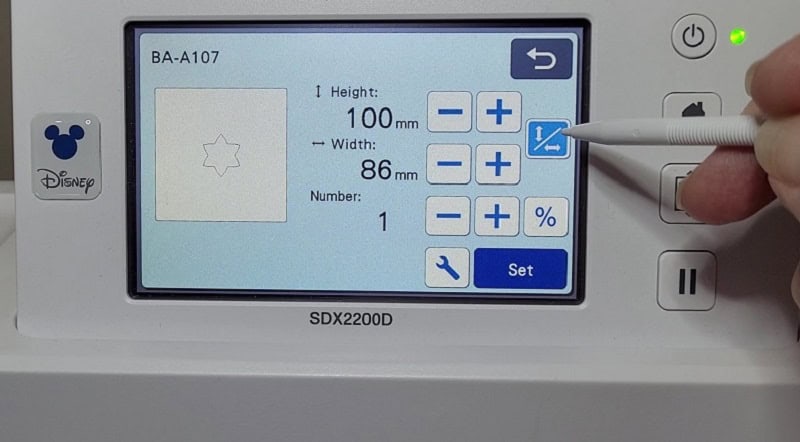
Press set to continue to the next step.
Multiple shapes on your Scan N Cut screen
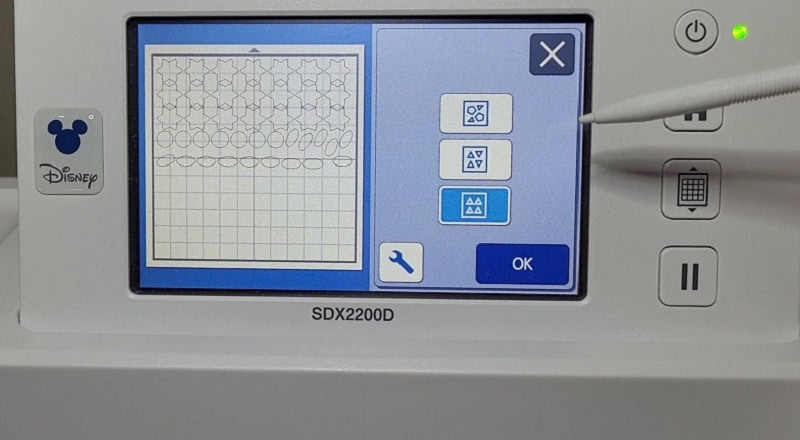
Below I am pointing to the Icon to select to use the automatic placement of multiple shapes on your Scan N Cut. This feature will maximize the cutting space of your materials and save you money.
Choose how you sort your shapes with the different icons available for selection.
There are 3 different choices.
- Top one will place all the shapes any which way on your mat. It will choose the spacing to maximize the placement and give you the best use of your materials.
- Second icon will place the various object in an upward and downward pattern. This would work well for triangular shapes where the base is larger than the top area of the shape.
- The third icon keeps the objects the same way up.
For squares and circular type shapes, any of these icons will be perfectly fine. For unusual shapes, one selection may perform better for you than another.
You can try them all without too much trouble. It will let you try them all and then select the best choice.
Want to duplicate the shape further?
Ok, so what if you want to add more shapes to completely fill the cutting mat? Well, that s easily done too.
Select the Edit Shape bar and it will take you to all these options. Lots of choices in the later models of the Scan N Cut machines.
We are going to look at the one I am pointing to which is the duplicate icon. Select the shape that you would like to duplicate and click on the icon.
It will bring you to this screen.
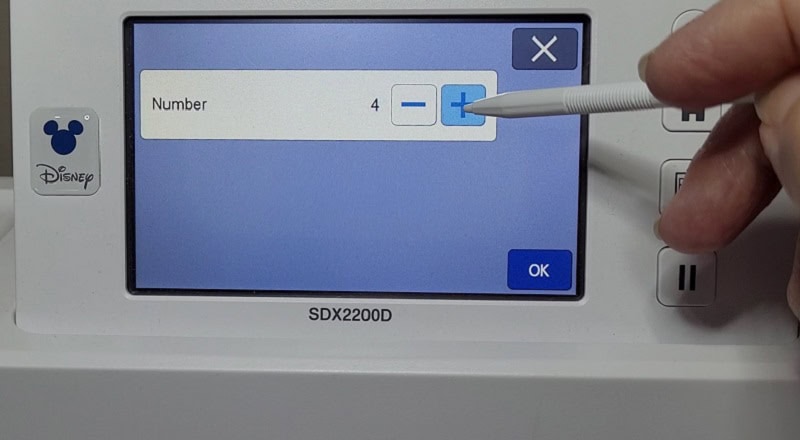
Simply click the plus or minus icon until you have the number you would like to import onto your working screen.
The newly created shapes will appear on your screen. Note, they will be bunched up. This is where the auto-placement feature truly shines!
Have a play!
Create Multiple Shapes – CM model Scan N Cut Video
This is an older video of mine using my CM 900 to film how to duplicate shapes or create multiple shapes and then use the Scan N Cut feature to automatically place the shapes. This is a cool feature so you don’t have to manually move each piece individually.
If you watch both videos you will notice that the process is VERY similar with both the CM and DX ranges of Scan N Cut. (my filming techniques are noteably better in the later video)
What else can you do with these shapes
You can weld shapes together on your Scan N Cut and create your own new shapes. This too is a cool feature. The machine is so clever.
Here is a tutorial on welding to check out when you have finished this one.
Wander through the site and you will find many tutorials on how to get the most out of your Scan N Cut.
In my tutorials, I always try to include additional tips and tricks to assist you with your designs. I always love to receive feedback and see YOUR creations.
I hope that you have enjoyed this tutorial!
Join me on Facebook
You are always welcome to join me in the Create With Sue Facebook where you can make friends, share your creations, and ask questions for additional assistance. I will provide any assistance that I can to help you use your Scan N Cut and Canvas Workspace.
Join me in the Scan N Cut – Let’s Create With Sue Facebook group.
I would love to see you there.
Happy creating,

Courses available for you
Learn how to use Canvas Workspace. This is a fantastic software from Brother specifically developed to use with the Scan N Cut. It will add a whole new dimension to using your cutting machine.
In the course, we cover how to create some awesome designs from scratch.
Get Started With Canvas Workspace
If you are an intermediate or advanced user of Canvas Workspace then “Editing Nodes” is a great choice. You will be amazed how much value this knowledge will add to your ability to troubleshoot purchased designs and also create your own projects from scratch.