
Have you wondered when to use the Weeding Box? It is a wonderful feature by Brother Scan N Cut for a number of projects and really, you could use it all the time.
Now, I know what you’re thinking. What exactly is a Weeding Box, and why do I need it?
Briefly, the Weeding Box is a small box that is placed around the area that you want to cut out to assist in weeding your project.
Imagine a way to make weeding easier, trouble-free, and more relaxing. That’s what the Weeding Box brings to your crafting experience! It allows you to effortlessly remove excess material from your designs, leaving behind only the most intricate and beautiful parts.
Let’s look at the most effective ways of using it in this tutorial.
- We will look at two ways that you can create a Weeding Box
- When to use the Weeding Box
- The types of materials best suited for a Weeding Box
- Weeding with the Weeding Box
Disclaimer: As an Amazon Associate, I earn from qualifying purchases. Links included in this tutorial may be affiliate links, Amazon or others, meaning I may earn a small commission at no additional cost. These commissions will help me continue creating content for you. Thank you for your support! Read my very boring full disclosure policy here.
Two ways of creating a Weeding Box
Yes, there are two ways of creating a Weeding Box for your project. Which way you choose will depend on how you are creating your project and makes sense to you. The reality is, there is no major difference between the two.
Create a Weeding Box in Canvas Workspace
The first way is via Canvas Workspace. The Weeding Box is only available in the downloadable version of Canvas Workspace sometimes referred to as the PC version (this is not completely accurate as the downloaded version will work on a Mac too.
Creating a Weeding Box if you are already working in Canvas Workspace is a great option. It is quick and easy to add. Possibly a little easier to add than on your Scan N Cut….maybe??? It is a bit of a toss-up which is easy as both methods are very easy.
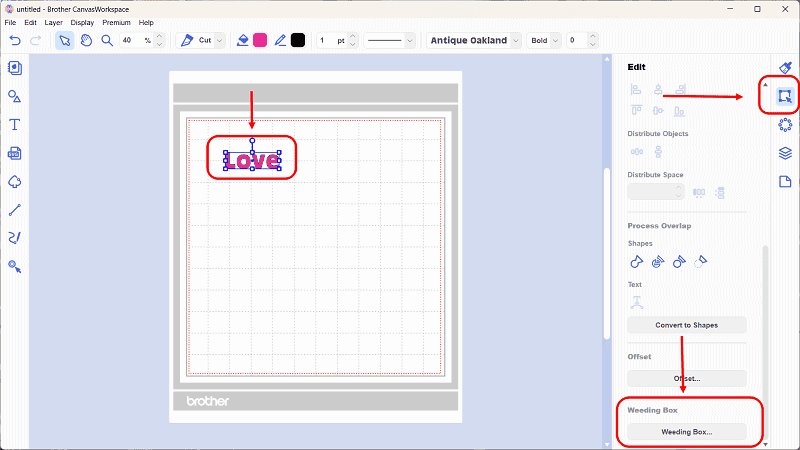
Once you have created your design you can add your Weeding Box by going to the right-hand “Edit” menu. You can see it highlighted below. In that menu, down near the bottom of the screen, you will find the Weeding Box. The area that you would like the Weeding Box to go around needs to be selected and have the blue box showing to be able to use the Weeding Box. Otherwise, it will be greyed out.
How to add the Weeding Box on your Scan N Cut
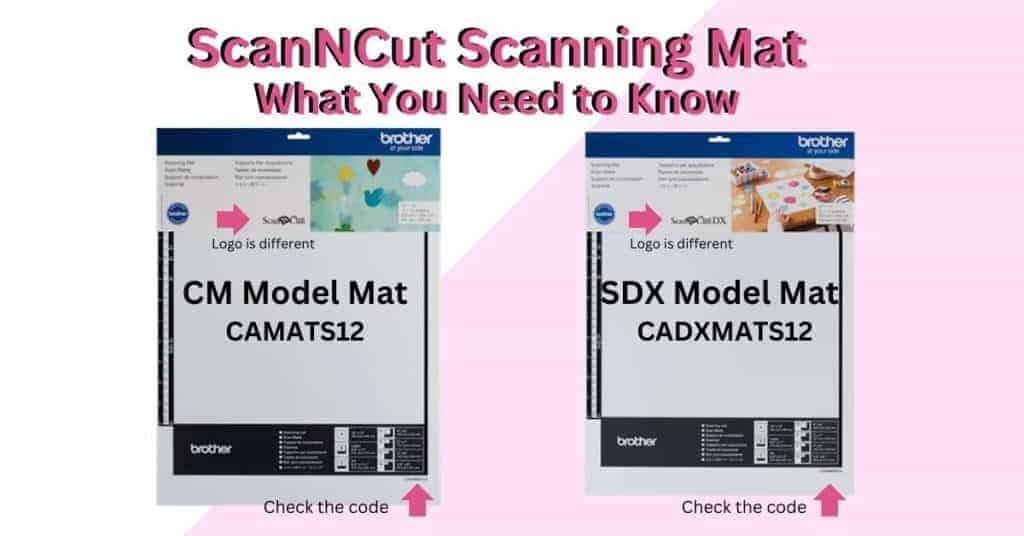
It is very easy to create a Weeding Box on your Scan N Cut. Now, the Weeding Box is a newer feature from Brother for the Scan N Cut. This means that your older CM model will not have that feature. (well, mine does not!)
However, this does not mean you cannot create a Weeding Box and I will cover adding a Weeding Box in the next section.
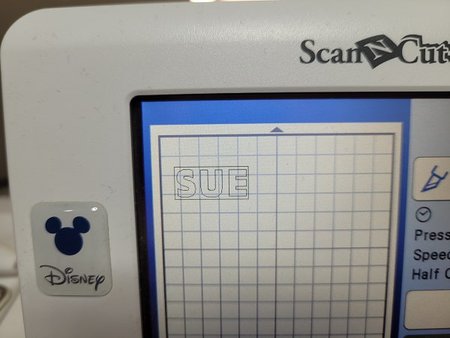
For the SDX Scan N Cut cutting machines, there is a special box CALLED the “Weeding Box”.
To add the Weeding Box create your design – or import it into your Scan N Cut. Then, work through to where you select Cut or Draw. Choose the Cut and your screen will look similar to the below screen.
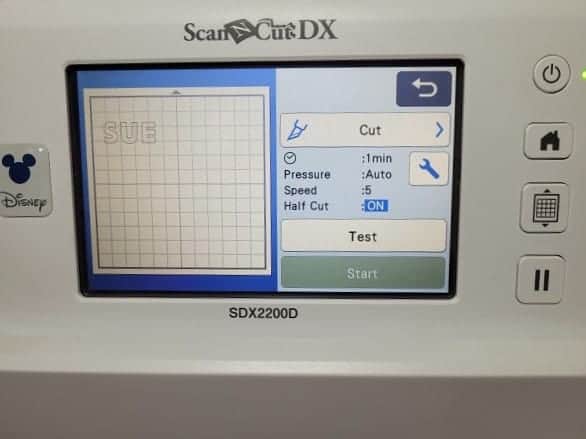
Next, go into the Tools icon and you will be able to add your Weeding Box. Note that I already have my Half Cut setting on for cutting vinyl. Find out how to use the Half Cut feature here.
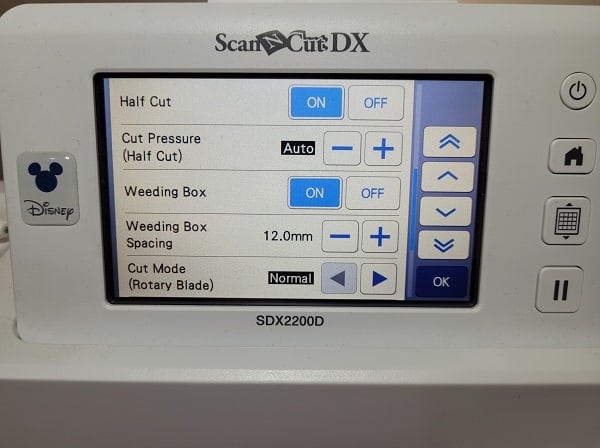
Scroll using the arrows on the right-hand side to the next screen. You have the choice of having the Weeding Box ON or OFF. Note on the next line there is a choice on spacing.
Adjusting to fit your design
The Weeding Box spacing is the distance around your design to the Weeding Box. eg the gap between the edge of your design to the actual cut line of the box.
You can make your box so there is a fair bit of space or have it quite close to your design. To maximize the use of your material the closer your Weeding Box is to your design the least materials used.
TIP: Your design needs to be far enough away from the edge of the mat to be able to add a Weeding Box. If you receive an error message, go back into your design and move it away from the edges to make room for the box to go around the design.
The default setting for the Weeding Box is shown above with the black box denoting a “default” setting. My DX machine is set in millimetres and yours will be the metric of your choice. Adjustment is made using the plus and minus icons.
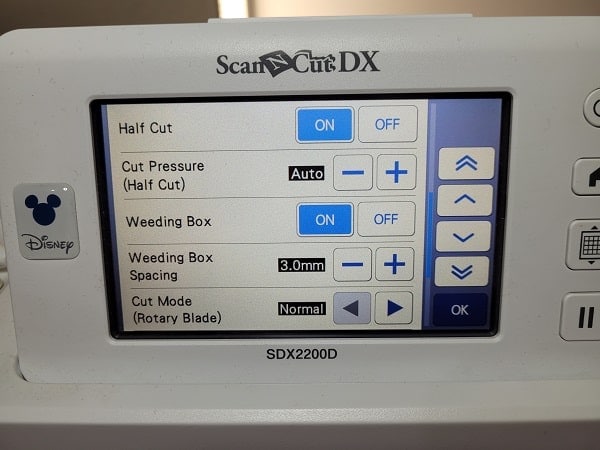
Wondering what the different settings look like?
Default setting
12.0 mm setting
What if you have a CM model Scan N Cut
What if you have an older CM model Scan N Cut? You can still add a Weeding Box and it is still fairly simple. It is just not called a Weeding Box… it is just a box. LOL
Creating the Weeding Box in Canvas Workspace is just the same as described earlier. No difference at all.
How to do this…
Add the box after you have created or imported your design into your cutting machine. Ensure that the design is far enough away from the edge of your mat to add a box around it. Go into “Add” and add a suitable shape to place around your design. This may be a square, rectangle, or possibly a circle. The choice will depend on the shape of your project.
The part that is a little trickier is creating the shape the best size for your design. This may be a little trial and adjustment but it is certainly doable. Work out roughly what size your design actually is… prior to adding the box. Play with the plus and minus icons to adjust the size of your shape to suit your project before you select OK.
When you are back on your main screen move the box so that it is placed over your design. Make sure that it is not cutting into your project at all.
This graphic is my CM900 – If your box is not quite the right size after adding it, then use this icon to edit the shape and make more adjustments to the box around your design. You can get here by the top left icon with shapes on it.
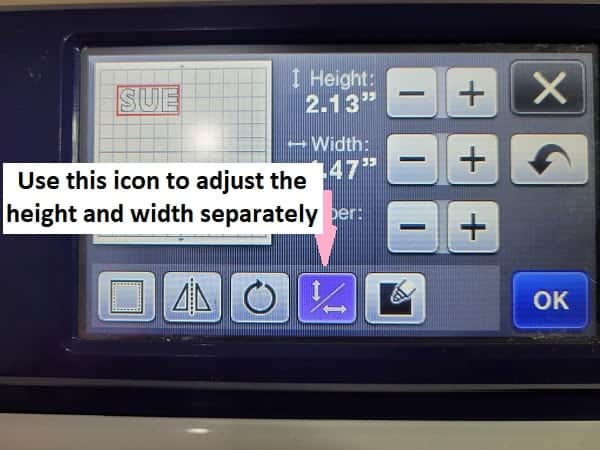
Below graphic – Once you are in the adjustment screen, this icon will allow you to change whether you are adjusting the height and width in equal portions or one edge more than the other. Once you are in this screen it is a lot easier to adjust the shape to fit your design.
The Zoom feature and alignment tools will assist in making sure your box and design are positioned correctly too.
New to your machine? I have a free course to assist you available.
What materials are best
While you could use a Weeding Box for a number of materials, for me, it is most useful for cutting vinyl projects. Mainly permanent or removable vinyl projects however it works really well for HTV (Heat Transfer Vinyl) projects as well.
I have picked permanent vinyl as the most beneficial as this type of vinyl is quite sticky and can be a bit tricky to weed. Adding a Weeding Box to this type of project makes it so much easier. HTV vinyl is often quite easy vinyl to weed regardless.
When to use a Weeding Box
I am going to expand on my previous comment about permanent vinyl (or removable). When creating projects in vinyl you will find the most benefits. You might say “well, I can just cut closely around the vinyl design cut lines”. To this, I say yes you can however here is when you will find it a blessing.
Here are a few reasons
- Patterned vinyl – it is SO much easier to weed if you use a Weeding Box when you cut patterned vinyl as it is much easier to SEE the design. Weed the larger outer area first and then the smaller areas. The busier the patterned vinyl is the more use the box is.
- Saving on vinyl – I hadn’t initially realized this but adding the box around your design will enable you to use less vinyl. This is especially true for smaller designs. Place a larger than required piece of vinyl (full piece?)on the mat. Once the box has been added, place the design on an edge and weed directly from the large piece without cutting the vinyl at all. When you want to use that vinyl again, it will have a small weeded area showing but perfectly good to add more and more designs to that piece of vinyl.
- Smaller intricate designs – super beneficial. You can remove the outer area of the design to the edge of the Weeding Box and then reverse weed the small writing or design. Reverse weeding can make weeding small intricate designs a lot easier. More on this below.
- Placement of the design – I found this out when I was reverse weeding. Often when I cut around the design with scissors the edge is not straight. Definitely not straight! LOL. Reverse weeding, in particular, is a little harder to see where you are placing your design and if you need it straight… and the scissor line is not straight…. you get the drift. The Weeding Box cut line is dead straight and much easier to line up your design placement.
Tips for weeding
Weeding the outer area of the design to the edge of the Weeding Box works really well. Once that outer area has been removed the design can usually be seen easily.
For designs that are intricate with tiny pieces or very small writing then using the Reverse Weed technique is a good option. This is when you remove the larger outer area of the design and then place the transfer tape/sheet over the remaining parts of the design. Lift the vinyl off the paper backing and place it on your project however only lightly attach it. Peel off the transfer sheet. With any luck many of the tiny unwanted pieces will remain attached to the transfer sheet.
Check carefully that any parts of the design that you want to retain do not lift up with the transfer sheet. If this happens, I will pop the transfer sheet back down onto the project and give that area a bit of a rub to press the wanted pieces back down firmly.
TIP: I normally use very inexpensive and not overly sticky transfer sheet. I will often use it for multiple transfers too. Glitter projects are probably the exception to this as they can be a bit more difficult to pick up and transfer.
Once your transfer sheet has been removed you can continue to weed the remaining parts of the design. I like to use a weeding pin pen for tiny pieces.
Mine is like this one… I like this particular one because it cannot be mistaken for a writing pen and go missing LOL. The pin tip is easy on the vinyl and your project.
I hope that you have found this helpful. Enjoy making your projects!
Happy creating,

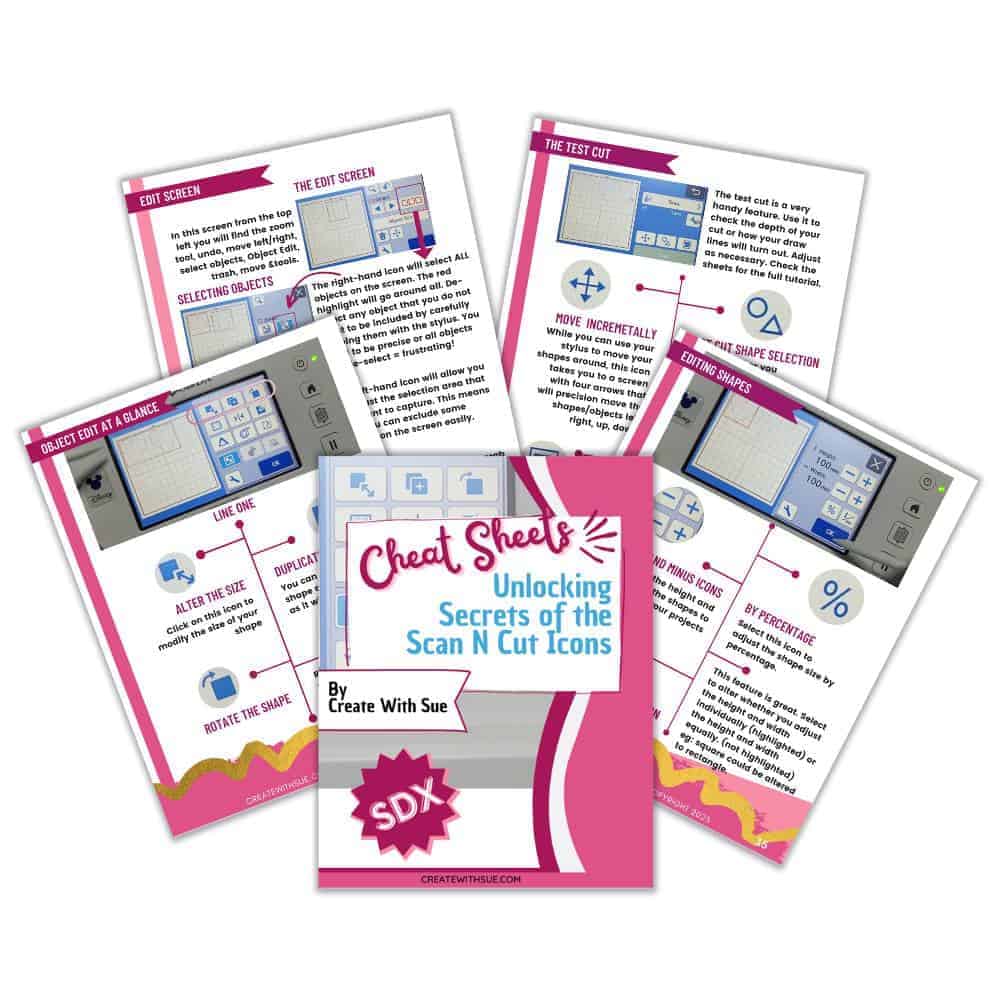
Scan N Cut Cheat Sheets for the SDX models
Are you at a bit of a loss with what all the icons in your cutting machine are for? I have a solution for you… Cheat Sheets. These cheat Sheets suit all models of the SDX Scan N Cut machines.

Join me on Facebook
Join me in the Scan N Cut – Let’s Create With Sue Facebook group. It is a group of awesome craft friends sharing and caring.
I would love to see you there.
Please feel free to ask any questions that you need.


This article is so helpful Sue and material saving!
I am pleased that you found it helful. 🙂 Sue