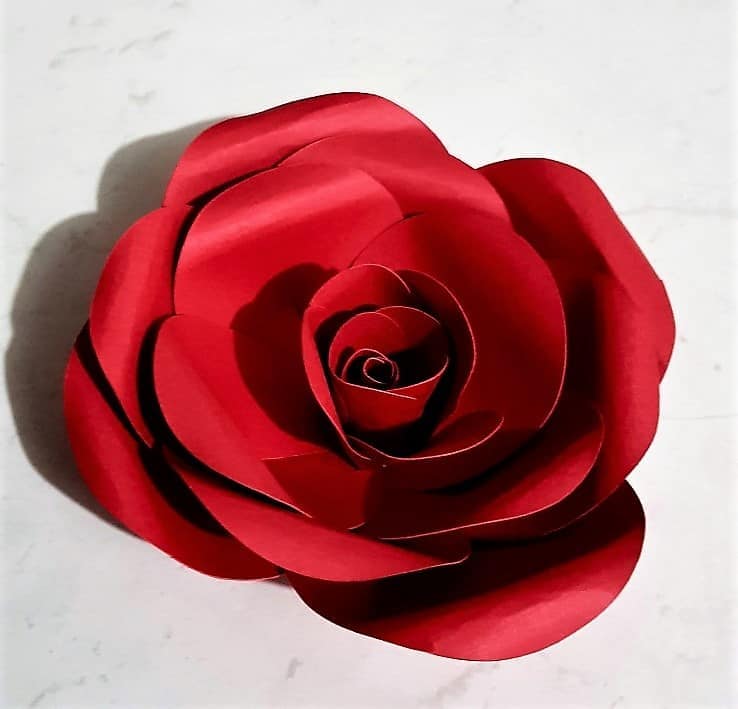
The other weekend I set about designing a paper rose template. I love roses and wanted to emulate them in paper. Now, you too can make your own paper roses! This is how to make a paper rose step by step with pictures and I have included a free template for you as well.
I have made the paper rose in red color card-stock….my favorite color of roses in real life. They would look fantastic in pink or yellow … really whatever color takes your fancy. I have used my Scan N Cut to cut this paper rose out.
This post contains some affiliate links for your convenience (which means if you make a purchase after clicking a link I may earn a small commission but it won’t cost you a penny more)! Read my full disclosure policy.
What do you need?
- 2 sheets 12″x12″ card-stock (could be done on A4 if you prefer)
- Something to cut it out with. Scan N Cut, Cricut or Exacto Knife or scissors
- Glue
- Something to curl the paper around to shape the petals.
- Free template from the Resource Library
Get the free paper rose template
Download the paper rose template from the Resource Library. Resize it if you would like. The template will be fine with reducing the size possibly up to about 30% however if you increase the size you may need to add another layer of petals.
NOTE: If you have a Scan N cut I recommend that you use the .fcm file as it is customized for your machine. An SVG file has been included for Cricut users.
Cut the design out using your preferred cutting machine. The pattern has each layer stacked on top of each other and each of the layers is grouped together, so remember to move each group of the petals into their own space on the mat before they are cut.
If you need assistance with uploading a file into Canvas Workspace check this tutorial for more helpful information.
Let’s put the paper rose together step by step
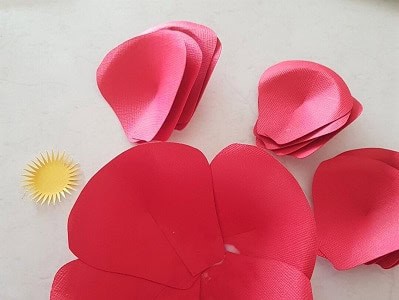
Now you have cut all the petals out we can put it together. Group the same size paper rose petals together so that you have the sizes organized which will make it easier for you when you put it together.
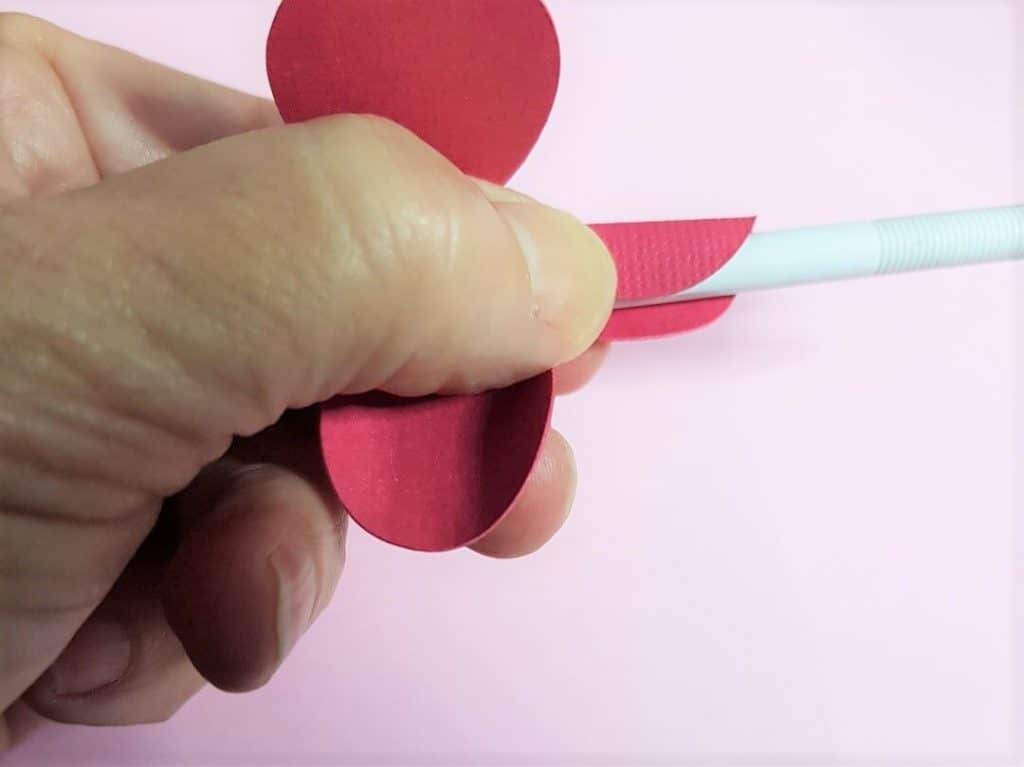
Step 1 – rolling the center petals of the paper rose
I tackled the centerpiece of the paper rose first. It doesn’t have to be done this way so I will leave that up to you, in fact, most of these next few sections can be done in any order.
Start with the smallest of the centerpieces and use your tool to roll each of the petals around it to form a curled shape. This shape will form the center of your rose.
NOTE: I used the stylus from my Scan N Cut for these pieces however I needed a thicker tool for the petals. Anything you can locate will do the job.
Glue the petals down so they form a curled center like you would see in nature.
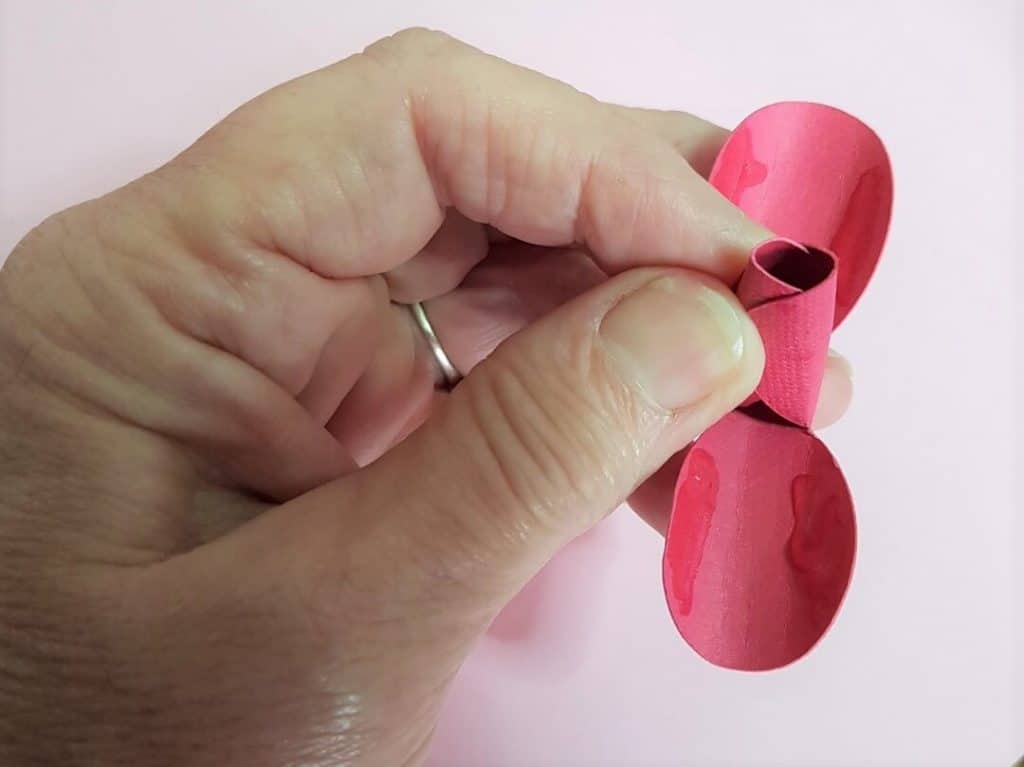
Don’t use too much glue. I feel I used a little too much in places on this project (as you can see above) and it took a while to dry, delaying the creating process. (was a little frustrating waiting )
Step 2 – glue the centers together
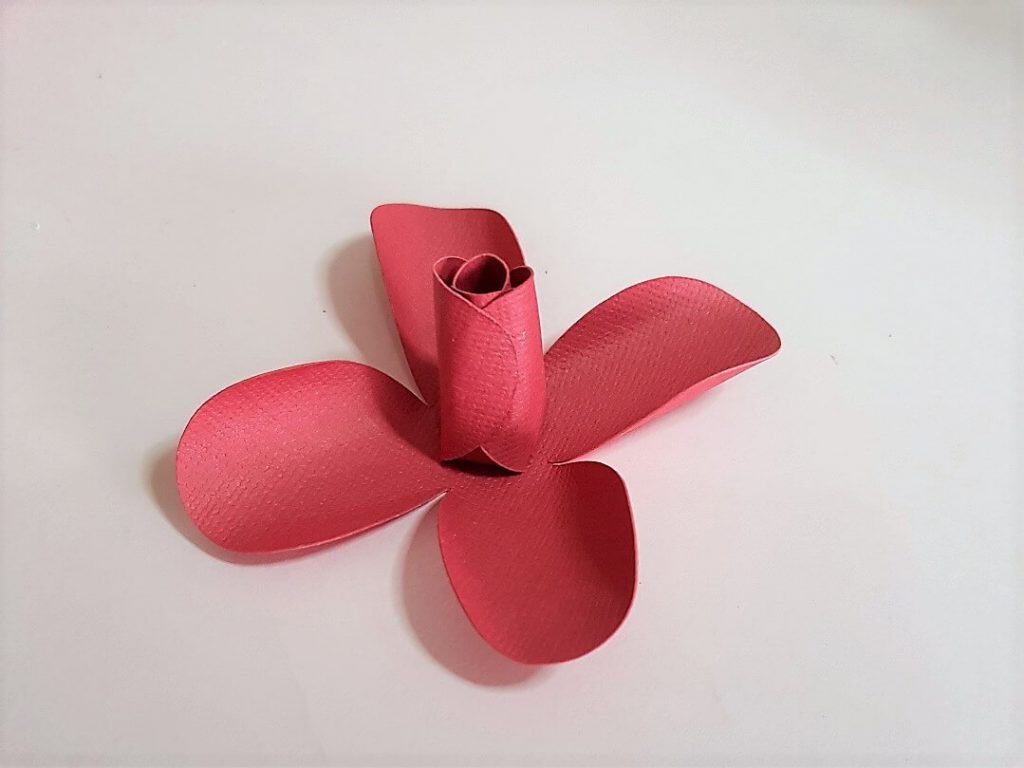
Once you have the first centerpiece curled and glued you are ready to start on the second centerpiece layer. Roll the edges of the petals in the same way you previously did them and place the smallest in the middle of the second size center.
Fold up the rose petals to curly around the middle section and glue. Don’t have them glued too tightly. Try and leave them a little loose.
Step 3 – add the next layer of petals
Time to add the third layer of the centerpieces. In the above photo, you will notice that I put them together and then glued however I believe you may find it easier to glue each layer as you are doing them.
With the third layer, I started to roll the top edge of the paper rose outwards as well as curl it around. Sound fiddly? Yes, well it was a little bit however that is why I am suggesting to glue each layer as you do them.
Step 4 – glue and shape the larger petals
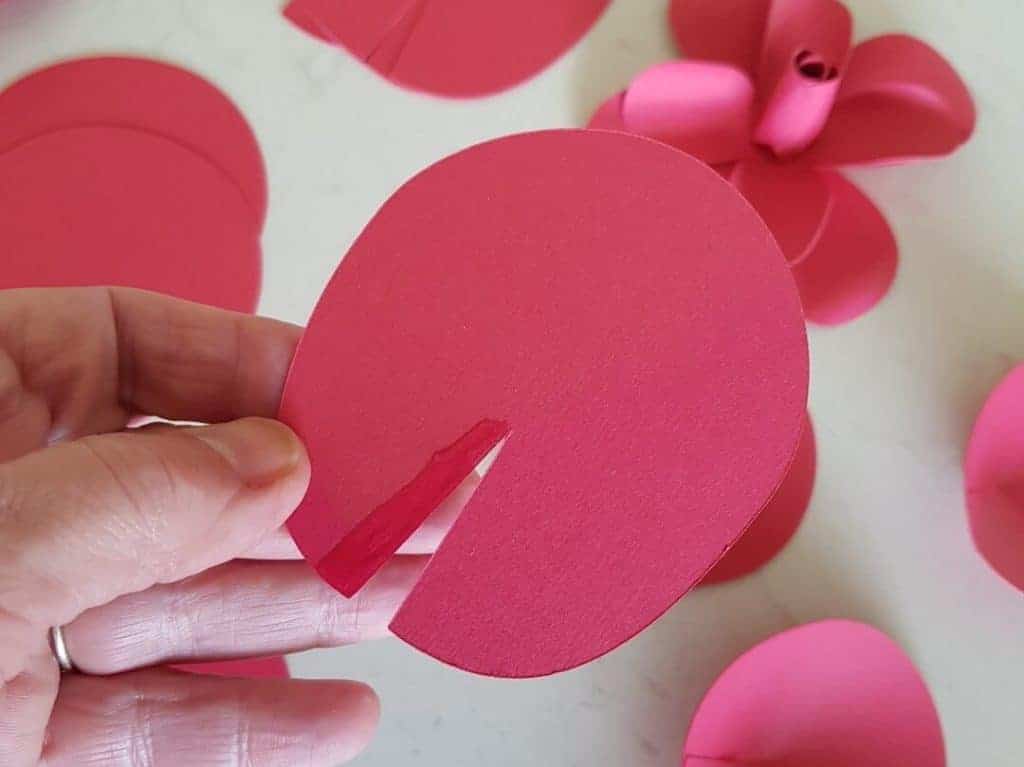
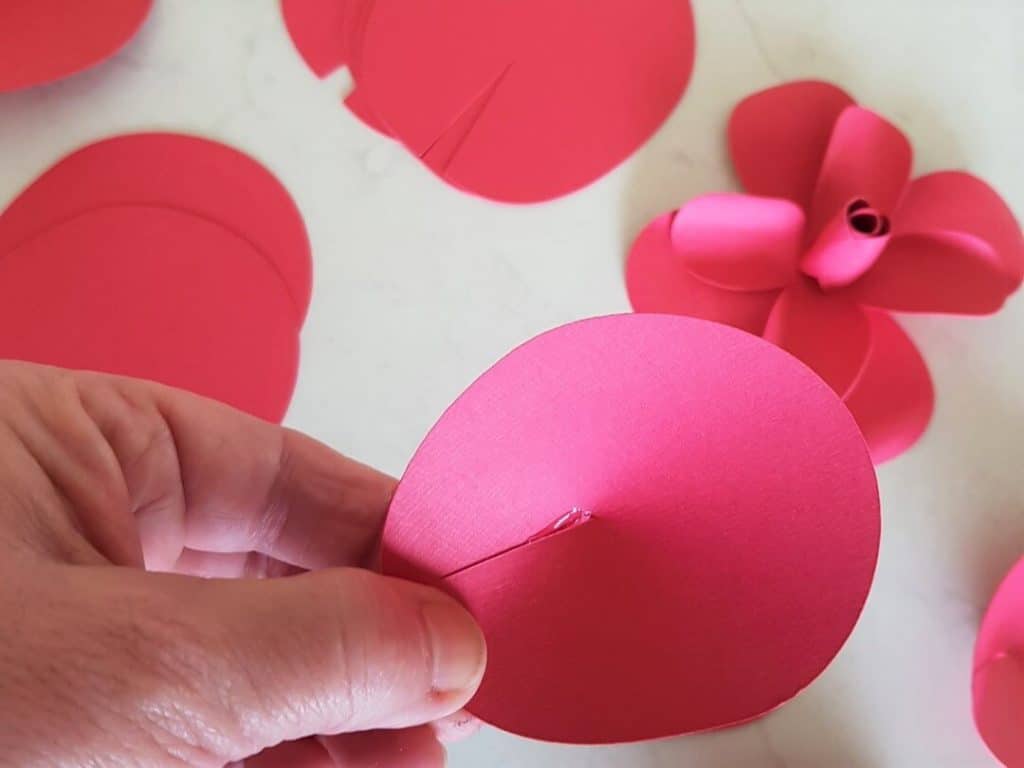
Time to glue the larger outside petals.
Start on the largest of the paper rose petals and place the glue on one side of the cut-out section. Bring the unglued side over the top of the side with glue on it and hold it together until it has gripped.
This will create a rose petal shape.
Step 5 – keep paper rose petals in order
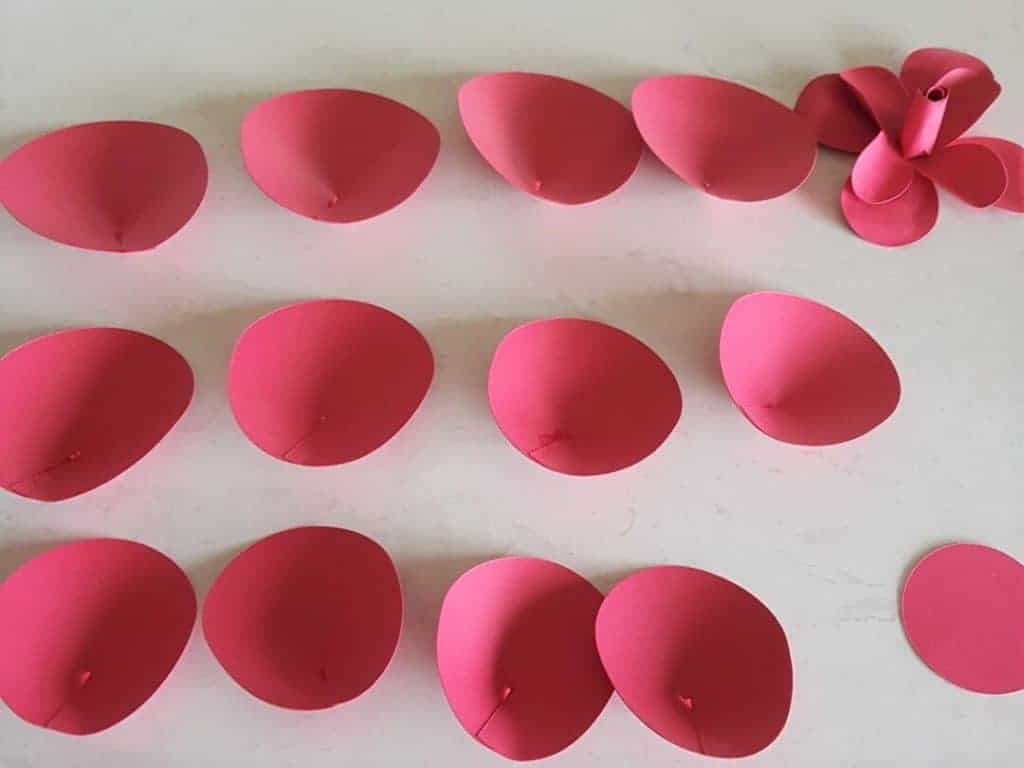
Glue all the petals in the above manner.
TIP: try to keep them in their sizing groups to make it easier for you to grab the correct petal as you put your paper rose together. I arranged mine in rows.
Step 6 – build the paper rose step by step
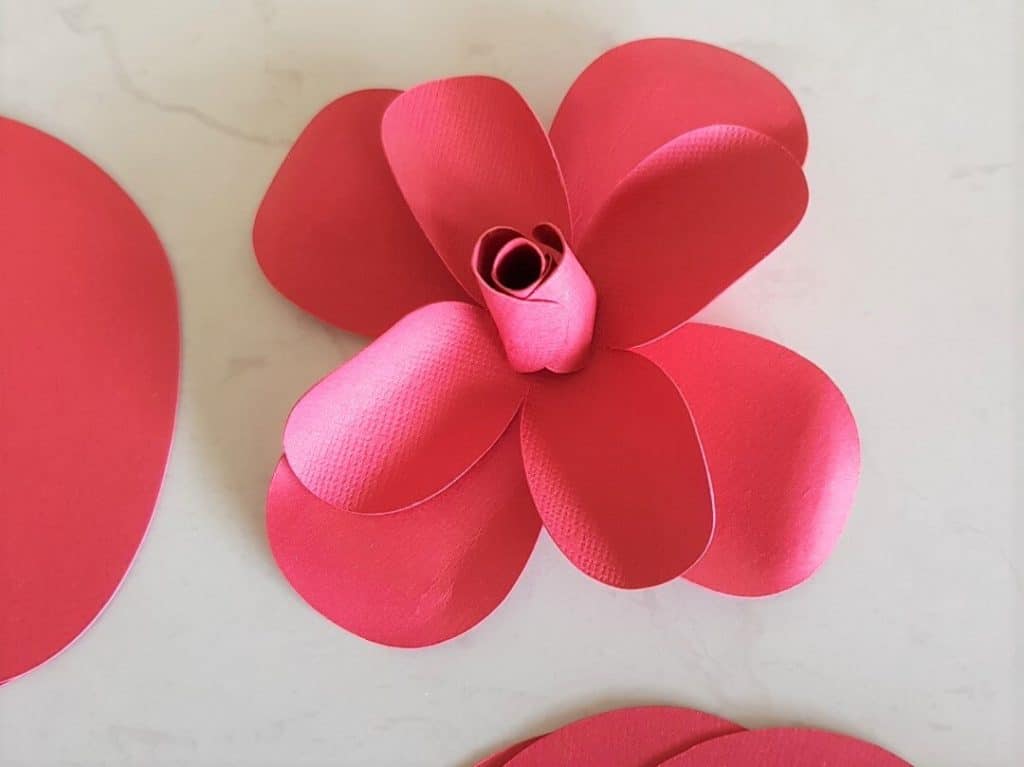
Grab the circle piece of the of your rose. This piece is the base that the petals will be glued to.
Start with the largest of the petals and glue the four petals evenly around the circle. I placed the first two on the opposite sides of each other with them touching each other in the middle and then the second two layered on top of them on the opposite side of the circle.
Continue adding each layer of your petals, building from the outside row of the flower with the largest petals and adding each layer inside the next layer towards the center.
Each layer is placed off-center to the layer before.
The Ranunculus flower is put together in a similar way.
This is a picture of my Ranunculus paper flower during construction. How you put them together is very similar. Why don’t you try this one too!
NOTE: In the picture below I have rolled the petals BEFORE gluing them down to the center circle. Both ways will work and it is a matter of preference and which way you personally find easier.
Step 7 – add the centerpiece
Once you have all the petals on you should have space in the center for your centerpiece that you had put together in the earlier steps. Glue your center into the middle.
Step 8 – give your rose some shape
Now to give your paper rose some shape, this is a really important step and may take a little patience to get the petals exactly like you want them to look. Work your way around the petals curling them out and down. Be a little careful not to tear your card-stock…. it is easily done.
I used a thicker rolling tool that I had previously made from Dowling to curl flowers. It is actually called a quilling tool and works great.
I found the tutorial on Jennifer Maker’s site on how to make your own quilling tool. Jennifer’s site is focused on using Cricut cutting machines and she is fantastic.
NOTE: If you make one of these be careful cutting the slit in it. I saw stitches in one of the groups I was in…easy to slip and cut yourself.

Your paper rose is finished
Once you are happy with the curling and rolling of your paper rose you are done!
NOW TO MAKE SOME MORE!
I hope you enjoy making your paper roses and until next time.
Happy creating,

Join Me
If you haven’t already, join me in the Facebook group Scan N Cut ~ Let’s Create With Sue. The group is full of awesome crafting friends and we would love you to see your there.
AND of course…. like my Facebook page Create With Sue

Would you like to get more out of your Scan N Cut?
Have you used your scan feature on your Scan N Cut?
What about where to look to set up wifi or calibration.
(Limited time only)
Are you just starting out or perhaps a little intimidated by your Scan N Cut? This course is for you!
This video course is a step-by-step introduction to using your Scan N Cut. It has been designed especially for YOU!
The course will show you how to use your Scan N Cut machine from the very start with minimal fuss and bother. This will allow you to create beautiful, cuttable designs.

The butterflies above were cut from a free image that I downloaded from Pixabay.com. The image was printed out and then scanned.
(another option would be to use your stamps.)
You can see the variations available to you using the Scan feature of your Scan N Cut.
The scanning feature is what makes this cutting machine unique!
IF YOU LIKE IT….PIN IT SO OTHERS CAN ENJOY IT TOO!