
This tutorial is going to show how to set up your half-cut on the Scan N Cut DX. This feature is not available on the earlier CM Scan N Cut models as they are manually set.
Below are pictures of the Scan N Cut SDX2200D screen which is a Disney model. I have used this to film the Scan N Cut DX “How To” series that I have put together.
While the pictures may look a little different from yours, the DX range are all set up with the same icons, in fact, the icons flow through all the models which is great. The main variation between the earlier models is where they are precisely located. It is fairly easy to follow along.
I have included a video tutorial below for those who prefer to watch tutorials.
When do you need to set up Half Cut
When do you set up Half Cut? Vinyl is the main reason for using the Half Cut feature. Both Heat Transfer Vinyl (HTV) and normal adhesive vinyl, only have the top layer of the vinyl cut through. The backing paper or carrier sheet needs to remain intact. This makes it so much easier to transfer your designs onto your project.
Here are some links to several tutorials on how to create with vinyl. I love making things with vinyl and I am sure you will too so make sure you give it a go as it is very easy once you start.
This is the link to the Projects section on the website where you will find tutorials on labeling, creating vinyl signs etc
And a very handy beginner’s guide on different vinyls, where to buy them, and how to use them.
There is also one to get you started with weeding your projects.
Ok, let’s get started!
Half Cut Video Tutorial
You may prefer to watch the video tutorial on how to set up Half Cut so I have included it for you.
Here is the video tutorial demonstrating how to set up Half Cut. – I hope that you enjoy it! You will also find more information below.
Don’t forget to subscribe to my YouTube channel to ensure that you do not miss out on new release videos. See you there!
Add your design
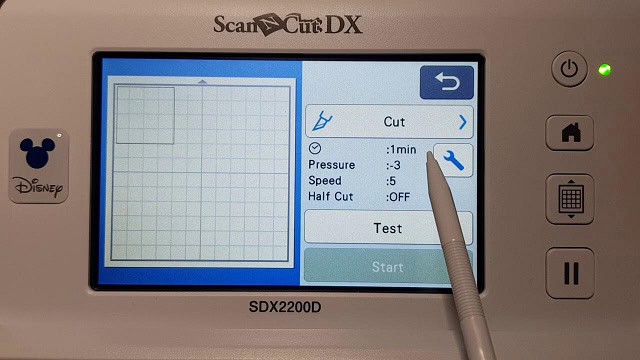
Add your design and when you are ready go to the Please Select and then choose the Cut option. You will then be in the below screen where you can see your settings and the time your project will take to cut out. I love this feature on the DX.
You can see that the Half Cut is OFF.
Use the tool icon
Click on the little wrench or tool icon here.
Select Half Cut
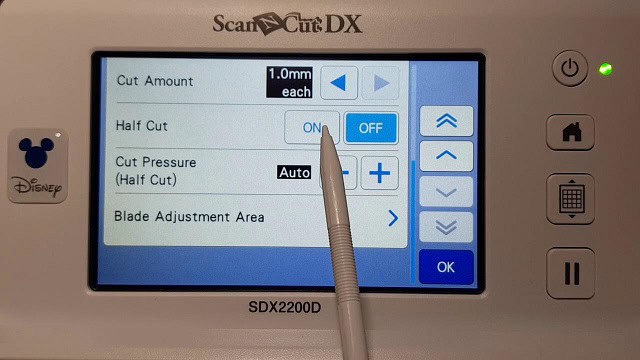
When you are on the next screen you will need to scroll down. Use the arrows on the right-hand side of the screen. The double arrows take you between the first screen of settings and the last screen and the single arrows take you through the screens one at a time.
Scroll down until you get to the Half Cut screen and you will see that the Half Cut can be On or Off. To turn it on, you simply press the On button.
Test cuts
I am a huge believer in test cuts. With the CM range of Scan N Cut machines a test cut was essential however this is not the case as much with the DX range due to the auto blade. Your DX model does a fairly good job of gauging the depth that it needs to cut.
BUT
There are times when you still need to do a test cut so I recommend that before you cut out your first vinyl project you add a test cut. If it cuts perfectly then you are good to continue cutting your design. The auto sensor for the blade depth works very well, so once you get an idea of what settings work for you then it should be roughly the same as most of your projects.

Click on the Test button and it will add a small triangle to your Scan N Cut screen. You can move the test triangle around the screen with your stylus to place it in an appropriate spot to do the test. Once you click on Start your machine will cut the test cut and then kindly stop and give you time to check the test cut. Very friendly.
You will then have the option to either continue cutting your project or Quit and tweak more settings to make it perfect.
NOTE: Quitting at this point will not impact your design.
Oh no, my test cut was not the right depth
Don’t panic as there is an easy fix.
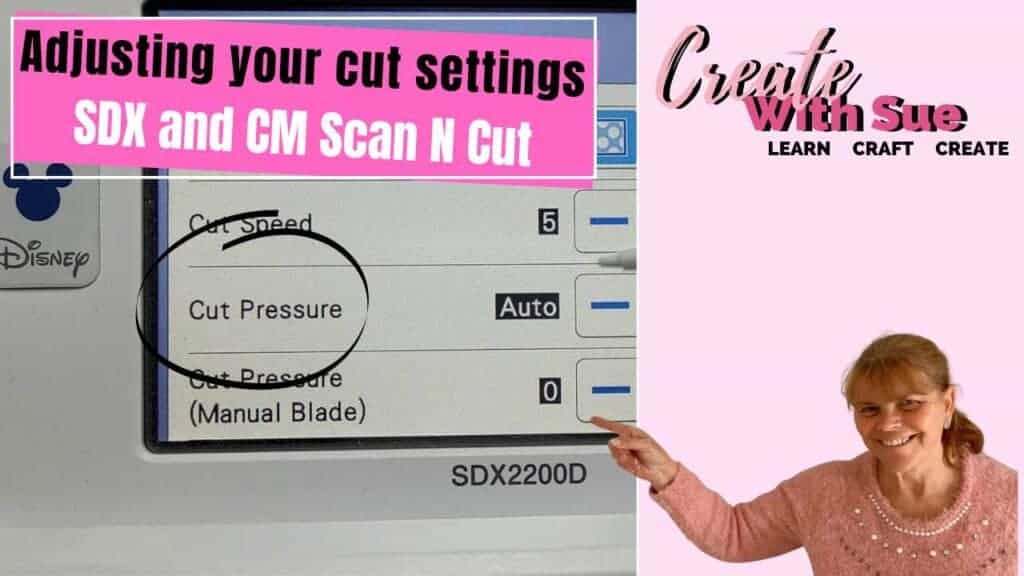
You can change the Cut Pressure, the Half Cut Pressure, and also the Cut Speed.
These three settings are your best troubleshooting friends. Tweaking these settings can make a huge difference to how your project cuts out.
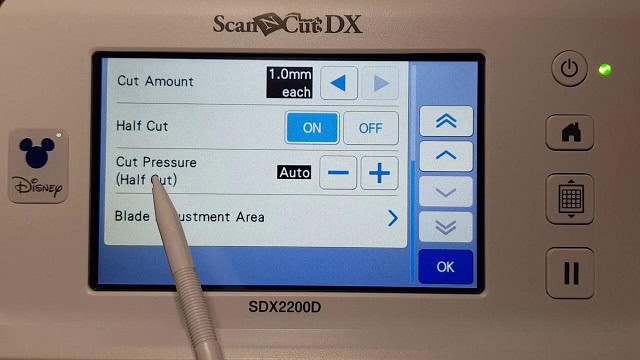
Half Cut Pressure
Changing the Half Cut Pressure will only alter the pressure when your machine is set up for Half Cut. Depending on the results of your original test cut, select the minus icon to reduce the pressure or the plus icon to increase pressure.
If your vinyl has been cut through too far you can reduce the Cut Pressure by clicking on the minus icon. You can see in the picture below I have mine set on -3 as this was the best selection for my project.
For vinyl that has not been cut through far enough increase the Cut Pressure by clicking on the plus icon.

Cut speed
Another issue that can occur is your vinyl rips or pulls up as it cuts. Sometimes this does not show up in the test cut which is a nuisance as it messes up your project. Try reducing your Cut Speed to resolve this issue.
For more troubleshooting tips check here.
After any alterations to the settings, I would recommend doing another test cut to make sure that you are happy with the adjustments you have made. A small triangle is much less frustrating and much cheaper than cutting your project and it is not cut correctly.
Half Cut setup is now perfect
After you have checked your cut, and made any necessary adjustments you are ready to continue to cut out your design. I would love to see pictures of what you have made.
NOTE: The great thing about the auto blade is that once you have set up any pressure adjustments for Half Cut, your machine will remember them, and the next time you cut vinyl you shouldn’t need to make any changes.
If you aren’t already, please join my Facebook group Scan N Cut ~ Let’s Create With Sue. You can share your awesome creations with the group, ask for assistance or simply pick up some additional tips and tricks.
Happy creating,

P.S. Don’t forget to check out other posts on the site. There are LOTS of tutorials and ideas.
BIG Changes for ScanNCut Owners – You Need to Know This!
Exploring the New Affinity Designer V3 — My First Impressions
Today we are exploring the new Affinity Designer V2 software which was released on October…
Cutting Cardstock: Tips for Better Results
Cutting cardstock with your ScanNCut can produce beautiful results, but sometimes you may notice issues…

Rejuvenate Old Jeans with HTV and Your ScanNCut
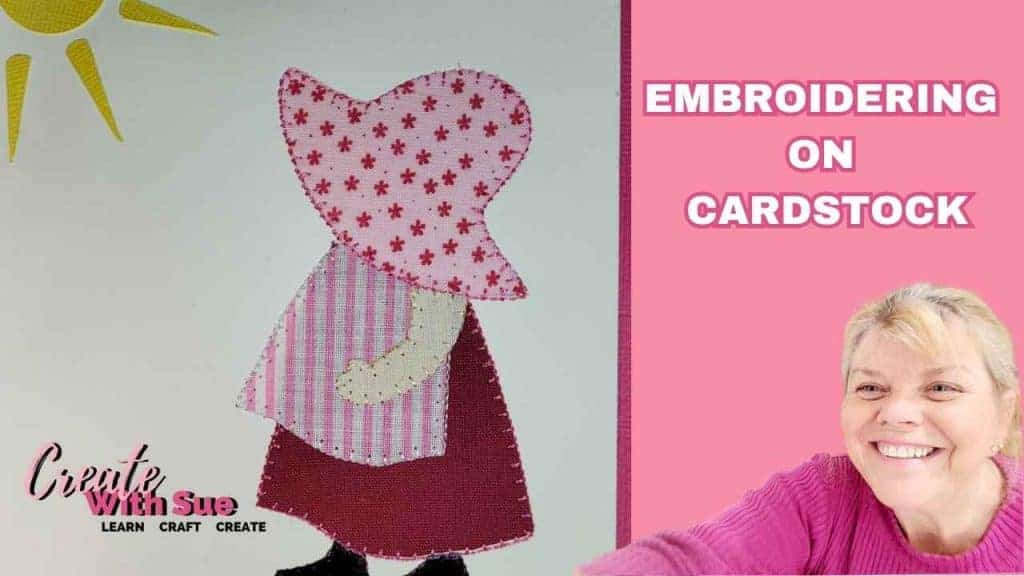
Embroidering Cardstock: A Creative Twist for Your Craft Projects
If you’re looking for something a little different to add to your cardmaking or papercraft…


Hi Sue,
I have an earlier version of the scan-n-cut and play around with it occasionally, but I was intrigued with the wood burning project. Where can I get the stencil used in this project (wine and cheese)?
Thanks,
Cindy Adams
Hi Cindy, I have contacted Tamra, and unfortunately at this stage, she does not have the file in SVG format. She actually created the file from scratch herself and did an amazing job.