
Ever wanted to have a go at making your own paper flowers? I have put together a tutorial for this delightful flower PLUS a free template. Such an easy DIY.
So, over time I have had a couple of shots at making paper flowers….with a dreadful outcome. They didn’t look like flowers AT ALL! I was sooo disappointed each time as I had tried different peoples patterns with no luck.
Recently I completed a course through Jennifer Maker and part of the course was designing and making these paper flowers. I have some more information if you are interested here!
NOTE: (I have placed affiliate links for Jennifer Maker courses in this post because I have loved how she delivers training. While I may earn a small commission if you use any of my links to her site, it will not cost you any additional money)
Well, I won’t lie, I still had to have a couple of attempts at one of the flowers I designed ( I am NOT adding it to my Resource Library) BUT then I designed this one and it just went together like a dream! I had a lot of enthusiastic comments on it so I am adding it for you to access in my Resource Library. (and putting together a tutorial to help you further)
I was so excited it went together like a dream!
Using Canvas Workspace
I uploaded the template into Canvas Workspace in this tutorial when making the flowers.
If you don’t have a Scan N Cut you are still able to make these flowers as I will include an SVG file which any cutting machine is able to use. A pdf will be included for those who would prefer to cut it out by hand.
What Do You Need!
- Card stock – I used 1 sheet of 12″ x 12″ dk red and a small amount of yellow and green. The pattern will fit on smaller pieces of card.
- Something to cut it out with – I have a Scan N Cut but any cutting machine will work
- Download my template
- Glue
Step 1 ~ Download
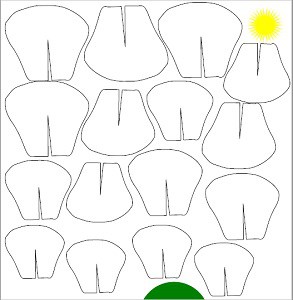
Download the paper flower template from the Resource Library (or use your own) and upload it into Canvas Workspace. I recommend that you use the .fcm file for Canvas Workspace.
If you need assistance with uploading a file into Canvas Workspace check this tutorial for more helpful information.
Step 2 ~ Move or Resize
Once you have the file in Canvas you may need to move the flower petals around to suit your selected paper OR maybe you want to resize them to make a different size paper flower. The file is quite versatile.
To resize please watch this tutorial – (if you are confident with resizing then skip this step.)
Tip: You may find that you can flip some of the petals upside down to maximize the use of your paper.
Step 3 ~ Let’s Cut
Now that you have sized the petals to the size that you wanted and placed them to match the paper type chosen we are ready to cut them out. Send them to your cutting machine. Double check that they fit your paper then press cut.
Tip: Remember to do a test cut. This is really important if you haven’t just cut the exact same material. I use the triangle but you can use your preference.
Step 4 ~ Organisation Required
Let’s get organised!
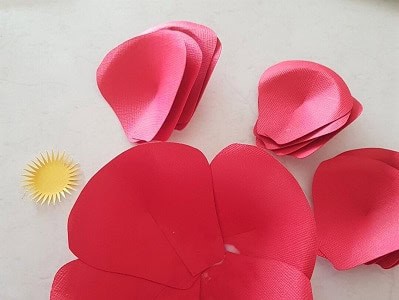
Collect all the petal pieces and sort them into sizes. You should have 4 petals of each size. Place them in decending order ready to put them together. You should also have one round circle and small circle (potentially yellow) with lots of pointy bits.
Step 5 ~ Let’s Put it Together
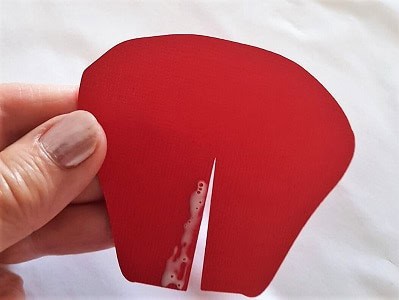
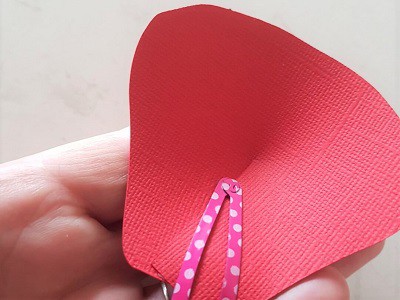
Glue each petal’s base v section together with a small amount of glue as shown below.
Tip: If you use glue that takes too long to dry you can use a hair clip to hold edges together. I (of course) could not find the long flat type that I was looking for so used the one pictured below.
(Make sure that whatever you choose does not bend the petal and affect your project.)
Work through this step until of all your petals are done. Don’t forget to place them back into their sorted size groups you originally put them into.
Step 6 ~ Curling and Shaping
We are getting there!
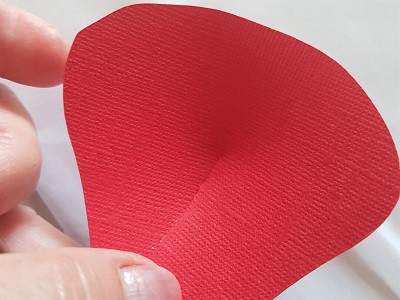
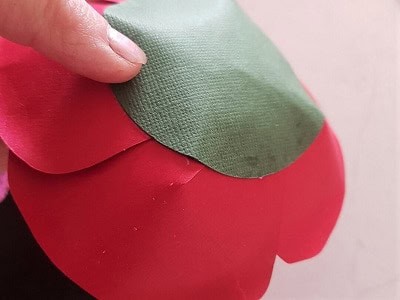
I gave each petal a ‘curl’ so that the top part of the petal bent backwards slightly giving it a bit of shape. You can use a pen, a piece of dowel or whatever is easiest for you.
For this project I actually used the white stylus that comes with your Scan N Cut and it worked beautifully. Just remember to put it back with your machine when you are finished. (I often forget).
Step 7 ~ On they go!
Now that you have put a bit of shape into your petals we can start placing them onto your large circle.
Take one of the largest petals and with a small amount of glue at the back of the petal glue it to a section of the large circle.
Then, add the next large petal next to it spacing them so that all four petals fit nicely around the circle. See below.
Once you have placed all the largest petals onto the circle you then add the next largest ones. Place the next size down petals across the middle of the bottom layer. Glue all four petals onto your base trying to keep them all off center to the previous layer as you work your way around.
Do this for the next size petals as well and then add the final layer of the smallest size petals in the middle. Each layer is placed off center to the layer before.
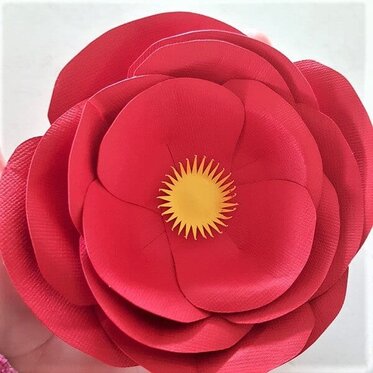
Add the yellow center ‘stamen’ into the middle of your flower and you have finished!
Voila!
I hope that you have enjoyed this flower project.
I have some more flowers in progress and look forward to sharing them with you.
Happy Creating,
Sue
Make Your Own SVG Files!
Would you like to design paper flowers like these from scratch? You can!
I have information about creating your own SVG’s with a great teacher, Jennifer Maker.
And remember……..
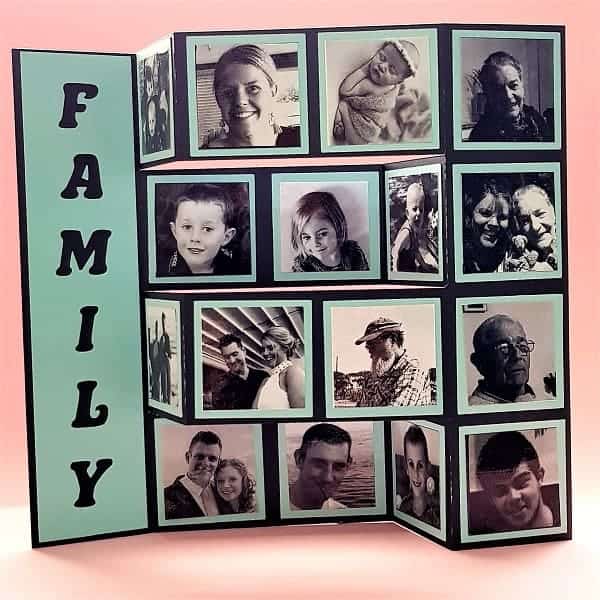
Access to Free Projects
Want to find more free projects you can create. Check out some of my other posts. You will find them on the sidebar of each page. If you don’t already have access to the Resource Library then complete the form at the bottom of the page so you can access all the free templates and patterns.
Facebook Anyone? Lets Connect!
I would love you to join my facebook group if you haven’t already. It has been set up as a place to get help you along the way.
It is called Scan N Cut !~ Let’s Create With Sue
And my like my page Create With Sue
or simply just say hello at [email protected]. I would love to hear from you!


If you find this page useful then others might too! Why don’t you share it with Facebook // Instagram // Pinterest so others benefit too!
Access to my FREE Resource Library below.


Beautiful flower. I found more paper flowers here: https://creative-vector-studio.com/product-category/paper-flowers/