This tutorial is on how to trace using Canvas Workspace. It covers how to trace in both the online version and the downloaded version of Canvas Workspace. While both versions use the trace function in a similar manner there are some subtle differences.
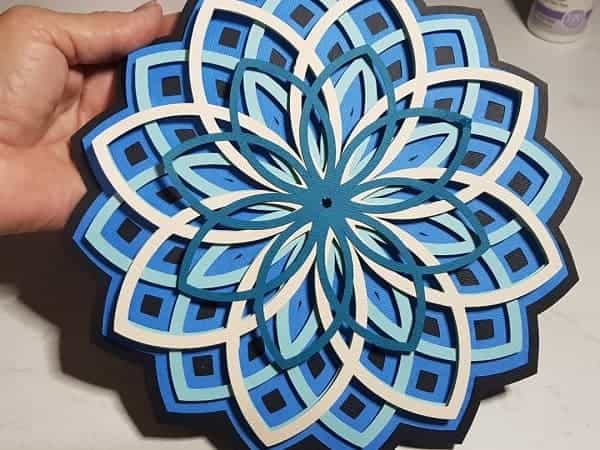
The mandala image I have used comes from the Pixabay.com site and is free for personal and commercial use which is absolutely fantastic of the designer.
The link for the mandala is https://pixabay.com/vectors/search/mandala/ and the design is Image by Gordon Johnson from Pixabay
I picked this image as it was an interesting one to trace and show you how it will work. To actually cut this image it may need some tweaking. For example, the lines thickened and areas checked for where the cut lines end up. Still, a fun project to have a play with and expand your skills.
Accessing Canvas Workspace
To use Canvas Workspace you need to register with Brother and there is a tutorial from them covering both versions that you can find at https://support.brother.ca/app/answers/detail/a_id/127981/~/how-do-i-install-the-canvasworkspace-in-the-computer%3F
I have included a short video tutorial in case this is your preferred method of learning.
Let’s start with the online version of Canvas Workspace.
Online Version
Step 1
Click on the Trace icon which is the icon found on the top shortcut bar circled in the picture below.
Step 2
Select your file. Image formats that Canvas Workspace accepts are PNG, JPEG, GIF or BMP. I usually use PNG or JPEG for good tracing results. BMP is not the best option.
The better quality the image is then the better the trace will be!
For the Mandala, I selected from the Vector image section of the website as these have a less jagged edge (not pixelated). The image I downloaded was still a JPEG. A mandala is quite a complex image and once traced may need nodes checked and fixed.
Note: SVG’s are a Scalable Vector Graphic file = The BEST for cutting machines.
There is a really good article explaining the difference between files here https://www.clashgraphics.com/printing-tips/difference-between-vector-jpeg-and-bitmap-graphics/

Step 3
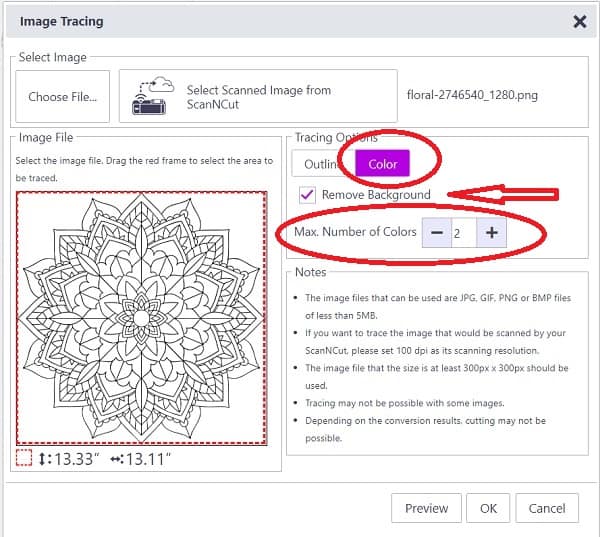
If the file has detail inside of it then select the Color option. I circled the option I selected.
The Outline option will only trace the outside shape. The Outline option is great for silhouettes.
Note: Check ‘remove background’ if it is not required. You would only need to retain the background if you need additional guidance on how the traced image should look or be colored. It is not an editable image.
The dotted red outline around the image to be scanned can be moved to only select required areas of the image. This is handy if you have extra objects in your image that you do not want.
Step 4
Select the number of scans you would like to do. This basically means that it will scan a number of layers of the design. I circled the area in red in the picture above to highlight it. By default, it is set to 5 however for the mandala reduce that to 2.
How many scans would be determined by number of colors in your image. Play around with the setting by increasing or decreasing to see what works/looks best with your particular image. Keep in mind, fewer scans are often better.
Step 5

By default, the YES is selected on the screen above which is the next one you will be presented with. This is asking you if you need the original image pulled into Canvas Workspace. This is a non-editable image and only useful if you need to use it for managing colors or following the pattern for some reason. I find I rarely need the image so I always select NO.
Step 6
Click OK and when your image is in Canvas Workspace you may need to resize it. If you look at the Mandala image size that will trace in it is over 13″ x 13″ so definitely too big for us.
The traced image will import in ungrouped.
Note the picture below. It has lots of small dotted lines around all the different pieces of the Mandala. These are all separate objects in the traced design.
Importing the image as an ungrouped object makes it easy to alter sections of your design HOWEVER if you need to resize then you need to do this BEFORE you edit anything. To resize the image GROUP it first, then resize it and this will maintain the scale of your project. You can ungroup and edit as necessary once resized.
Note: You need to select the entire image to group it for this exercise. Click on the far top right of the image and drag your mouse to capture ALL objects of the design.

The GROUP function is highlighted above and lives in the Edit tab. It is also available if you right-click the object about halfway down the selections.
Downloaded Version
Step 1 & 2
Step 1 and 2 are very similar to the online version. The main differences are
1. Trace Image icon looks slightly different than in the online version and lives in the side shortcut menu bar instead of the top shortcut menu bar.
2. The box you are presented with looks different.
See the images below.


Step 3
Step 3 is where the downloaded version of Canvas Workspace image tracing starts to vary. The options are pretty much the same but look a little different. The same thing, if the file has detail, select the Trace Area by Color option as the outline option will only trace the outside shape.

Note: The check ‘remove background’ is now ‘include background. Only add the background if you have a reason that you require it. It is unchecked by default.
A big change is that the ‘add image to the drawing area’ (Canvas Workspace work mat) is by default checked. UNCHECK if you don’t need the traced image to work with. (recommended)
Step 4
Select the number of scans you require. Again, I selected 2 scans as this is a black and white image. Depending on your image, select the number that suits your image the best. I think that the fewer scans the better though. The scan selection area is circled in the picture above near the bottom.
Step 5
Click OK and the traced image will be imported into Canvas Workspace.
Again, if you chose not to bring the original design into Canvas Workspace you will need to remember to group and resize your design if resizing is required.
Don’t Panic!

If you receive the above error when trying to move or work with your imported image DO NOT PANIC! LOL.
It seemed to take me ages to work out why this was occurring. It doesn’t happen in the online version.
What has happened is that you have brought the original, uneditable image into the work mat with the traced image.
Error Message Fix
There is an easy fix for this.
Open the Layers Panel which is on the right-hand side menu bar. The icon that looks like layers of paper. Scroll right down to the bottom of all your layers and right at the very bottom you will see a layer called ‘image’. This is your uneditable image that has come in. (maybe you forgot to uncheck that little box in the earlier screen)
You will see a small lock on the right-hand side – Unlock it and it will separate your original image from your traced image. You will now be able to edit your traced image.
There is also an option to hide the image if you don’t want it on your mat. The small eye shape changes layers on your mat to hide or unhide.

I hope you have fun playing with the Trace function in Canvas Workspace and found the How to Trace post useful. It is always a balancing act between explaining it clearly and it being plain old BORING!
Happy creating,

P.S. Don’t forget to find me on facebook and other social media
I would love you to join my facebook group if you haven’t already. The group has been set up as a place to help you along the way.
The facebook group is called Scan N Cut !~ Let’s Create With Sue
And while you are there, like my page which is Create With Sue
or simply just say hello at [email protected]. I would love to hear from you!
If you find this page useful then others might too! Why don’t you share it with Facebook // Instagram // Pinterest so others benefit too!
Access to Free Projects
Want to find more free projects you can create. Check out some of my other posts. You will find them on the sidebar of each page. If you don’t already have access to the Resource Library then complete the form at the bottom of the page so you can access all the free templates and patterns.