Ever thought about trying to create a vinyl sign? You know…make one of the wooden hanging signs with funky writing on? This is your chance to find out how and create your very own!
AND it is easy!
I have seen so many fantastic vinyl signs around that I had a little trouble working out which one to choose. I picked out the file that I planned to use about a year ago (it is still available) and knew exactly what I wanted to do with it and who for. Yep, it has been on the back burner while I have been so busy creating lots of other projects. Well, the time has come!
This post will cover what you will need to create a vinyl sign and how to put your sign together, join me on our creative journey.
Disclaimer: As an Amazon Associate, I earn from qualifying purchases. Links included in this tutorial may be affiliate links, Amazon or others, meaning I may earn a small commission at no additional cost. These commissions will help me continue creating content for you. Thank you for your support! Read my very boring full disclosure policy here.
What do you need
I will go into more detail about these supplies in the next sections.
- A board to create your vinyl sign on.
- Indoor or outdoor grade Vinyl. This will depend on whether you plan for your project to be inside or outside. If you can source Oracle 651 Vinyl that would be my recommendation. I used Cricut Vinyl for this project which I find is reasonable for most projects.
- An SVG file for the design on your vinyl sign. Here is the one that I used.
- Clear Vinyl Transfer Paper/sheet. (will refer to it as paper in these instructions)
- An electronic cutting machine. I used my Brother Scan N Cut however, a Cricut or Silhouette Cameo would also be a great option. While not as easy, this can also be achieved even if you do not have an electronic cutter.
- About 60cm of rope.
- Paint, hammer, nails, and drill (possibly a handy husband)
Don’t be put off by the list… it looks worse than what it was.
The sign-board
I have to admit this was my biggest challenge, trying to find a board to create my vinyl sign on. I tried sourcing a ready-made board however none were exactly like what I was envisioning. Don’t you hate that!
So to meet my vision I made the board from scratch and on a budget! My partner hooked up the trailer and I went looking for a giveaway pallet to re-purpose some of the planks from the top of the pallet.
Check! ……. Found one.
I will include the measurements I used however you can make yours the size that suits you. That’s is the beauty of craft, NO RULES.
Working dimensions out
I decided to make the board three planks wide as it w three planks worked out to be 12″ (30cm) wide which enabled me to create a design to fit on the cutting mat just right. My Scan N Cut is able to cut 12″ x 12″ OR 12″ x 24″ so I made the length of the board 29″ ( cms) long to use the larger cutting mat. There would be a few inches spare each side of the design to give it more a balanced look. More information on altering the settings on a Scan N Cut to utilize the 12″ x 24″ mat if you need it here.
To join the boards together we used some narrow pieces of wood and cut them 12″ long. Placing them on that backside of the planks and in the opposite direction to the longer planks, nailed them on to hold the three planks together.
Painting your sign board
Now to paint – Don’t forget we are on a budget still so I found some white paint in the shed that we have been using for the outdoor furniture. (a little bit won’t be missed….I hope).
I had this rustic vision for the sign board and decided that I would sand back the paint so that patches of the wood below would peek through. Just to take the “whiteness” off of the board I used a damp cloth with a teeny bit of black poster paint on it and rubbed it over trying to get a bit of black paint into the tiny nooks and crannies in the wood.
Ok… happy with that!
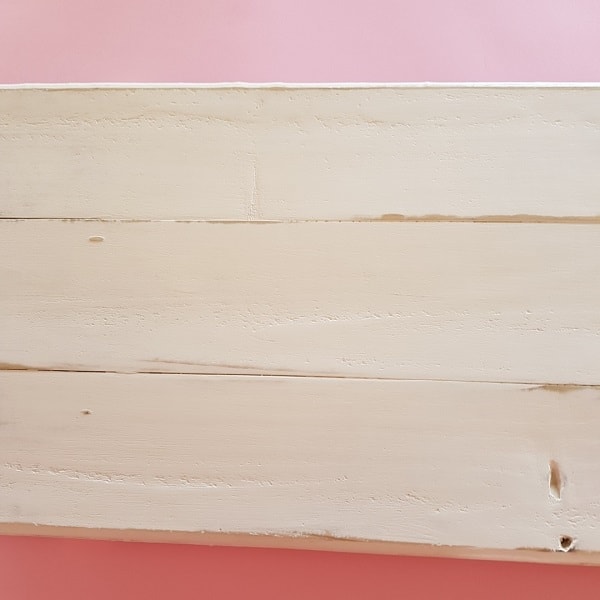
I wanted a rustic so not concerned about the indents. I sanded the paintwork back to reveal parts of the bare board.
Choose a design
This is the FUN bit. Now, which design! If you are anything like me you want to do them ALL! Electronic cutting machines will accept SVG files or a propriety file extension. Check out ” A SVG What? “ if you would like to read more about SVG files.
The person I am making this one for though loves her farm animals, especially her chooks. SO …… a chook one it is!
If you use Canvas Workspace
For this project, I am using Canvas Workspace. If you have chosen an SVG file then it will work with any electronic cutting machines software. If you are just starting your crafting journey, I have written an article on “What To Use To Create Designs”. Check it out!
I like the online version of Canvas Workspace best for use with the Scan N Cut, it is free and easily accessed. If you have a Cricut, the Design Space software is also free and very easy to use too. Sorry, Silhouette Cameo users….. I haven’t used that software yet however I have heard that the pro version for Silhouette is really good.
Upload your design into your software. If you would like some assistance on how to “add a SVG to Canvas Workspace” here.
Make sure that the design is the size suit your project. Size it to allow a little room all around so that the finished size of the vinyl won’t look too squished on your wooden sign.

This is what it will look like once it is uploaded into Canvas Workspace (online version). The mat is the 12″ x 24″.
Set your blade on your cutting machine to the depth that will only cut through the vinyl and NOT the backing paper. This is called a “Kiss Cut”. Proceed to cut the design out making sure that you do a test cut first. I occasionally have to do a number of test cuts depending on the medium I am cutting.
Weed your design.
OK, if at this point you say WEEDING !!!! “What is WEEDING”? check out my article covering this.

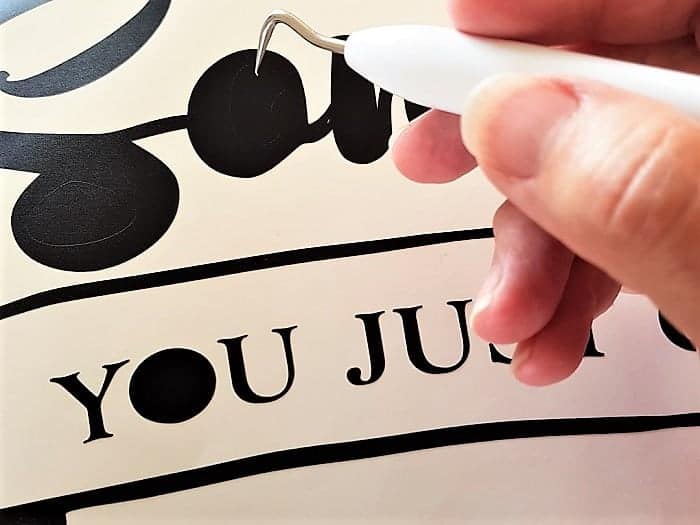
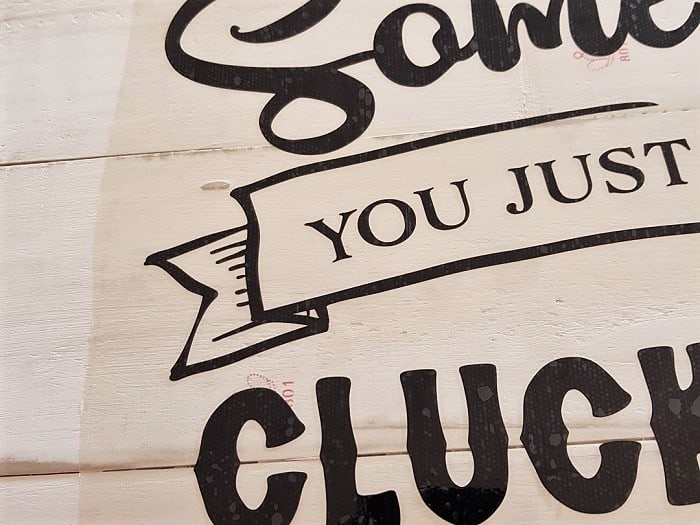
The design being weeded. You can see the score marks on the vinyl in the picture on the left as the vinyl is being pulled up. Don’t forget to remove the smaller pieces that are hiding in your design. I weeded most of this design just with my fingers only using the tool for the smaller and intricate areas.
Transfer your vinyl design
Whoohoo….. this is the best bit.
Can you remember covering school books during the school years? If so, this is much the same.
Cut a piece of transfer paper (I mostly call it transfer sheet) roughly the size of your finished design and peeling from one corner, carefully stick it down over the weeded design flattening it with your hand or a ruler or similar as you go. Don’t try to do too much too fast…. you can get into a mess (just ask me). Press the transfer paper down firmly. It needs to have contact with the entire design so it doesn’t leave any pieces on the backing paper when we do the next bit.
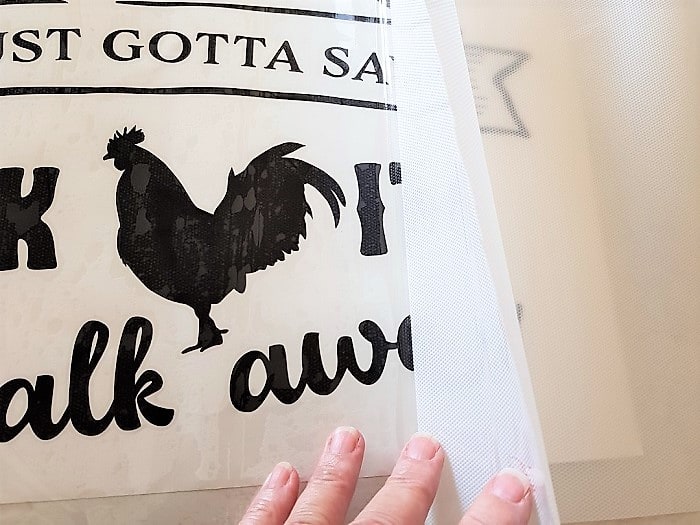
Part-way through the final section of peeling the back off the transfer paper and sticking it over the design.
*White paper on the background is the vinyl backing, Shiny contact part of the transfer paper is smoothed out over the top of the design and the last part of the transfer paper backing in being peeled away.
Which transfer paper you say?
What is transfer paper? Which one? I have been in this quandary too. I have used a few different brands of transfer paper now trying to find the easiest to use (that’s important) and one that doesn’t break the bank if you are doing a lot of vinyl work.
Best Transfer Paper that I have discovered!
One of the best options I have found is very cheap, clear book contact! Yes, you read that correctly. Contact! I have also purchased a non branded type that is clear plastic on a waffle type backing. Ideally, transfer paper that is clear and not too sticky.
So far so good with that one too. Winning!
I have also used a transfer paper that looks a little like masking tape. Easy to peel off the design but due to it not being clear much more of a challenge to place the design on your project. This does depend on your project. Easy enough to work it out if it is a small project for sure.
Cricut and some of the other brand names offer transfer paper in their product line. The downfall with the Cricut is that it is a little dearer than the options above and it is quite sticky. I have had occasions where it has been a nightmare getting my design to stick to my project …. it just wants to stay on the transfer sheet. NOT GOOD! Ends up being a lot of rubbing to make the transfer happen.
How do you transfer your design?
I would like to say easily….. and it is. You do need to transfer it carefully ensuring the design sits flat as it is applied to the project.
Step 1. – Placement
Work out exactly where you are going to place the design. It is sooo easy to place it a little crooked or a little to the left or right (again, just ask me!). Crooked is my favorite. On a positive note, YOU are your worst critic and others won’t notice these minor imperfections. If you are anything like me though it will annoy the beejeesus out of you if it isn’t right though!
Step 2 – Start transferring
NOW, similar to how you eased the transfer paper onto your design, start with one corner and peel a small section of the backing paper off the design. Your design will stay on the clear sticky transfer paper. (I say paper but it is usually more a plastic finish, like thin contact.) Don’t peel too much at once.
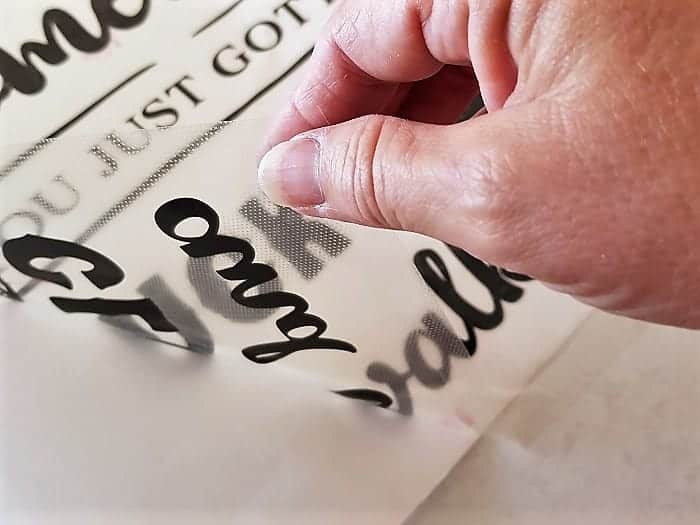
Your design will stay on the clear sticky transfer paper. You can see the vinyl coming away from the backing paper.
Tips for adding vinyl to sign
I like to work in sections. Attach the corner that you have peeled back to your project and smooth out as you go. When one section has smoothed on nicely then peel more backing paper away and smooth this section down. Keep working through like this until the transfer paper is totally on your project. Rub everywhere that your design is located down pressing it down firmly. It needs to stick! Keep rubbing until you are happy with it then move to the next step. I actually went over the design are with the handle end of my Cricut weeding tool, focusing on the lettering, over and over again…. didn’t do too bad a job at all really. (never seen it recommended but hey! if it works why not!)
The clear transfer paper and design attached to the signboard.
Step 3 – Remove the transfer paper
Here we go…… Lift one corner of the transfer paper up and slowly peel it away from your project.
Tip: I often find if I hold it flatter to the project I have a better outcome.
Keep peeling it slowly away checking that the vinyl is staying on your project as you go. If any of the vinyl design sticks to the transfer paper instead of your project don’t panic. Place it back down and do step 2 again, rubbing it down. This is where I had difficulties if the transfer paper was too sticky. I mostly use my hands to rub the design down although you can use a purchased tool or a credit card.
Once you have removed all the transfer material step back and admire what you have done.
Not quite finished – I know you thought you may have been.
I want you to rub your design a little more just to make sure it is really stuck well. Do it carefully … if you are too rough it will occasionally mark the vinyl (depending on what you are using to rub it with). I never have any trouble when I use my hands but credit cards and other objects I have had the odd issue with.
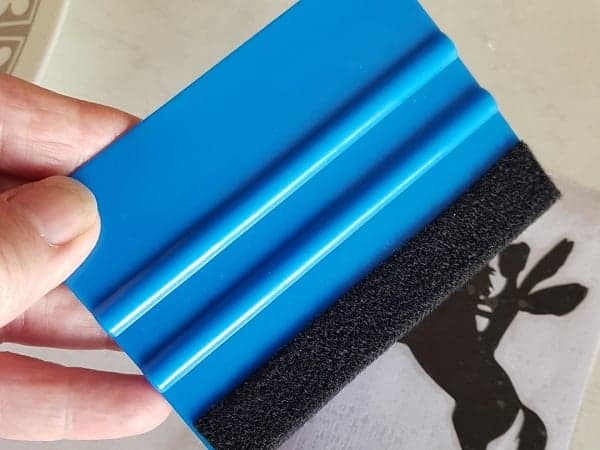
The best tool I have found is the squeegee which has two sides to it. I use the non fluffy side to press the vinyl down while it has the transfer paper on it. Then, once the transfer sheet has been removed I use the felt side of the squeegee
How to hang your vinyl sign
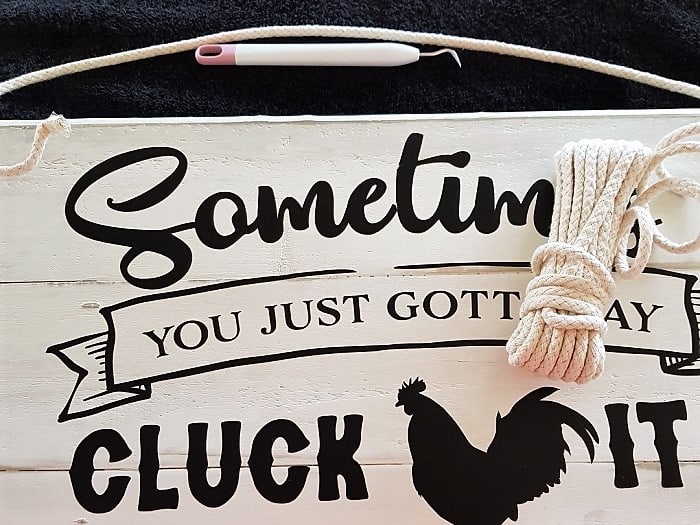
One more thing before we are finished. Something to hang your board up with. Rope was my choice for this project. Roughly work out how much rope you want and cut it to size. Drill holes in the wood at approximately 3/4″ (2cms) from each corner. Poke the rope (I used a cotton rope but anything your fancy will be fine) through the holes from the back making sure you leave enough coming through so that you can tie a knot.
Finalize your vinyl sign creation- tie the knot!
Now you are ready to tie your knot…..fluff your ends…..AND YOUR DONE!
It is so easy to create a vinyl sign! Give it a go…it is so much fun.
I do hope you enjoyed this project.
Please leave a comment below with any suggestions to either make the instructions easier to follow or let me know if they make no sense at all!
Don’t forget to subscribe so you don’t miss anything.
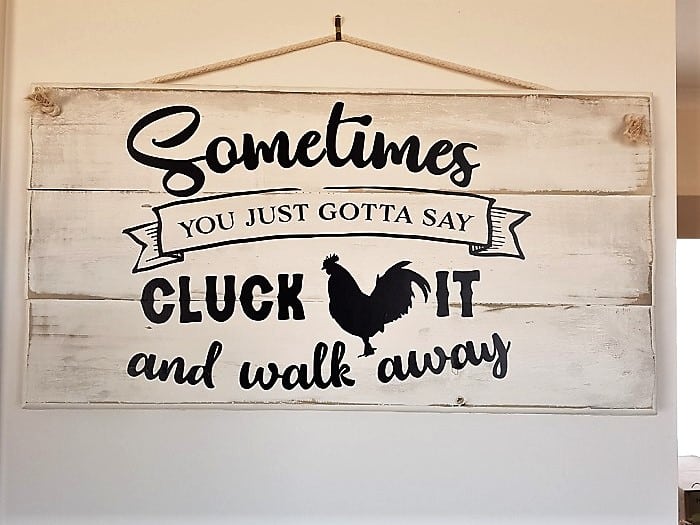
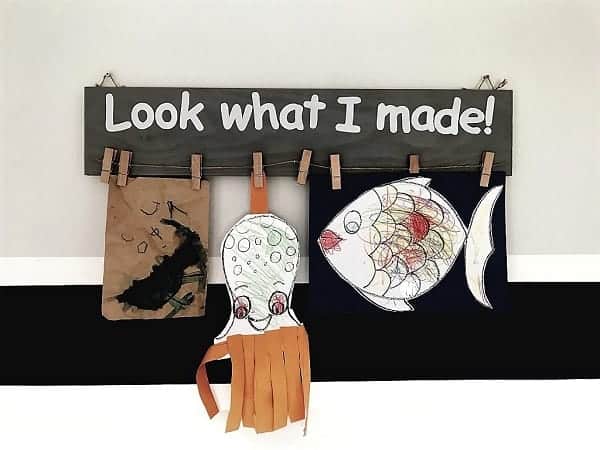
Finished project. I hope she likes it!
Did I mention earlier about being careful to place the design so that it sits straight and not lob sided. I did BOTH! Sheesh! Just remember, craft is not always perfect.
Creating a vinyl sign without a cutting machine.
Don’t have an electronic cutting machine? I haven’t forgotten you!
You don’t need to miss out don creating your own vinyl sign project. While a little more complicated it can still be done. I recommend choosing quite a simple design to start with though as you won’t be able to cut it out with a “Kiss Cut”. How I would tackle this is by printing the design out on paper and sticking it to the backside of the vinyl.
Most SVG files are provided in a number of file formats so it would be best to pick a jpeg or png if you have the option. OR you may have a picture already printed that you can use. Really, your imagination is unlimited. There are a myriad of options just remember to aim for something fairly simple at this stage.
Note: if your design has writing like mine, you will need to reverse the design before you print it so that when you stick it on the vinyl, the writing will still read correctly.
Attaching to signboard to create you vinyl sign
Stick your printed design down on the backside of the vinyl. Depending on how complicated the design you have picked is how well this needs to be stuck down. Glue or even potentially sticky tape may do the job! Use your scissors and carefully cut the design out.
You should be able to gently peel the backing off your vinyl, peeling from one corner and smooth down carefully. Much the same peeling and smoothing technique as if you had transfer material on it. If you have letters or need something to be in alignment try making a light pencil line with a ruler as a guide.
This method is a bit harder to ensure the pieces of the design end up on your project exactly where they should but it is not impossible.
Give it a go!
Happy creating,

Join Me
P.S. Don’t forget to pop into our Facebook group and say hi. I love hearing from you! The group is full of awesome crafty friends like you and is where you can share your creations and any issues you might have.
Scan N Cut Basics Course
Would you like to learn how to use your Scan N Cut to gain the most from it?
A free course is available for you – check out what is on offer!
# tutorial on How to create a vinyl sign easily


Thank-you, your site is very helpful.
Hi Tina, thank you for your wonderful feedback. I am really pleased that you are enjoying the site and finding it helpful. Sue