
Need to add an SVG file… how? This tutorial steps you through how to import and export SVG or FCM files into the downloaded version or offline version of Canvas Workspace. The tutorial also demonstrates the steps to send the design from your Scan N Cut back into Canvas Workspace.
Included is a video tutorial so you can either follow the written instructions or watch the video.
- Two versions of Canvas Workspace
- Why not just Open and Save?
- Add an SVG or FCM files from your computer
- Import FCM files from your Scan N Cut
- Exporting a FCM file from a CM model Scan N Cut
- Export or transfer your FCM design to be cut or drawn
- Succesful Export or Transfer of FCM file
- Video – how to add an SVG or FCM file
- What about PNG or JPG files
- Join me
- Get Started with Canvas Workspace full course
Two versions of Canvas Workspace
There are two versions of Canvas Workspace which operate slightly differently. One is online and an option for tablets and at a pinch…phones. (I find phone screens too small). Here is more information on the differences between the two versions.
To find out how to add an SVG or FCM file in the online version then check here for the instructions on how to do it.
This tutorial is focusing on how to use the downloaded version of Canvas Workspace which has many more features than the online version.
Why not just Open and Save?
Note that I used the term import and export in the header! This is quite different than Open and Save in the downloaded version and these terms are what you need to look for when you are in Canvas Workspace.
When you Save or Open in Canvas Workspace it will use its project file format CWPRJ. You can find out more about the CWPRJ files. This file type is great to use for designing your own projects so you can save colors and edit easily however it cannot be read by your Scan N Cut cutting machine.
Add an SVG or FCM files from your computer
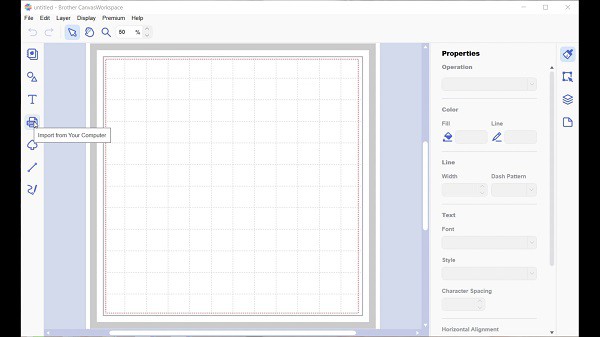
When you want to add an SVG or FCM you actually need to select Import to make this happen. There are a few ways to import your design into Canvas Workspace. One way and maybe the easiest is on the left-hand menu using the SVG icon. This will import either SVG or FCM files from your computer.
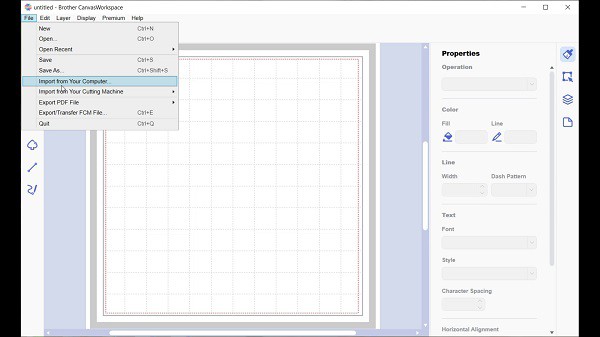
The next way is using the File dropdown in the top menu. Scroll down to Import From Your Computer.
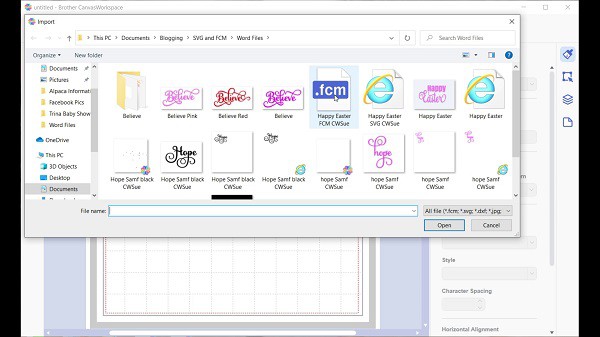
Below is the view of the import file screen that comes up after clicking on the SVG icon OR the import from computer selection.
Make sure that you have unzipped any files that you have received in a zipped format prior to trying to import them. For instruction on how to do this on a PC check here.
Import FCM files from your Scan N Cut
This section is about transferring FCM files from your Scan N Cut. Yes….this is an option. You can create a design on your Scan N Cut and either save it on your machine, save it to USB or export it to Canvas Workspace. This is a great way to utilize the added features of Canvas Workspace on any design that you create.
Note: Older Scan N Cut machines may not work quite the same as the newer models. if the feature is not available check to see if you can locate an update for your machine to provide additional functionality.
Exporting a FCM file from a CM model Scan N Cut
Here is the CM900 Scan N Cut cutting machine showing the Save button. The Save button will export or save your file to your computer and Canvas Workspace.
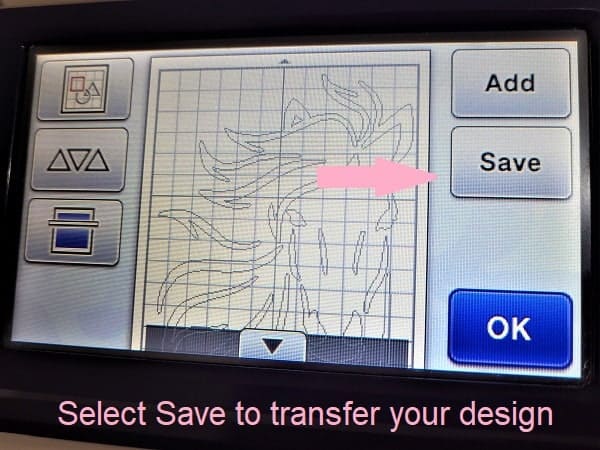
Choosing Save will open up a screen with more options to choose from.
The next picture shows the CM900 screen with the options on where you can save your FCM file. The choices in the below screen are to save the file to your Scan N Cut machine itself, to a USB device, to Canvas Workspace via WIFI, or to your cable-connected computer. Your computer would be connected via the USB port.

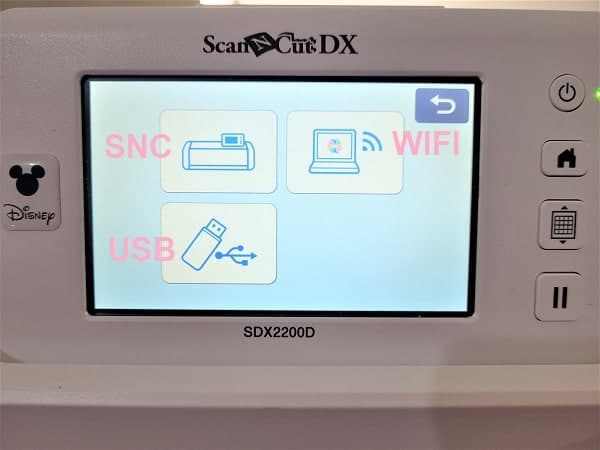
There is a similar look and feel on the DX range of Scan N Cut machines too. The screenshot below shows the SDX220D has similar icons as the CM range. The DX will also allow transferring the FCM file to your computer via wifi or the USB port.
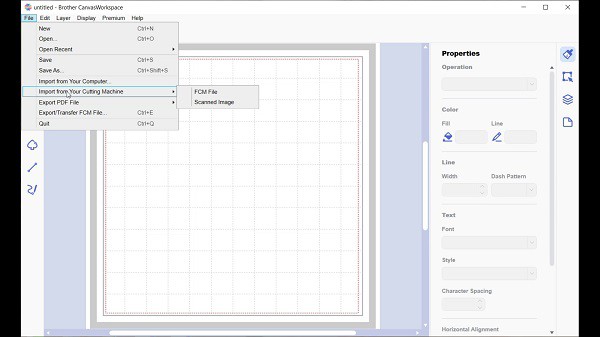
Once you have sent your FCM file from the Scan N Cut you can then import the file in Canvas Workspace. Files sent over wifi would be imported directly into Canvas Workspace using the Import From Your Cutting Machine option.
Files saved to your computer or USB device you would need to choose Import From Your Computer.
Export or transfer your FCM design to be cut or drawn
Once you are happy with your design and want to either cut or draw it on your Scan N Cut then it is time to export the file.
You use the same Export/Transfer FCM file option to save your file to USB or to transfer it to your Scan N Cut.
Below is the picture of Export/Transfer FCM file selection from the file menu. These selections all live in the File Menu in the top left-hand side of Canvas Workspace.
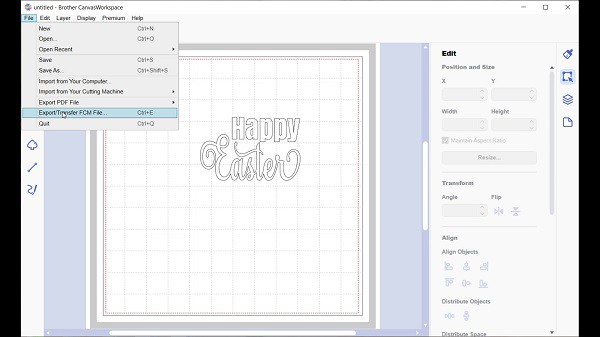
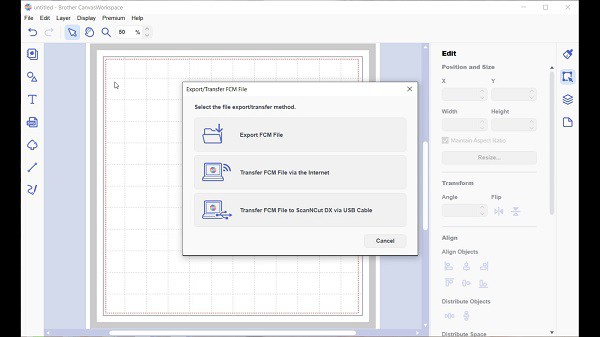
This is the next Canvas Workspace screen that pops up. You can see the options showing Export FCM file, Transfer FCM via the Internet, and Transfer FCM file to the Scan N Cut via a cable.
Succesful Export or Transfer of FCM file
You will then receive a message stating that the file has successfully been sent to your Scan N Cut.
Possible export error messages
Occasionally there is a message stating that some small objects will not be sent to your machine OR that there are hidden objects that will not be sent.
The hidden objects should only be the components of the file that you have deliberately hidden in the layers panel using the eye icon. Any objects that are “hidden” will not be visible on the mat/screen so you are easily able to double-check.
Anything hidden will not be sent to the Scan N Cut.
“Small objects removed” message is usually nothing to worry too much about. Often it is caused by something simple like a node or a couple of nodes that are too close together. They can create a tiny object that is way too small for your Scan N Cut to cut out.
Adding a dashed line to a project for the fold line is a common cause of this error message as a tiny part of a dash may be too small to cut.
In most instances, you can ignore the alert and continue to transfer the file to your Scan N Cut.
Having said that, if you are not certain what has caused the alert, make sure that you double-check the design after it has imported into your Scan N Cut. To check, select the imported objects and zoom in to 400x and inspect for any crucial component that is missing.
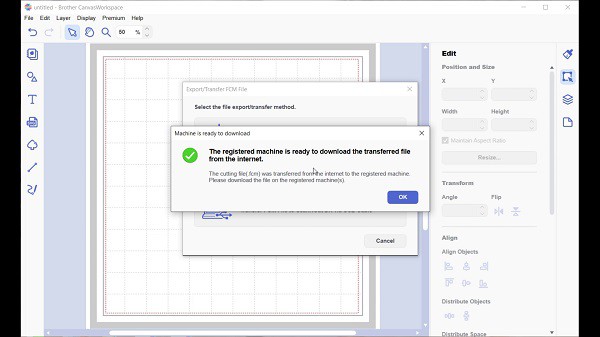
The registered machine is ready to download the transferred files from the internet …. message indicates that the FCM file has been transferred successfully to your Scan N Cut. Whoohoo.. we are off and running.
Video – how to add an SVG or FCM file
I know you may prefer to watch a video on how to add an SVG or FCM file so here it is.
What about PNG or JPG files
You can also bring in other file types like PNG or JPEG by using the Trace feature of Canvas Workspace. Alternatively, you can convert the picture formatted file in online SVG converter software.
Here is the tutorial on making PNG / JPG files work for you.
I hope you have found something helpful in this tutorial. Wander through the other links provided for more information and tutorials. There are heaps throughout the website.
Until next time……
Happy creating,

Join me
If you haven’t already, pop in and say hi in our Facebook group
Scan N Cut ~ Let’s Create With Sue
Before you go…..DON’T forget to subscribe! I would love you to follow my journey helping you create along the way.

Get Started with Canvas Workspace full course
What if you had a step-by-step, specially formulated, video course that leads you through learning to use Canvas Workspace from the very beginning and right through to being able to create your own amazing designs from scratch?
Yep, you read that right!!.. From scratch!!
The Get Started with Canvas Workspace course uses the downloaded version of Canvas Workspace and will take you from beginner to pro in very easy steps.
Limited special offer.


Hi Sue, I know how to put letters on a path – but is there a way of adding designs to path – like a line of flowers or decorative edge.
Thanks Elaine
Hi Elaine, yes. There are a few wingding type fonts that work with the Fit to Path feature. These fonts have a variety of icons etc associated with either the captial letters or the small letters. It is quite fun working through these fonts however you will need to check if the specific font you want to use will work with the Fit to Path as not all of them do.