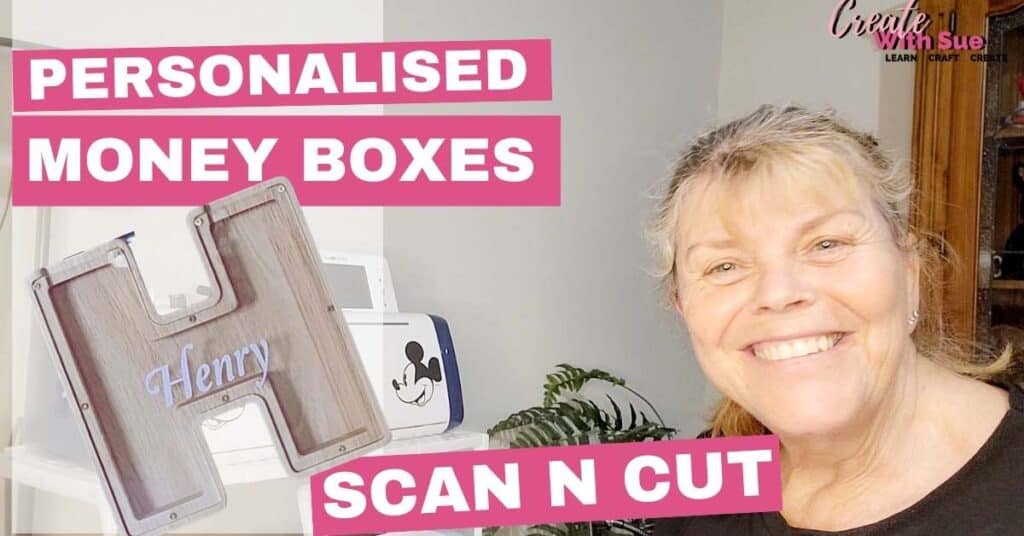
Personalized Money Boxes are ideal for Gifts and can be easily created with the Scan N Cut
Looking for a unique and fun gift for kids? Personalizing money boxes with their names using vinyl is a great way to add a special touch! Follow this tutorial to learn how to use the Scan N Cut machine to create custom vinyl decals for these wooden money boxes.
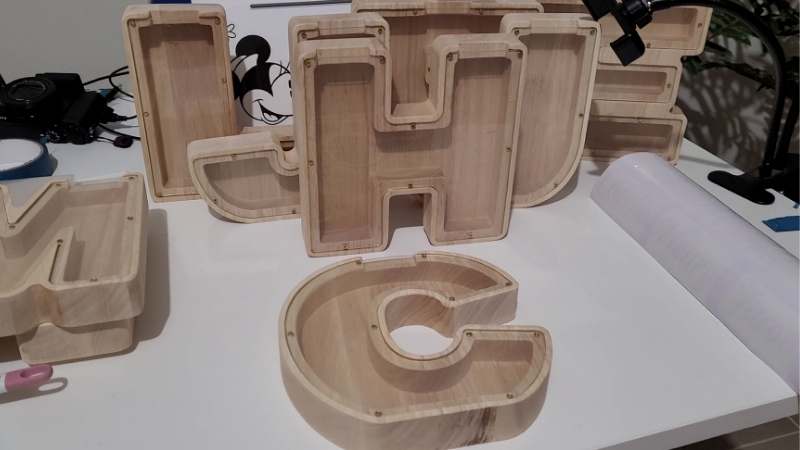
The wooden money boxes come in different lettering and also, a couple of sizes. Below are the letters that I purchased. … well, some of them. I enjoyed making them, and the kids absolutely loved them. I was surprised at how eager they were to put their money in! I remember loving my own money boxes when I was a kid.
Video Tutorial for Personalized Money Boxes
I know many of you love to watch how to make something so here is the video tutorial to complement the written instructions below. Be sure to like and subscribe to my channel so you don’t miss out on new videos as they are released.
Disclaimer: As an Amazon Associate, I earn from qualifying purchases. Links included in this tutorial may be affiliate links, Amazon or others, meaning I may earn a small commission at no additional cost. These commissions will help me continue creating content for you. Thank you for your support! Read my very boring full disclosure policy here.
Materials Needed:
- Money boxes (pre-purchased, in the shape of letters) These wooden money boxes come in different sizes so check the sizing to make certain you select the size you are after.
- Vinyl (any color of your choice) I used regular permanent vinyl in white.
- Transfer tape – this doesn’t need to be super sticky. I used the same piece of transfer tape for my entire project. (10 money boxes)
- Weeding tools – these are good value
- Brother Scan N Cut cutting machine
Preparing Your Personalized Names in Canvas Workspace
Begin by designing your names in Canvas Workspace. You can choose any font that you like. Be sure to create the text to fit the front of your money box. I made quite a few different letters and wanted all the names to be a uniform size. Check that the wooden alphabet letters do not vary too much, remembering that letters are different shapes so that all your personalized names fit. Here is a tutorial for creating names.
If you have the option in Canvas Workspace (download version) to use the weeding box, this option makes the weeding process easier later on. Once you are happy with the design, send it to your Scan N Cut. If you need help with this step check this tutorial for assistance.
Setting Up the Scan N Cut
Power on your Scan N Cut machine and place your vinyl onto the standard cutting mat. SDX models can use either the black-top Auto Blade or the blue-top Vinyl Blade. If you have a CM model the standard blue blade holder and blade will be fine.
Retrieve your file
Retrieve your files from the cloud pocket icon, USB, or direct connection to your computer. Once the design has been imported, adjust the position on the screen as needed. I will normally scan the material and check for placement. You can see in the picture below the icon I am pointing at with my stylus. This icon will scan the mat so that you can see your materials on the mat.

Cutting Your Design – Half Cut
Once you are happy with the placement, use the OK buttons to move to the Cut screen. In the settings area, ensure the settings are correct for the proposed cut. On the SDX Scan N Cut model, turn the Half Cut feature on. If you have a CM model, set the blade to only cut through the top layer of the vinyl and not the backing paper. This is the same as using the Half Cut feature in the SDX models.
Set the pressure to Auto for best results. This ensures the machine applies the right amount of pressure for a clean cut. Only adjust if necessary after you have completed a test cut. Find out more about adjusting the pressure setting here.
When placing your vinyl on the mat, ensure it has properly adhered to it so that it does not move during the cutting process. I often add long pieces of painter’s tape to the edges as an extra measure, just to be sure.
Adding a Weeding Box
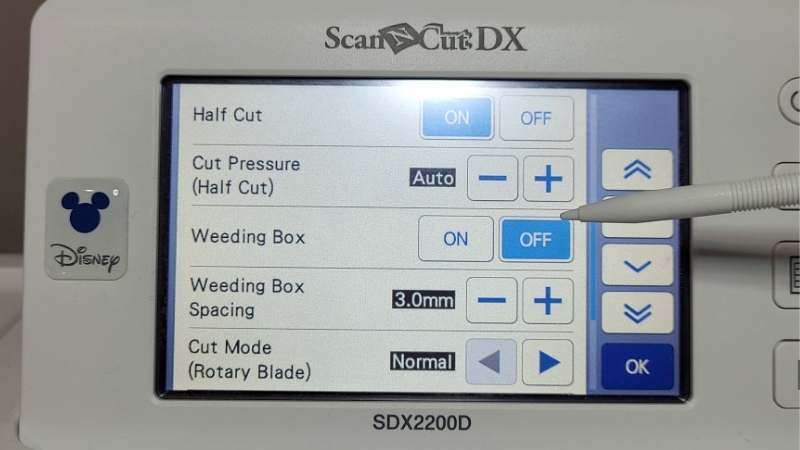
Not all machines might have this feature. It is a great feature for vinyl in particular as you can create a box around your project. This makes it so much easier to weed. If you do not have a weeding box don’t stress, you can easily create the same result by adding the box shape around your design. This can be added either in Canvas Workspace OR directly on your Scan N Cut. The weeding box feature is just a little handier.
As you can see in the picture below, you are able to adjust the distance between your design and the weeding box. The black box around the numbers denotes the default setting. This is usually a good choice however I know if does cope with it in closer as well.
One more thing to mention about the weeding box, when adding it at this step you may need to go back and adjust your distance between individual designs being cut at once to make room for the weeding box. Your machine will pop up a message to let you know. Simply go back to where you can move the designs and have another try.
The Test Cut
Perform a test cut to ensure the vinyl will cut properly without cutting through the backing paper. Move the triangle to a location on your material that doesn’t interfere with your design and is easy to access. You might need your weeding tool to remove the triangle. I recommend doing a test cut for new materials for the SDX models and ALL materials for the CM models. The SDX range does a fairly good job with its Auto Blade, however, it is still worth using the test cut to check.
Make sure the cut hasn’t gone through the backing by gently lifting the edge. Regular vinyl can be harder to check than cardstock because of its white backing paper which blends in with the mat.

Weeding Your Money Box Design
Now, this can be the fun bit…. seeing how your design has turned out.
Once your design has finished cutting, and before you remove your mat from the machine, check that the vinyl is cut through properly. If it has not, you can still recover the cut by sending the design through the Scan N Cut for a second pass if you haven’t removed the mat. If you discover that it has not cut through properly after the mat has been removed, it is unlikely that you can insert the mat so that it cuts on the identical path. You could fluke it however it is safer to use an Exacto blade to cut the missed areas.
Carefully weed out the excess vinyl around the letters and ensure that you don’t miss weeding out the centers of letters like d, a, e etc. If you’re having trouble seeing the cut lines, use a light board or apply a very light dusting of baby powder or cornflour to make the cuts more visible. This works especially well on dark vinyl. though baby powder is not useful on white vinyl at all. I don’t find I need it for larger wording.
Applying Transfer Tape
Cut a piece of transfer tape slightly larger than your vinyl design. Lay the transfer tape over your vinyl, rub it down with a scraper, and slowly lift the vinyl off the backing paper. If you find it difficult to lift, flip the design over and pull the backing paper away from the vinyl. I often use my fingernail to help the vinyl come away. You can also use the tip of the weeding tool.
I used the same piece of transfer tape for my entire project. There were TEN money boxes all up. Yep…ONE piece of transfer tape.
Applying the Vinyl – Personalized Money Box
With the vinyl on the transfer tape, carefully position it on the money box. Use any lines on the money box to guide you in placing the vinyl straight. Once positioned, press it down, working from one end to the other. Gently peel the transfer tape back, leaving the vinyl letters stuck to the money box. Once again, if a letter does not come away from the transfer tape easily, use your fingernail or weeding tool to assist it in coming away. If you use a weeding tool, be careful that you do not damage the edges of the lettering.
Finishing Touches
Smooth out any air bubbles with a scraper. Personalized money boxes make excellent gifts for birthdays, Christmas, holidays, or even craft projects to sell!
Tip: Use the same transfer tape multiple times to get the most out of it.

Personalized Money Box Tutorial Conclusion
Personalizing money boxes with vinyl using the Scan N Cut is an easy and enjoyable project. The kids will love their personalized gifts, and you’ll have a blast creating them.
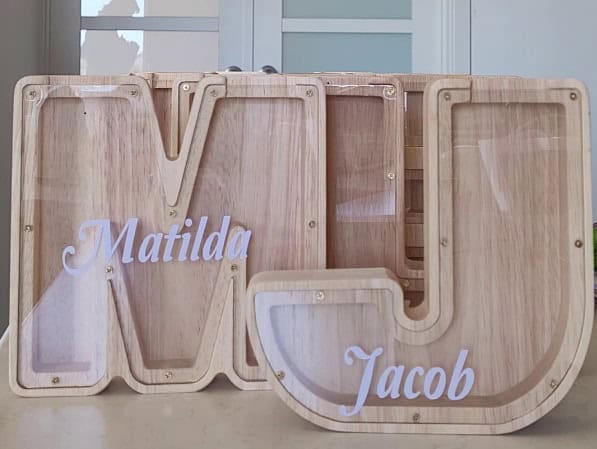
If you aren’t already, please join my Facebook group Scan N Cut ~ Let’s Create With Sue. You can share your awesome creations with the group, ask for assistance or simply pick up some additional tips and tricks.
Happy creating,

P.S. Don’t forget to check out other posts on the site. There are LOTS of tutorials and ideas.
Storefront
Have you checked out my Storefront? I have included some of my favorite tools and craft items and I am adding to them as I find them. You will find it here.