
Jigsaw puzzles can be a great source of fun and creating your own personalized Jigsaw adds that special touch. This tutorial will show you how you can make your own with your Scan N Cut or Cricut cutting machine. I have included TWO SVG Jigsaw puzzle files so that you can make a really easy to put together Jigsaw or one that is a bit more difficult.
DIFFICULTY LEVEL – Intermediate
Disclaimer: As an Amazon Associate, I earn from qualifying purchases. Links included in this tutorial may be affiliate links, Amazon or others, meaning I may earn a small commission at no additional cost. These commissions will help me continue creating content for you. Thank you for your support! Read my very boring full disclosure policy here.
- The fun of Jigsaw puzzles
- What do you need
- Download the template
- Picture ideas for your Jigsaw puzzles
- Materials to use
- Preparing the picture
- The importance of placement
- Upload the Jigsaw puzzle template into the Scan N Cut
- Video of the below Scan N Cut instructions
- Problems that may need resolving
- To seal or not to seal
- Fudge my Alpaca Jigsaw cut out
- Packaging suggestions for gifts and storage
- Additional Info
- Join me on facebook
The fun of Jigsaw puzzles
Have you ever thought of creating your own personalized Jigsaw puzzle? Well, I have many times. Many members of my family love doing Jigsaw puzzles, including the little ones.
This is why I have included two different puzzles so that you can create your Jigsaw for the appropriate age bracket. You can choose between a 20 piece puzzle (easy) or a 56 piece puzzle (a little harder).
Note that I have rated this tutorial ‘Intermediate’. There are a few challenges with the materials used. If you are a beginner, the steps are very easy to follow however be aware that the cardboard that you use may offer you some challenges.
What do you need
- Cardboard, Chipboard or a cereal box – yep! … you read that last one right.
- A picture to stick on your cardboard. I have included a couple if you would like to use them
- A4 or 8.5×11 sticker paper.
- Printer to print the picture or you could use an old calendar pic etc
- Cutting machine – Scan N Cut or Cricut
- Template and pictures from my Resource Library
(Note – Chipboard in the US is thick cardboard which, if not too thick, will cut on your Scan N Cut – Chipboard in Australia is wood and will NOT cut with the Scan N Cut)
Download the template
The first step is to download the SVG file from the Resource Library. It will come in a zipped format with all the files included. If you need assistance with unzipping the file you will find instructions in this post on how to unzip on a PC.
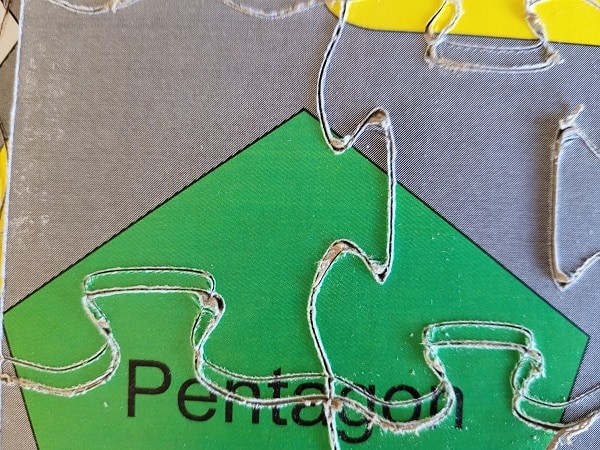
Included in the file are a couple of pictures and two different Jigsaw puzzles, one with fewer cut shapes. This will be much simpler for a little person to put together. You will see that I have created an educationally focused Jigsaw to suit.
Picture ideas for your Jigsaw puzzles
So many choices for pictures to use for your puzzles.
- General family pictures
- Holiday scenes
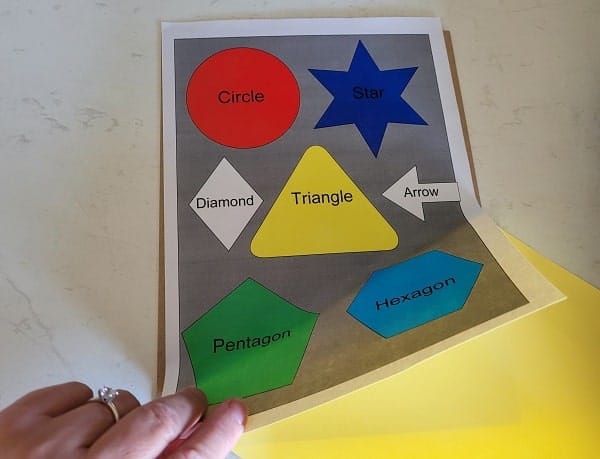
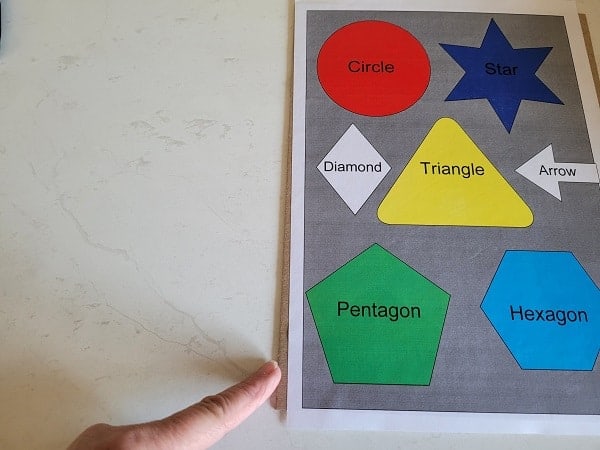
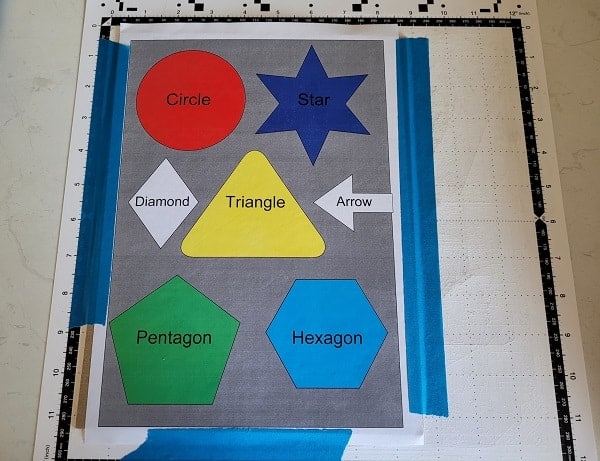
- Educational focused pictures – I have used shapes for this one
- Pets – this is my favorite
- Special cars – bikes
- Special family event
- A picture of Mum, Dad, Aunt, Uncle or Grandparents – this is great for young ones
- Your home
- Flowers in your garden
- Memorable sporting event
- Trip to the Zoo
- Awesome Calendar pictures from an older calendar
Can you think of more? I am certain you can!
Materials to use
Finding cardboard or chipboard that is sturdy enough to create a Jigsaw puzzle BUT still able to be cut by your Scan N Cut or Cricut is the next challenge.
On my first attempt, I used a cereal box. Yes, a plain ol’ cereal box which actually cut like butter with the Scan N Cut so I was really pleased.
The downside is that it creates a lightweight Jigsaw puzzle which is not quite as sturdy as I would have liked. Mind you, it was still fun to do!
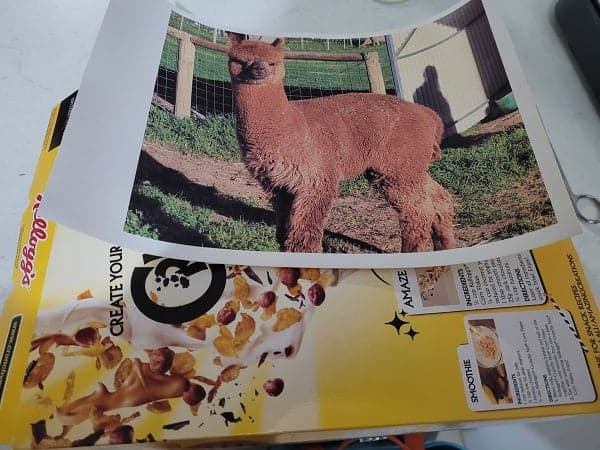
Ok, so you may have guessed it is a Crunchy Nut cereal box. Funny thing is, I have never noticed that it has some nice recipes on the back until I cut it up to use it for this project. Go figure!
If you can find a thicker box to recycle then give that a try. Stay clear of cardboard that has a hollow center. It does need to have a sturdy feel about it too.
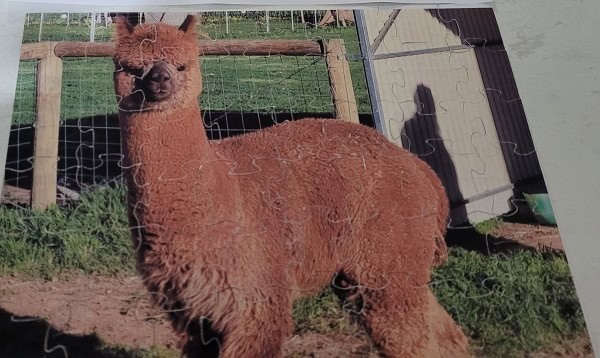
The picture is my Alpaca. Notice I have a picture with a fairly busy background, including shadows. A busy, unique background makes it easier to complete the Jigsaw when it is in pieces. You know… to work out where the pieces actually fit.
Preparing the picture
What to print your picture on and what with are the first two considerations. My laser printer was used to print the Jigsaw puzzles in this tutorial however an inkjet printer would be perfectly acceptable too.
Print your picture for the puzzle
Setting your printout to high quality will give your the best results. The next decision is what type of paper to print on. There are so many…
For this project, I used A4 sticker paper which was a great decision. It made it super easy to stick the picture to the cardboard. Two types of sticker paper were trialed. One problem that I came across with one pack of sticker papers that I tested was that it was white on both sides. Yes, very hard to see at a glance which side was the right side to print on. The other pack had a yellow backing and was easy to see at a glance.
Another tip is to check which side your printer will print your design on so that you can place the sticker paper in the correct way. To test you can place an X on one side of regular paper and send it through. This will give you the correct orientation and save you from wasting the more expensive sticker paper.
You could also glue on regular paper. Be careful how much glue you apply as liquid glue may cause your printed picture to bubble. Permanent spray glue is another option and is less likely to cause that bubble effect.
TIP: If you have a problem with the picture bubbling, place a large book or heavy, flat item on the project while it dries to help flatten out the paper while it dries.
***You may also be able to use printable vinyl as another option
Applying the sticker paper
To apply the sticker paper, start peeling the backing off at a top corner only revealing a small portion of the sticky area.
Align the peeled corner with the corner of your backing board and press down. Work your way slowly pressing and peeling until the entire picture has been stuck down.
Ensure that the sticker paper is well attached to the backing board. If you have a craft brayer roll that over your project for firm placement.
I used one of these squeegees which are really inexpensive and are useful for a lot of my projects.
The importance of placement
This is one thing that I did not pay attention to when I was cutting out my first Jigsaw puzzle. And, to be perfectly honest, it seemed ok. It was only when I got it over to my Scan N Cut that I realized the importance of placement.
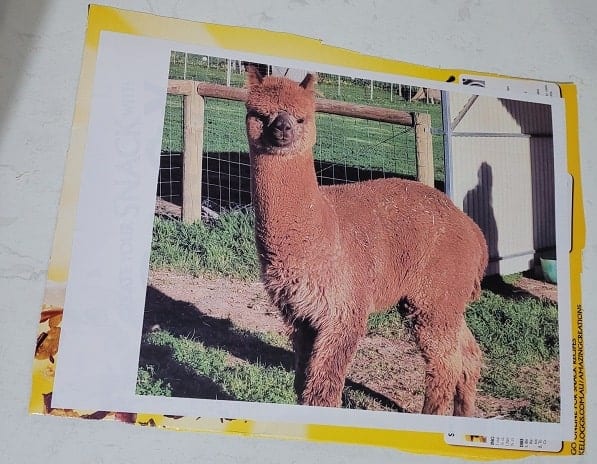
You may be able to see in the above picture that I have stuck the sticker paper slightly crooked.
There are a couple of ways to resolve this problem and I have used both of them. Obviously, the first preference is to stick the picture on straight. While this seems straightforward, I didn’t manage to achieve this until my third Jigsaw.
First option – Adjust mat placement
Use the edges and grid features of your mat to ensure that your design is placed so that it will cut out straight. Align the actual picture and not the edge of the cardboard. This is how I fixed the Alpaca Jigsaw. (his name is Fudge by the way)
Second option – rotate your Jigsaw puzzle SVG fie
Scan the design in your Scan N Cut so that you can confirm that it is straight. Once you can see your picture, go into the Edit settings and use the rotate file feature. On my Scan N Cut, there is the option for 1deg rotation which is what I chose. This worked perfectly.
Note: Rotation by 1 degree may not be an option on your Scan N Cut as the models vary.
I was so sure that I had this one straight but sadly no…. still slightly crooked.
Fix thicker materials firmly
Tape thicker materials down firmly to reduce the risk of movement during the cutting process. Do not tape over the registration marks or your mat will not load. Make certain the tape is firmly attached as it can come loose and get caught on your scanner.
Note: The scanner cover can be removed to access the scanner for cleaning and removing unwanted debris that may have stuck onto the scanner glass. Tutorial for CM model. (a tutorial for the DX is on my “to do” list)
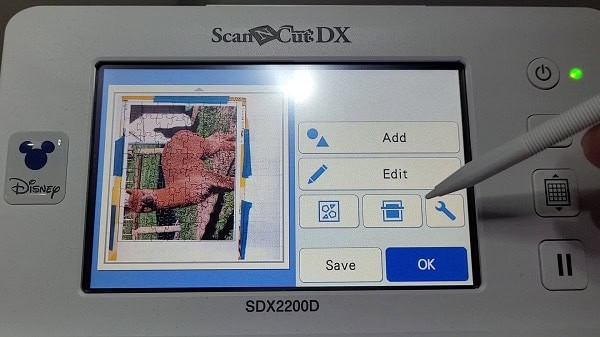
Upload the Jigsaw puzzle template into the Scan N Cut
Head over to the Create With Sue Resource Library and download the puzzle template to use. You will find two of them in the P section for Puzzle. One is designed with larger pieces for little ones and the other with medium size pieces which will be a little more complex to put together.
The file will be in zipped format and will need to be unzipped prior to uploading into your Scan N Cut. If you need help with this step you will find information here.
Video of the below Scan N Cut instructions
If you prefer video instructions, here are the next few steps to watch. Alternatively, I have included written instructions as well.
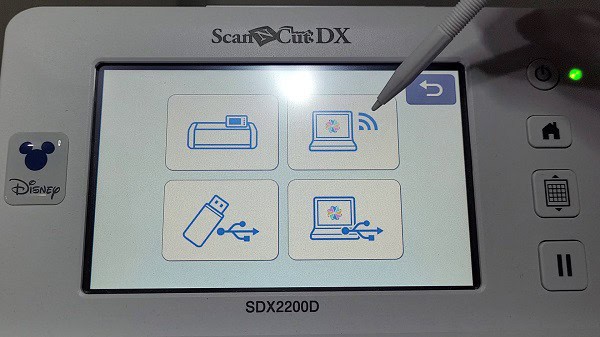
Select “Retrieve Data” to import your Jigsaw puzzle file.
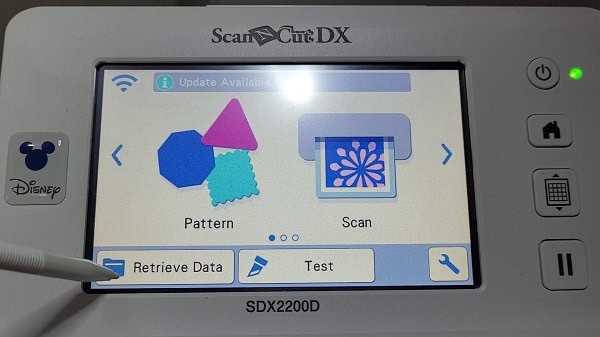
Depending on how you are sending your file to your machine, choose to appropriate option.
Options are from the top left is directly from your Scan N Cut, top right is over WiFi, bottom left is USB device and bottom right is directly from your computer via cable.
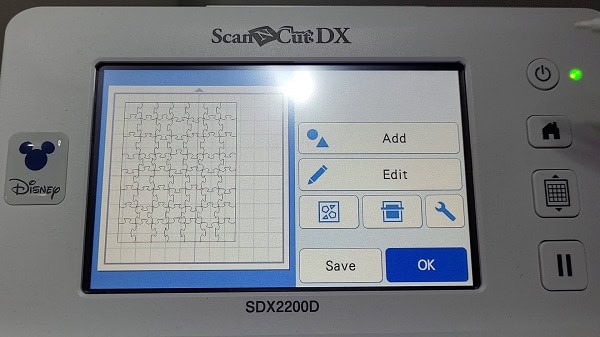
This is what the Jigsaw design will look like once it has been uploaded into your Scan N Cut.
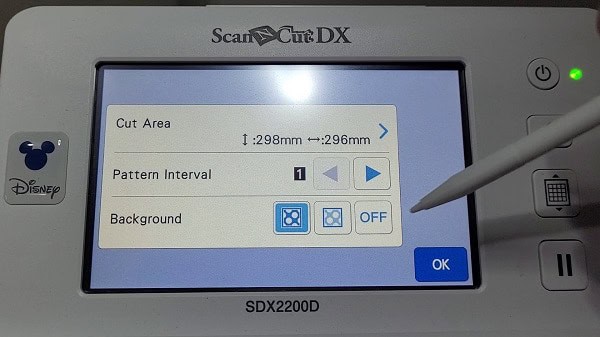
Scan your mat for perfect placement
Scan your picture so that you can place the Jigsaw template perfectly. If you need assistance with using this feature check out this tutorial. The tutorial is demonstrating how to cut multiple colored materials at one time however this scanning feature is super handy for EVERYTHING and as far as I am aware, it is available on all models of the Scan N Cut.
Note: When your scanned image is darker or lighter and you cannot see the design, change the background scan color setting to assist you in viewing placement. It makes a huge difference!
In this instance, I needed to be able to see the edges of the puzzle to ensure I sized it perfectly around the outside edge of my picture. I changed the background to fade out the picture so the puzzle template was clearer to see.
Check here to find out more information about altering the background scan color.
Resize the Jigsaw puzzle template
Now, on to resizing.
The great news about your Scan N Cut is that you can resize the Jigsaw template to suit your picture. Obviously, we aim to have the picture fairly similar in size however the template will also cope well with minor sizing changes.
Adjust the size of the Jigsaw template to match your printed image.
In the Edit image settings, you can click on the plus or minus symbols to make the adjustment. By default, the setting will adjust both the width and length together.
You can select the icon with arrows that point vertical and horizontal. This icon will toggle the resize feature between resizing just the width or just the length OR resizing both together. If possible, elect to resize the template evenly. Once again, it will cope with minor variations in length or width.
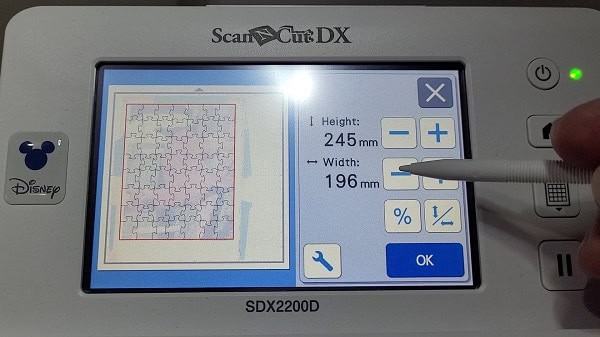
What you choose will depend on your project.
Cutting your project out
Once you have your placement under control head over to cut the project out.
I always recommend doing a test cut and this project is definitely no different. With a thick card, you may need to adjust your settings. The thicker the card the more likely you will need to adjust the settings.
Problems that may need resolving
I decided to check out a number of different types of cardstock and chipboard in an effort to cut the thickest Jigsaw puzzle that I could.
While doing this I came across some materials that the Scan N Cut did not like cutting. Problems included the mat twisting in the machine due to the weight and also one occasion where, for some reason after a couple of passes, my machine decided it would not follow the same path. This was frustrating indeed!
Settings that may help
You are able to adjust the speed and pressure settings. If you have a CM model Scan N Cut then the depth of the blade can be adjusted accordingly. For the CM, test whether cutting multiple paths and slowly increasing the blade depth improves your finished result. The DX machines will do the multiple passes automatically.
Settings can go to speed 1 if necessary (which is very slow) and adjust the pressure to suit. I ended up settling on pressure at about a 5 for the thicker card. Be prepared that your Scan N Cut will want to complete multiple passes to cut thicker cards. The thicker the materials the more passes it may make. It is also really important to ensure that your materials are firmly attached to your mat.
If you have the purple deep-cut blade you can use this in both the CM models OR the DX models. You will find more about tools here.
Material failures
Below is my puzzle disaster where the Scan N Cut did not follow the same line on one of its later passes. After a number of attempts, I ended up bailing on trying to cut this chipboard as my machine DID NOT like it at all. The number of passes really damaged the picture as well.
This was 50pt Chipboard.
The other cardboard that I had trouble with was a 1000gsm beautiful stiff white card. When I purchased it I thought that it would be perfect for the Jigsaw puzzle. What I found was it was a very compact card that was extremely hard which of course, made it hard to cut…. even with an Exacto knife.
The ‘rule of thumb’ for the Scan N Cut is if you can cut the materials with scissors or an Exacto knife then your machine should cut it ok too.
I plan to have another few attempts with this 1000gsm card as what it did cut was very crisp, just not all the way through the card.
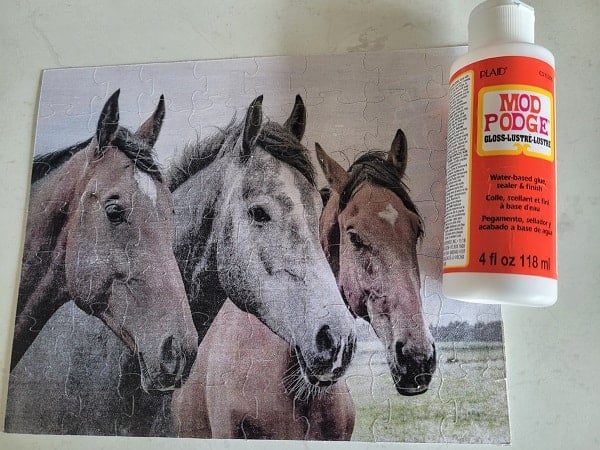
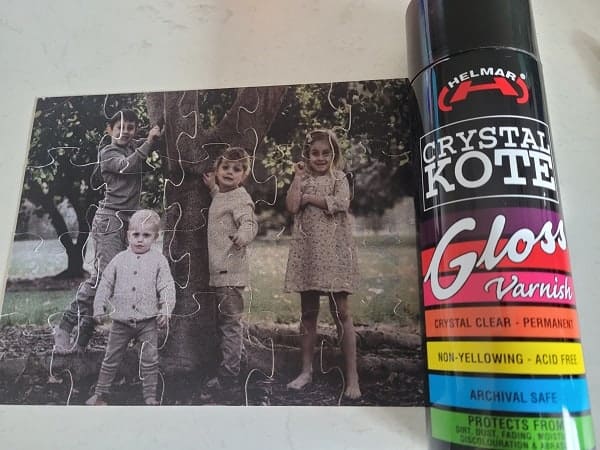
To seal or not to seal
I decided to look into sealing the jigsaw puzzle. I normally don’t seal any of my projects however a Jigsaw will take a bit of punishment, certainly if it is for a small child. Plus, I figured it would add another layer of strength.
Modpodge was the first product that I tried. Using a foam-padded brush the puzzle picture was covered in Modpodge Prior to cutting it out. The Modpodge left a few raised lines on the picture when It dried however I rather liked the end result as it provided some texture to the finished project. The puzzle now feels like it has some much needed added protection
The second sealer I tried was a spray can of varnish designed for paper. I sprayed the picture outside and it was quite stinky. In fact, it still smelled a lot when I brought it back inside. The finish was a lovely smooth finish and time will tell whether it provided a sturdy enough finish.
My recommendation at this time is the Modpodge. I used the gloss however the matte would be perfectly fine too.
TIP: I used the larger pieces puzzle for the family Jigsaw puzzle. Initially, I had thought that it would be a good one for my little 4-year-old grandson as he would love doing one with his brothers and sister in it. Even with the larger pieces, I think this one may be too hard for him.
Fudge my Alpaca Jigsaw cut out
Here is my finished Jigsaw of my Alpaca, Fudge. Isn’t he a cute boy? I have included this picture as an option for you to create your own Jigsaw with too.
Packaging suggestions for gifts and storage
I have made my Jigsaw puzzles for gifts which means I needed some way to package them. I purchased plastic zip-lock bags which worked great. Included in the bag is a copy of the picture used for the puzzle to assist with making the Jigsaw.
The bags are big enough so that the pictures do not have to be folded. My bags are clear and the pictures are visible which makes it clear what the puzzle inside the bag is.
Another idea that I had was to make a vinyl design to add further interest to the bag. Might add their name onto the bag. Food for thought.
Additional Info
A lovely crafter has shared this link with me. It is a site where you can create your own customizable-sized Jigsaw puzzles. Worth a play.
Create customizable Jigsaw puzzles
Let me know how you go with it!
Happy creating,

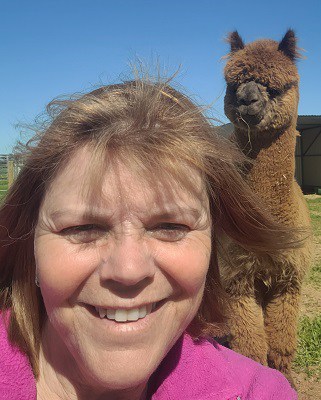
Below is Fudge photobombing me. He is very inquisitive! A bit of a country boy with that piece of straw hanging out of his mouth.
Join me on facebook
Welcome to Create With Sue Facebook where you can make friends, share your creations, and ask questions for additional assistance.
Join me in the Scan N Cut – Let’s Create With Sue Facebook group.
I would love to see you there.

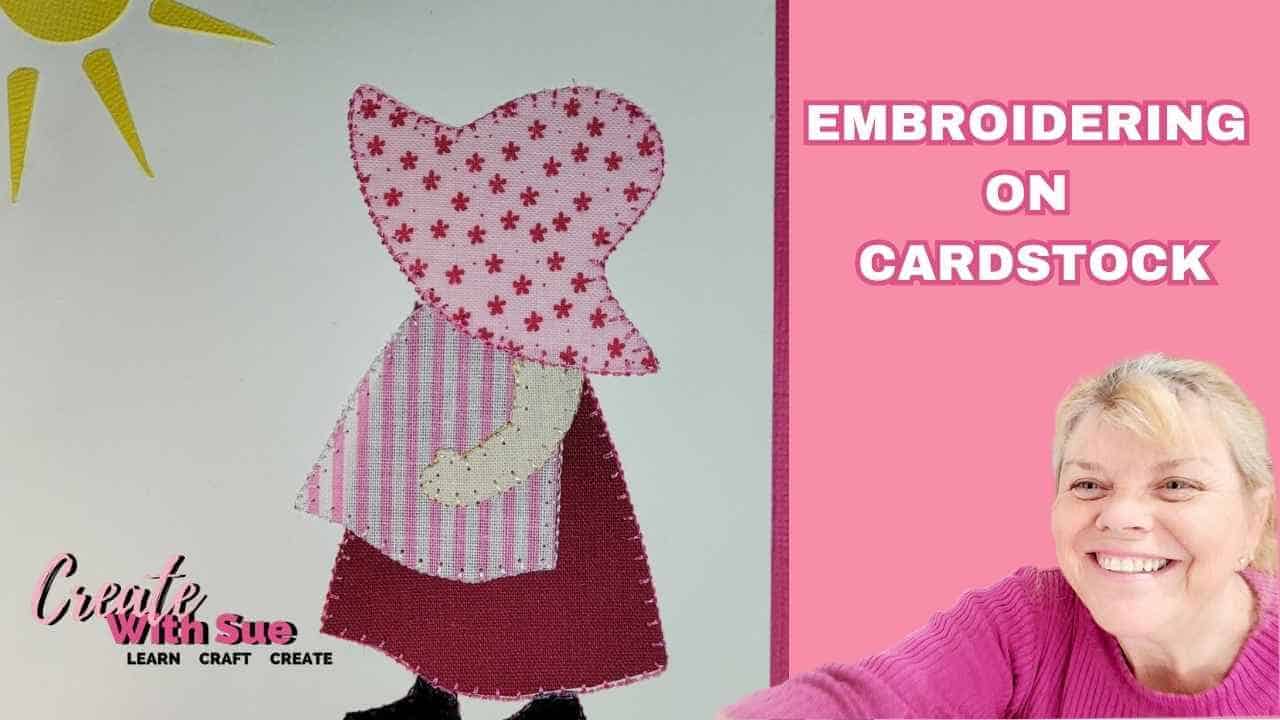
Embroidering Cardstock: A Creative Twist for Your Craft Projects
If you’re looking for something a little different to add to your cardmaking or papercraft…
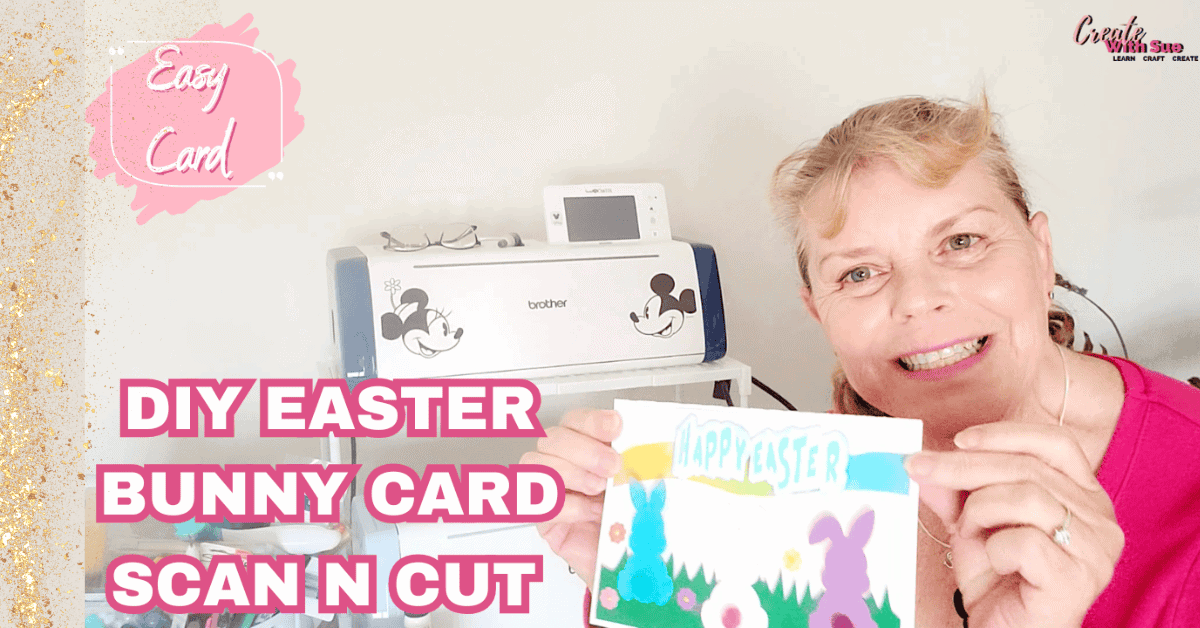
How to Make an Easter Bunny Card – A Step-by-Step Guide – ScanNCut


Hi Sue, That is an interesting project. But I do like the Stencil one.
have you got the PDF on that one? What size would you do a quilting Stencil? My grandson who is 3 would like a Dinosaur Stencil and would like to make him a few of them to keep him occupied while I am baby sitting him.
Thank you
Regards
Caroline
Hi Caroline, thank you :-). I have added stencils to my “to do” list.