
Do you love working with vinyl! Like a bit of a guide? Well, I have put together this beginner’s guide to working with vinyl to help you through the myriad of choices.
- Types of Vinyl: Adhesive vs. Heat Transfer
- Outdoor and Indoor Vinyl: Differences and Uses
- How to Use Indoor/Outdoor Vinyl
- Heat Transfer Vinyl (HTV): A Comprehensive Guide
- Brands of HTV (Heat Transfer Vinyl)
- Common Issues with HTV and How to Solve Them
- More Top Tips for HTV
- Tools Needed for Applying HTV
- Where to Buy Vinyl Supplies
- Join me on Facebook
Disclaimer: As an Amazon Associate, I earn from qualifying purchases. Links included in this tutorial may be affiliate links, Amazon or others, meaning I may earn a small commission at no additional cost. These commissions will help me continue creating content for you. Thank you for your support! Read my very boring full disclosure policy here.
Types of Vinyl: Adhesive vs. Heat Transfer
There are two main types of vinyl that you can use. These are adhesive vinyl, often referred to simply as vinyl, and Heat Transfer Vinyl or HTV. Each type of vinyl has variations from glitter vinyl to printable vinyl, then indoor and outdoor vinyl, and commercial grade vinyl. Then there is hot-peel iron-on HTV, cold peel iron on HTV, patterned vinyl, printable vinyl, metallic, flocked, holographic and it goes on…sheesh..it is no wonder our eyes glaze over trying to work our way through the array of choices.
Outdoor and Indoor Vinyl: Differences and Uses
Let’s tackle this section first.
Every beginner’s guide to working with vinyl needs to start with some clarification.
So, let’s clarify!
Broadly speaking – indoor = removable and outdoor = permanent.
I personally find outdoor permanent vinyl to be the most versatile and use it for so many projects. My favorite application is creating vinyl signs, but I was thrilled with how the horse design I added to my horse float turned out. We renovated our float about four years ago, and the design has held up beautifully, enduring the harsh, hot Australian weather every single day.

Scan N Cut and Cricut brand
Made out of Scan N Cut’s vinyl, the horse design in the picture above was one of my very first vinyl projects. I made a reverse of the horse design as well and placed one on the other side of the float (so both horses were facing forward).
I have also had reasonably good success with Cricut brand vinyl however I know some crafters are not keen on the Cricut brand at all.
Cricut Transfer Sheet – I found their transfer sheets were a little too sticky and a pain to get my design off the transfer sheet and onto my project. A less sticky transfer sheet, in most cases, was easier unless you are transferring glitter vinyl, then a stickier transfer sheet would be the better choice.
Alternatives -You can even use cheap dollar shop clear contact. Masking tape is another option. There are lots of cost-effective choices when looking for transfer sheets.
AND…don’t forget, you can often use the transfer material a few times. I was doing labels and managed to use the transfer material three and four times. (It only failed because I got in a mess and stuck it to itself so I had to get a new piece)
Siser
Siser vinyl is a popular and trusted brand among crafters, known for its high-quality materials and versatile applications. The brand offers a wide range of products to suit various crafting needs, including:
- Adhesive Permanent Vinyl: Ideal for outdoor projects, signs, decals, and any application requiring durability and resistance to weather. It adheres well to smooth surfaces like glass, plastic, and metal.
- Heat Transfer Vinyl (HTV): Siser HTV comes in a variety of styles and finishes, such as matte, glossy, glitter, holographic, and even stretchable options for athletic wear. It’s perfect for personalizing clothing, bags, and other fabric items. (I personally love EasyWeed HTV which is super easy to weed and my projects have turned out great.)
- Specialty Vinyl: Siser also provides specialty vinyl like glow-in-the-dark, metallic, and patterned HTV, allowing for more creative and unique designs.
One of the key features of Siser products is their ease of use. Their HTV, for example, often comes with a pressure-sensitive carrier sheet, making it simple to weed intricate designs. Additionally, Siser vinyl is compatible with most cutting machines, including the ScanNCut, Cricut, and Silhouette.
If you’re just starting with Siser vinyl, their EasyWeed HTV is a great place to begin. It’s beginner-friendly, cuts and weeds easily, and adheres beautifully with an iron or heat press.”
Oracal
Now, when we talk about outdoor vinyl the most popular and widely recommended vinyl is Oracal 651. EVERYBODY seems to love this vinyl so this one is well worth a try and it comes in a myriad of colors with a choice of gloss or matt. You can also purchase it in a range of sizes, from (30cm x 30cm) 12″ x 12″ sheets to (30cm) 12″ wide rolls and I also noted it was available in (60cm) 24″ wide rolls.
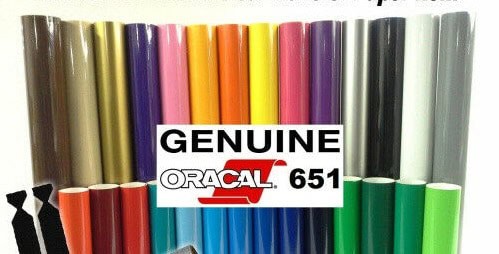
Oracal 631 is the indoor version of their product and is classed as “removable”. This one might be the one that you would put up on the wall however, I haven’t been game enough to try it just in case it takes the paint and gyprock paper off when you remove it. I will be game and give it a go one day I guess.
While you may see other ‘numbers’ associated with Oracal products the above two are the most used by crafters.
Unbranded
The next one I want to cover is a ‘no name’ brand that I purchased on eBay. It is 24″ wide and manufactured more for commercial applications. It was SUPER cheap to purchase it and it has been fantastic. One of my best buys yet!
Where I am going with this is you do not have to buy expensive brand-name vinyl for it to work well. One thing to look for is thickness, if the vinyl is too thin it isn’t nice to cut and it can be tricky to weed and generally work with.
Another option for cost-saving while we are tackling that is to approach commercial sign makers to see if they have any offcuts or scraps. What is scrap to them is a treasure to home crafters.
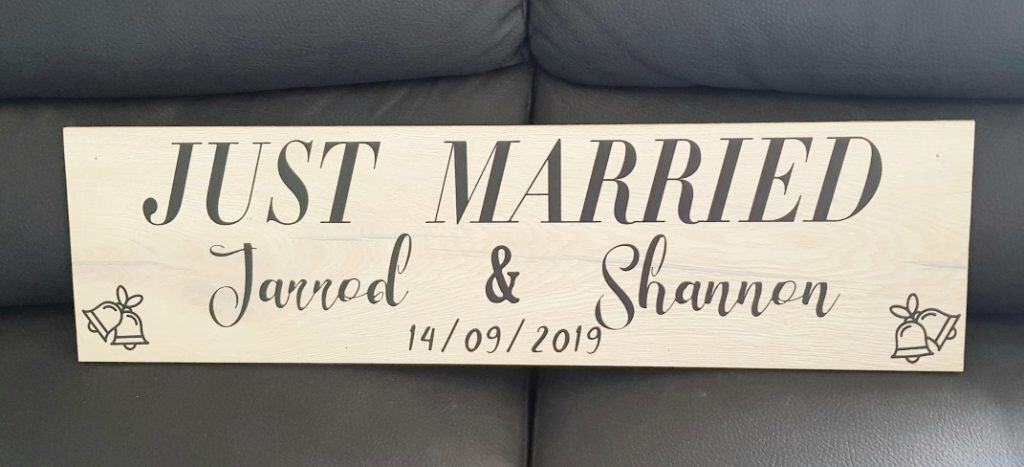
Signs can be done with either indoor or outdoor vinyl however if you are going to put them out in the weather outdoor would be the one to use.
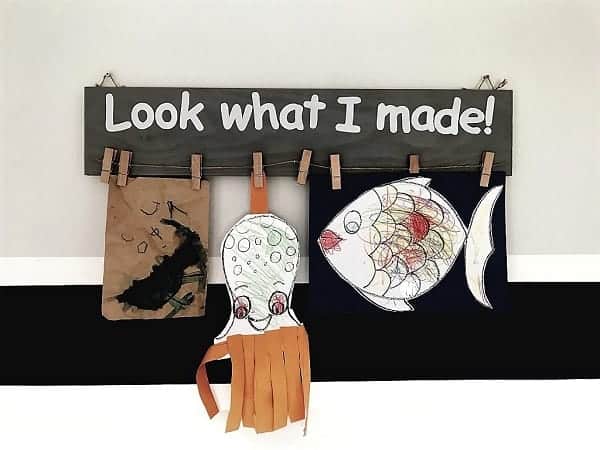
Here are more ideas on what to use vinyl on. There are lots of ideas and I keep adding to it.
How to Use Indoor/Outdoor Vinyl
Vinyl reminds me of the contact that we used to cover our books with when I went to school only thicker. It has a backing sheet that is removed just prior to placing your design on your project.
TIP: You can tell adhesive vinyl from HTV by the fact that adhesive vinyl usually has a paperlike backing, often with a grid guide to assist with placement. Heat Transfer Vinyl normally has a plastic carrier sheet. (looks like shiny plastic)
Steps to working with adhesive vinyl
- Choose your design and load it into your machine – no need to mirror adhesive vinyl.
- Kiss-cut the design out of the vinyl ( Kiss-cut is cutting through the vinyl layer ONLY and not the backing) TEST CUT! If you have an SDX ScanNCut then select the Half Cut setting on the machine. If you need help with setting up and using the Half Cut feature on the SDX machine you will find a tutorial here.
- Weed the unwanted vinyl from your project. You will find a comprehensive tutorial here.
- Place transfer tape or sheet onto the top of the weeded vinyl
- Peel the vinyl off the backing and place it on your project. The easiest way to do this is to pull the vinyl back onto itself. You can also have the vinyl side down and peel the backing onto itself that way. It does not matter which way you choose as long as it works for the project you are transferring.
TIP: If the vinyl does not come away easily, you can use your fingernail or weeding tool to assist the design off the transfer sheet and onto your project. - Press down firmly so that it attaches and gently remove the transfer sheet
Follow the links above if you would like more information on these steps.
Other posts with instructions that cover working with vinyl are:
Heat Transfer Vinyl (HTV): A Comprehensive Guide
HTV is for items that you can attach it to by heating both the material and vinyl up so that it bonds together. This creates delightful projects for decor, clothing, really anything that can be heated and have HTV pressed onto it.
NOTE: this vinyl is usually referred to as HTV as opposed to ‘vinyl’ which is usually associated with indoor/outdoor vinyl.
It can be used on:
- Clothing: T-shirts, sweatshirts, hoodies, onesies, bibs, and other baby items
- Socks: Great for custom designs and personal touches
- Mugs and Tumblers: While HTV can be used, permanent adhesive vinyl is generally more durable for these items
- Aprons: Perfect for personalizing for cooking or crafting enthusiasts
- Tea Towels: Ideal for decorative or functional kitchen items
- Bags: Tote bags, backpacks, gym bags, and even reusable shopping bags
- Blinds and Curtains: Adds a creative touch to window treatments
- Wooden Shapes: Great for decor, signs, or custom gifts
- Shoes: Canvas sneakers and other fabric-based footwear
- Pillowcases and Cushions: Fantastic for home decor projects
As I mentioned – anything that can withstand heat to bond the HTV on.
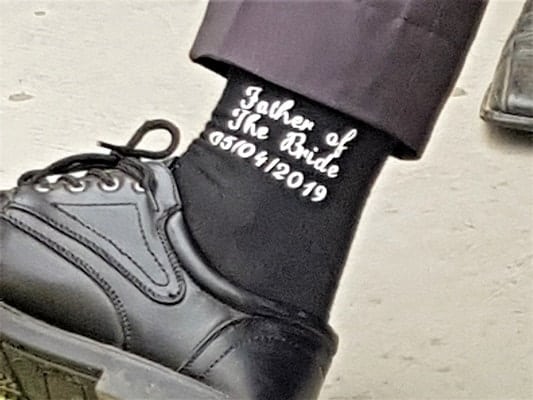
The biggest thing to remember with HTV is that you need to reverse or mirror your design to cut it out. It kinda works back to front to the non-heated vinyl we went through above. This is particularly important if you have writing on your design, if it is just a picture, you may get away with having it back to front.
HTV has its own ‘built-in’ transfer sheet which is the side that is placed on the mat when you are cutting the vinyl. The transfer sheet is usually the shiniest side however occasionally this is a bit hard to determine. When cutting HTV you still use a kiss cut so as to leave the transfer sheet in one piece.
Note: Some of the newer brands of HTV do not come with a built-in carrier sheet and doesn’t require mirroring.
Brands of HTV (Heat Transfer Vinyl)
As you guessed, there are lots of brands to choose from in the HTV range.
Siser brand vinyl
A favorite amongst crafters is the Siser brand as it is one of the easiest to work with. (Pronounced See-Zur)
- SISER Glitter Heat Transfer Vinyl
- Siser EasyWeed Stretch Heat Transfer Vinyl
- SISER EasyWeed Heat Transfer Vinyl
- SISER Holographic Heat Transfer Vinyl
- Siser EasyPatterns Heat
- Flock Heat Transfer Vinyl
- Printable Heat Transfer Vinyl
- HTVRont Glitter HTV (I love this one)
- HTVRont HTV
NOTE: the info above is not necessarily a recommendation.
- Transfer Vinyl
- SISER StripFlock Heat Transfer Vinyl
- SISER EW Glow in the Dark Heat Transfer Vinyl
- Logical Color Heat Transfer Vinyl
- EnduraTEX Heat Transfer Vinyl
- Chemical Heat Transfer Vinyl
- Oracle 651 Permanent Adhesive Vinyl
This list I got off SignWarehouse.com and it is LARGE isn’t it! Scarily large when you are trying to choose what to buy and even more scary is that I found more than what I listed here!
Don’t let this confuse you!
Take a step back….
All you need to think about is the effect that you are after and then make sure you follow the bonding instructions. So, if you want a glittery effect, choose one that states glitter. If you want a shimmery, shiny finish then a metallic vinyl is the one to choose and so on which is much easier to get your head around. You get the idea.
While the Siser brand is popular it is checking out other brands as well. Test out a few brands, buying a smaller quantity to start with, and then when you find what you are happiest with you can purchase larger quantities.
Oracle is another very popular brand.
Bundles of vinyl
Often you can purchase packs with a number of different colors included in the pack. The vinyl may only be 12×12 which is just the right size for the mat.
This is a great way to purchase the vinyl as the bundles usually come in smaller cut pieces so you can give it a try and a variety of colors. Some crafters even purchase mystery bundles which are quite fun as you get a surprise when you receive the bundle.
The downside I found with some that I have purchased is that there have been limited or NO instructions, so a bit of guesswork was required. Still fun!

This T-Shirt has a combo of metallic HTV and plain HTV on it. Both rocked up in a bundle with a number of other ‘sample’ pieces of HTV.
Common Issues with HTV and How to Solve Them
There are a few common issues when using HTV.
Forgetting to reverse HTV!
The most common mistake is forgetting to reverse the design. To help remember this step, many crafters use clever techniques like attaching reminders directly to their cutting machine (some even use vinyl for a permanent note), writing on their HTV roll, or adding reminders within their design files. If you’re prone to forgetting, create a reminder in a spot that works best for you.
I’ll admit, I still forget to reverse my design occasionally—it’s so frustrating!
Timing
The next common issue is how long to heat the vinyl. I recommend that you heat your fabric you are about to place your design on first, then place your weeded HTV design onto your fabric and heat for the time recommended on the wrapper (if it had one) of your HTV. Unfortunately not all HTV comes with instructions however try to find a guide on heating times to match what you are using and whether it is a hot peel HTV or a cold peel HTV.
NOTE: Hot and cold peel is exactly as you think, peel the transfer sheet off either when the HTV is still warm or has gone cold. If you receive these instructions with your HTV, make a note on the vinyl so that when you pick it up next time to use it you can tell what it is. It is soooo hard to work out what HTV is what otherwise.
Pressure
The amount of pressure (or lack of it) can also affect your end product. HTV doesn’t really like a rubbing ironing type effect. You are better off placing your heat with steady pressure, moving as little as possible.
Layering
If you have instructions that come with your HTV I recommend reading and following them. For example, you normally can’t overlay standard HTV over holographic or metallic HTV even though it may look ok. You risk it coming off in the wash!
You will find a HTV layering project tutorial here. The design is a free SVG you will find in my Resource Library however the tips and techniques are the same for most HTV projects. You don’t have to create the design that I used….choose your own :-).
The use of registration marks can assist you with the alignment of layers. Registration marks are simply a small mark cut in the vinyl of each layer that you can use to line up the different layers.
Remember to remove the registration marks BEFORE you bond your HTV to your project.
Which side of the HTV do you place on the mat?
The shiny side is normally the transfer sheet side of HTV. Sometimes working out which side is the shiniest side can be a challenge. If it comes on a roll, then the side against the cardboard insert (the inside of the curl) is usually the transfer sheet side.
If you have problems working out which side is which, test the HTV by cutting a small test piece. It is the side that will peel the easiest. You can use the test shapes of your Scan N Cut to do this in the corner of your HTV.
It is a good idea to mark your HTV once you are sure which side is which.
More Top Tips for HTV
I have a complete tutorial with more information on sorting out issues and step-by-step instructions.

Cricut app may help
If there is no information included with the HTV you have purchased then the timing is often guesswork and experience. If you can locate the suggested or recommended settings online then you are in front!
I found that the Cricut site had a cool app that provides a guide to time and heat. So, if you have Cricut Easy Press and using Cricut vinyl, check it out!

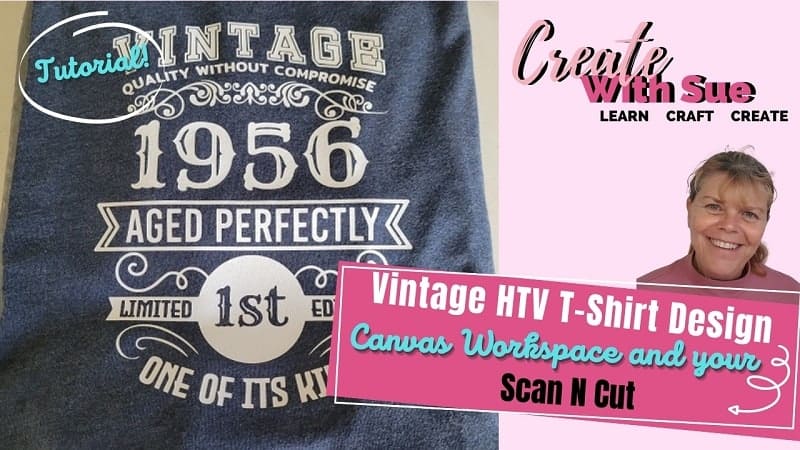
The above picture is HTV on a T-shirt. The picture on the left is the weeded HTV. You can see it is mirrored or back to front. Once applied to the T-shirt it is the correct way around. Mirroring is extremely important if there is text on the design. Pressure and time are also critical in getting your design finished to perfection.
You can find this Vintage Series on my Etsy shop here. If there is a year that you would particularly like and is not in there, please contact me and I will check if I have created it.
Tools Needed for Applying HTV
I initially started by simply using a dry household iron to heat the HTV and bond it to my projects however this is definitely NOT the best choice. If you can manage it and are planning to do a lot of HTV projects then I would recommend getting a device designed specifically for pressing HTV.
Choices are Easy Presses by Cricut which come in a few sizes and are designed specifically for the home crafter or there are bigger Heat Press devices, some of which come with all sorts of fun attachments. These are suited to the home crafter and someone who is planning to sell their creations.
- Cricut Easy Press – needs you to add pressure.
- Cricut Easy Press mini – is quite small and harder to press larger designs.
- HTVRont Mini Press – This is a tiny handheld press and is awesome for pressing Applique shapes in the hoop. It is small enough to fit into the Brother 4×4 hoop.
- Swing Away Heat Press – Very easy to add and remove projects to heat however, the downside is that it takes up more room than some of the other presses.
- Clamshell – similar to the heat press but no swing-away action. A little bit friendlier size-wise if you are struggling with room to store the heat press. The upright action of this type of press uses much less room.
- A household Iron – has lots of disadvantages, however, I used this for ages until I found the funds to purchase a bigger press.
Auto Presses -There are a few Auto Press heat presses on the market. Cricut and HTVRont both produce Auto Presses. Pictured below is my HTVRont Auto Press with a slide-in draw so that it is easy to place items on. I use this for HTV projects and sublimation projects. (occasionally to press my clothes too). I really like the auto press as it is much easier to use than my other presses. Except for my very lightweight HTVRont Mini Press. That too is super easy however is not ideal for all projects.
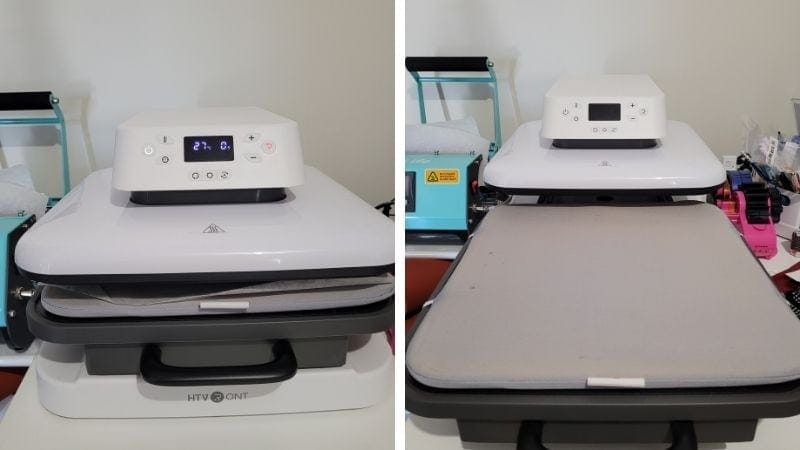
HTVRont recently released a new version of this auto press which has some added features. Find out more on Amazon here.
I have a few presses these days. I really like this HTVRont Mini Press for pressing my Applique designs directly in the hoop. It fits beautifully. If you love Applique as well, check out my Applique series to see how easy it is to use your ScanNCut for Applique.

Where to Buy Vinyl Supplies
There are so many places to choose from that you can buy vinyl from. I will do my best to provide a list and will add to it as I can.
NOTE: While I have used a few of these sites these links are not necessarily recommendations, simply an easy way for you to find HTV and Vinyl.
USA
- Amazon
- SignWarehouse
- Joann’s
- Michaels
- Craftables
- Expressions Vinyl
- USCutter
- Walmart
- ThreadArt – has a lot of blanks too (kindly shared by Robin)
Australia
UK
Hope this beginner’s guide helps you work with vinyl. It is such a fun medium to use and can make AMAZING creations.
Have you tried working with vinyl? Share your experiences or ask any questions in the comments below!
Join me on Facebook
I would love you to pop into my Facebook group and post some of your creations.
If you have any recommendations on the best places to buy vinyl in your country, let me know and I will share it with readers. You can either leave me a comment below, email me at [email protected] OR post a message in FB.
****SPECIAL thanks to some of my UK group members for their suggestions and questions which has triggered this post.
Happy creating,

P.S. Remember to check out some of my other posts.
- Exploring the New Affinity Designer V3 — My First Impressions
- Cutting Cardstock: Tips for Better Results
- Rejuvenate Old Jeans with HTV and Your ScanNCut
- Embroidering Cardstock: A Creative Twist for Your Craft Projects
- How to Delete Saved Files on Your ScanNCut
vinyl crafting tips, HTV tutorial, vinyl project ideas, working with vinyl, beginner’s guide, adhesive vinyl, heat transfer vinyl






I do the test on the vinyl and it does fine but when I cut the pattern out it does not cut good .I am cutting small letters or zentangles and it just makes a mess of it wind up throwing it away and I can’t get it to do the infusible ink paper either
Hi Betty, slow the speed down to see if this helps you can also make adjustments with the cut pressure. Tweak these settings and you should have more success. What vinyl you use also makes a difference. If the vinyl is a very thin vinyl it may give you a bit more grief.
Hi sue I was wondering if you can help with blade settings when using siser stretch (sdx1200) – I know to do half cut… i tried with half cut pressure on auto and It was catching the vinyl so a reduced the pressure to -1 and was still catching so I reduced to -2 and it didn’t cut through the vinyl completely in places
I also have speed set for 1..
I intend to purchase the vinyl blade kit in the future but I can’t afford it just yet (after having recently spent $700 on my machine and buying vinyl too..)
I also have been using the silhouette htv without a problem
And have got the hang of cutting oracal 651 now too.. (I keep a notebook with blade settings for the different colours)
Any help or advice would be much appreciated 😊
Each SNC is a little different and so is the brands of vinyl (both HTV and adhesive) My DX2200D doesn’t like auto when in Half Cut mode and is set at 4. When you say “catching the vinyl” is it pulling at the vinyl or cutting too deep. If it is pulling then check your blade for sticky gum/adhesive, chips in the blade or perhaps paper or fluff caught in the blade holder. Sticky gum on the blade can be removed by punching the blade into a ball of scrunched up alfoil lots and lots of times.
If you are meaning it is cutting into the carrier sheet slightly on -1 that should fine and not really impact the project.
HI Sue,
I love this article – lot’s or hard work put in there – well done! We are a nw UK based Vinyl Craft site and we’d love to get added to you list of UK suppliers if possible.
We are http://www.my-craft.com
I hope thats OK. If you can it woud be very much appricated
Many thanks
Ross @ MyCraft
Thank you. All the best with your business.
Thank you 🙂 Really appreciated.
Hi, I am so pleased that you found the information helpful. Regards, Sue 🙂
HI – Hope you can help me – Im not sure why when I scan a body of text the scanner does not pick up the insides of the letters ie e a g o. I have even scanned the text in outline and the same problem happens so I end up cutting it by hand which is pointless having the machine. I have a SDX22000D by the way. I would really appreciate your guidance as Im close to just giving up. Stay safe. Kindest regards
Caroline for UK
Hi Caroline, to capture the inside of the letters or any object you will need to select the icon with both inside and outside cuts. I am assuming that you have probably tried that icon too so the next choice is choosing B&W… even if it is a colored image. Tweak and try different settings. If all that fails, go around the areas you would like scanned.. particularly the areas that are giving you trouble, and see if you can darken the edges with a pen or pencil.(use a pencil if you need to rub it out) As I haven’t seen the design, you will be able to determine whether this is viable.
Very Useful Post For HTV Film. I Learn A Lot
Thank you Nicole. Very pleased to hear. Sue
Great tips for working with vinyl! Your step-by-step guide makes the process so much easier for beginners and pros alike.
Thank you. I am pleased you liked it. Sue